Before you start
This chapter lists 4 amber, 12 notes and 4 tapes (20 stops). Entries follow the published collection reference’s order, grouped into broad story stages. These groups are navigation aids, not a promise that every stop is immediately accessible or that no backtracking is needed. Follow your active objective and use the Chapter 1 walkthrough between detours.
Checks are shared with the amber, note and tape guides on this browser. Image reviewed means the linked source image was compared with the route; Community report means the final pickup remains unconfirmed here. Item names are reported labels. Seven notes remain unmapped across the game; this is not a complete 97-note achievement route. Toy deliveries remain in the separate pickup and pedestal list.
Chapter 1: Entrance and theater
Story objective: Collect the torn clue, theater token and projector fuse. Open the steps.
Checkpoint: The theater presentation finishes and the exhibit exit opens. Collectible detours below may span the approach and return route.
| Stop | Location and reference |
|---|---|
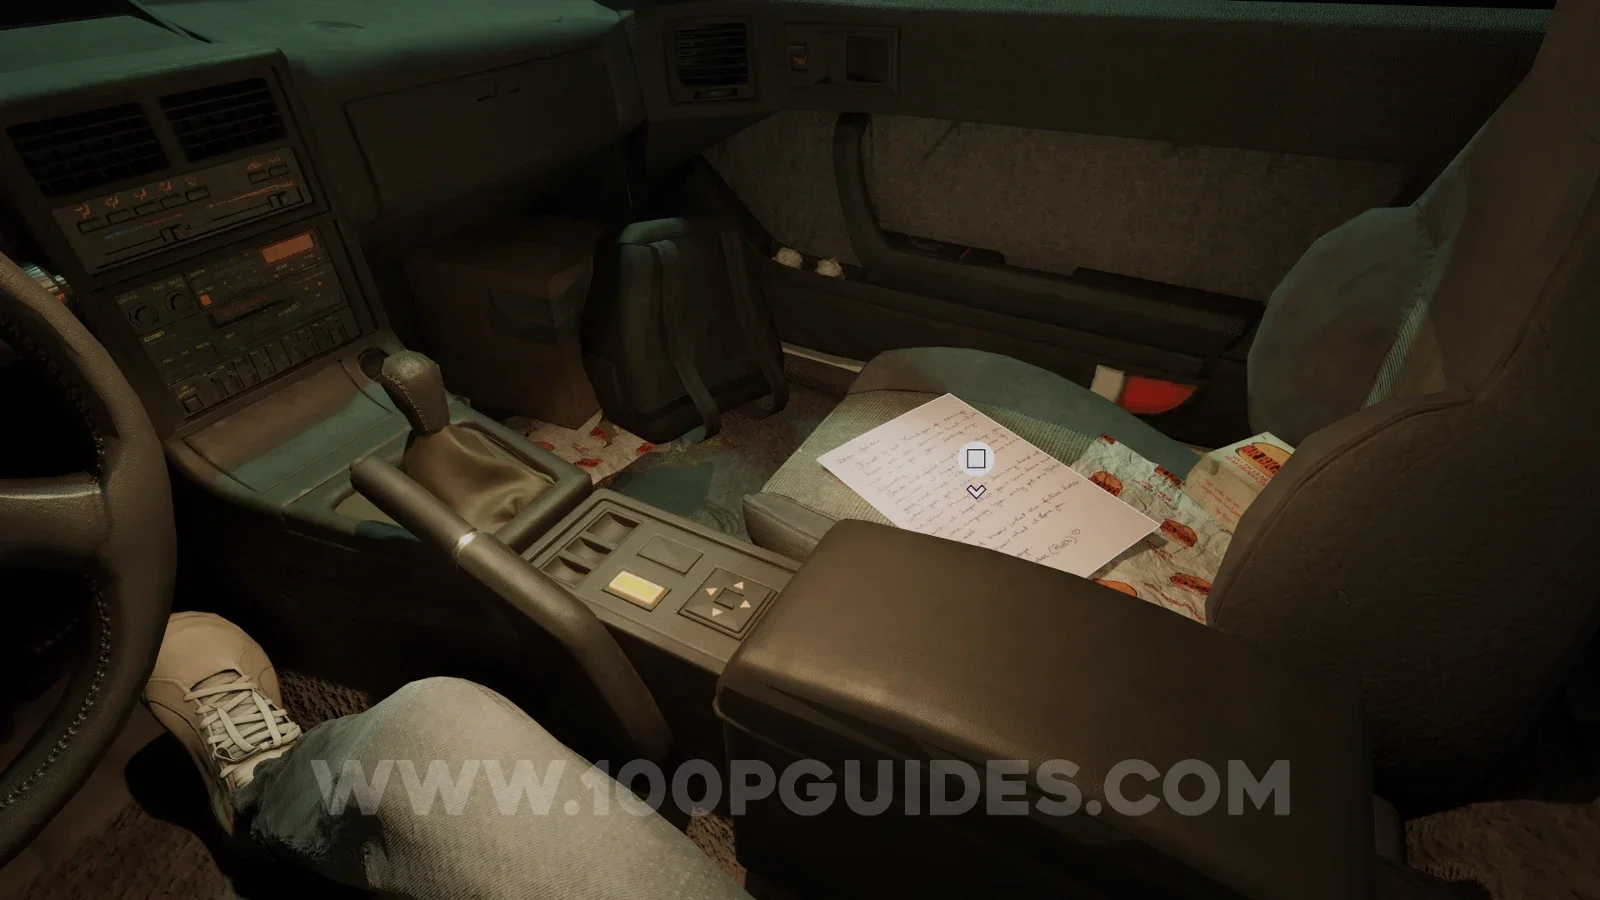
NoteLetter from MomImage reviewed |
Opening car: look at the front passenger seat, beside the backpack and food wrappers. Read it before getting out. Location image ↗ Open collection entry ↗ |
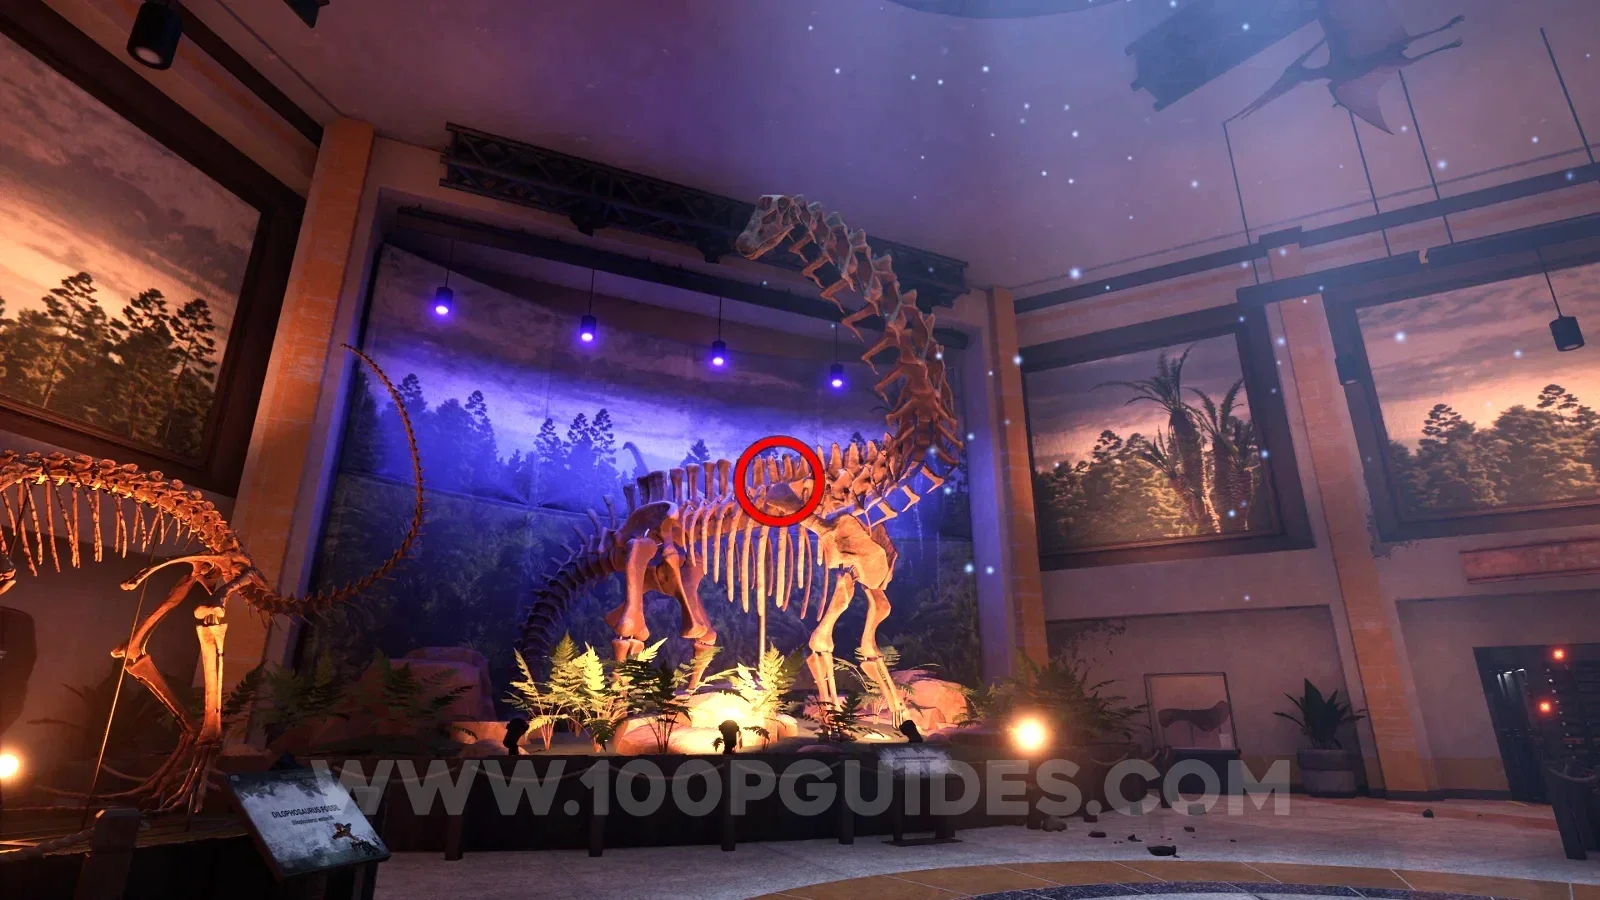
AmberAmber 01 |
Entrance skeleton’s head; climb its tail. View 01 ↗ Open collection entry ↗ |
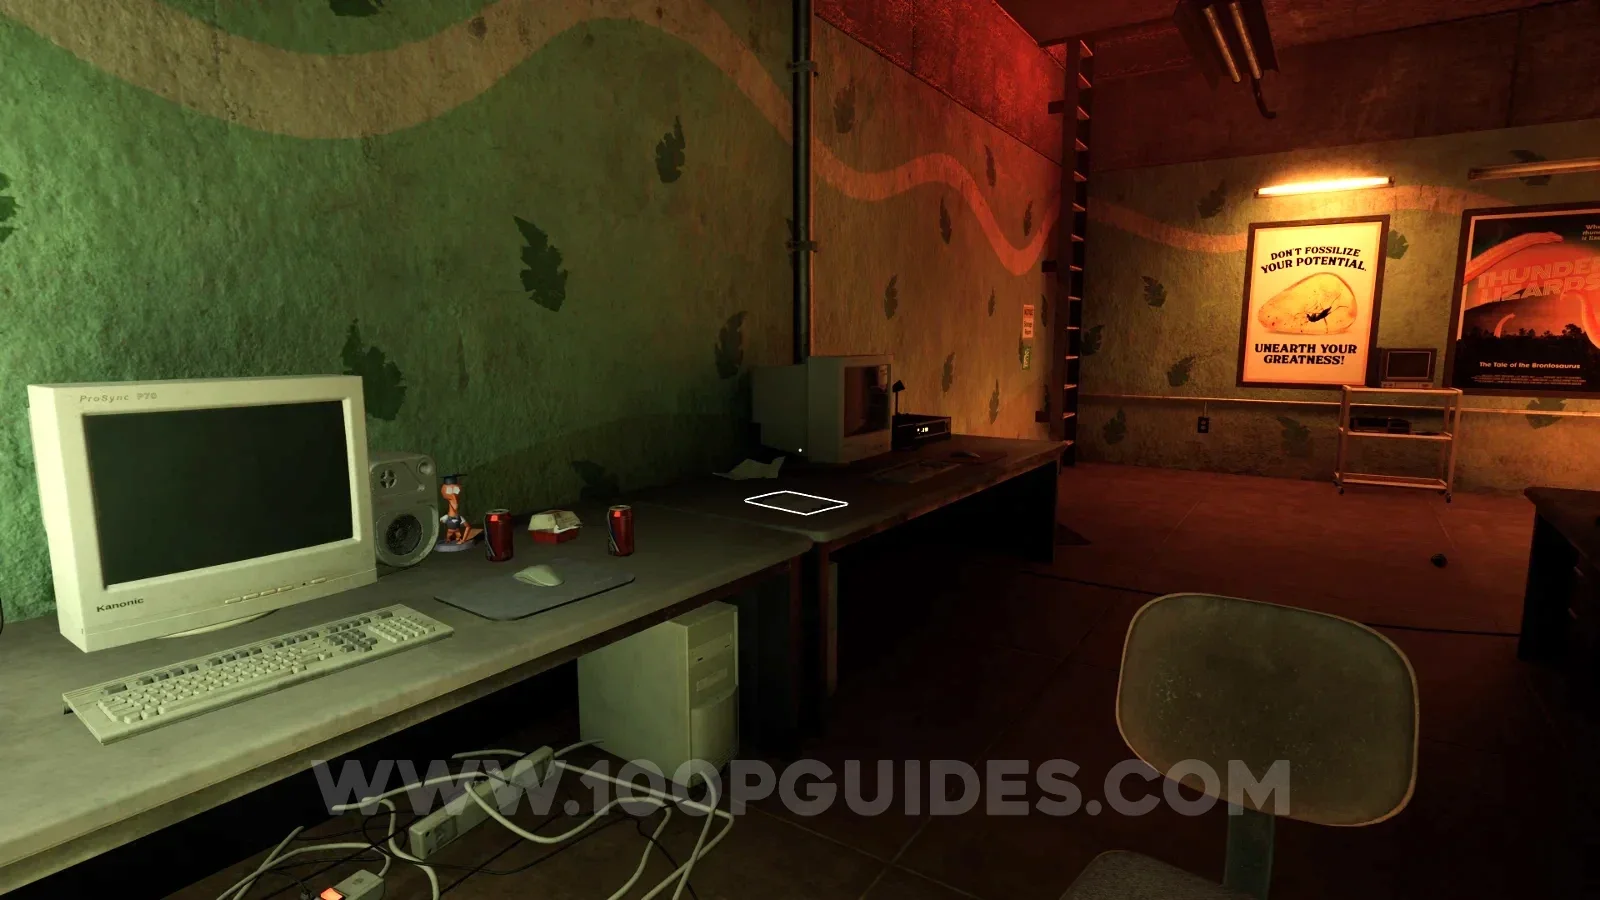
NoteNote from office managerImage reviewed |
Box office: examine the long computer desk below the dinosaur-pattern wall. The paper lies between the monitor workstations. Location image ↗ Open collection entry ↗ |
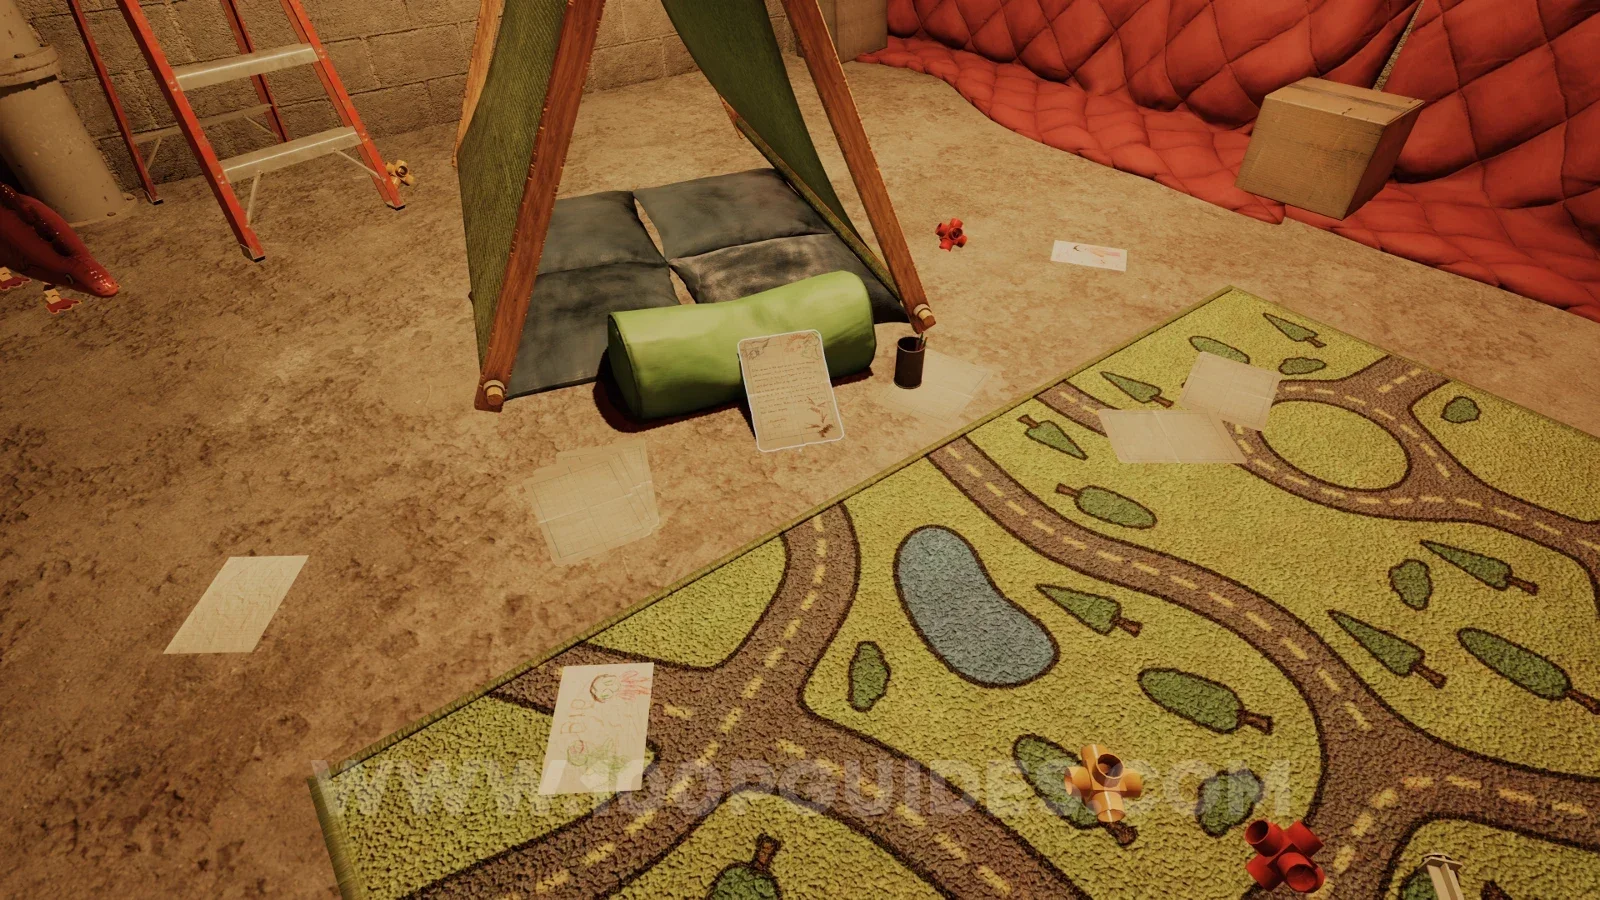
NoteLetter from Dalton to ElenaImage reviewed |
Tent above the box office: look beside the rolled green sleeping mat, next to the road-pattern play rug. Location image ↗ Open collection entry ↗ |
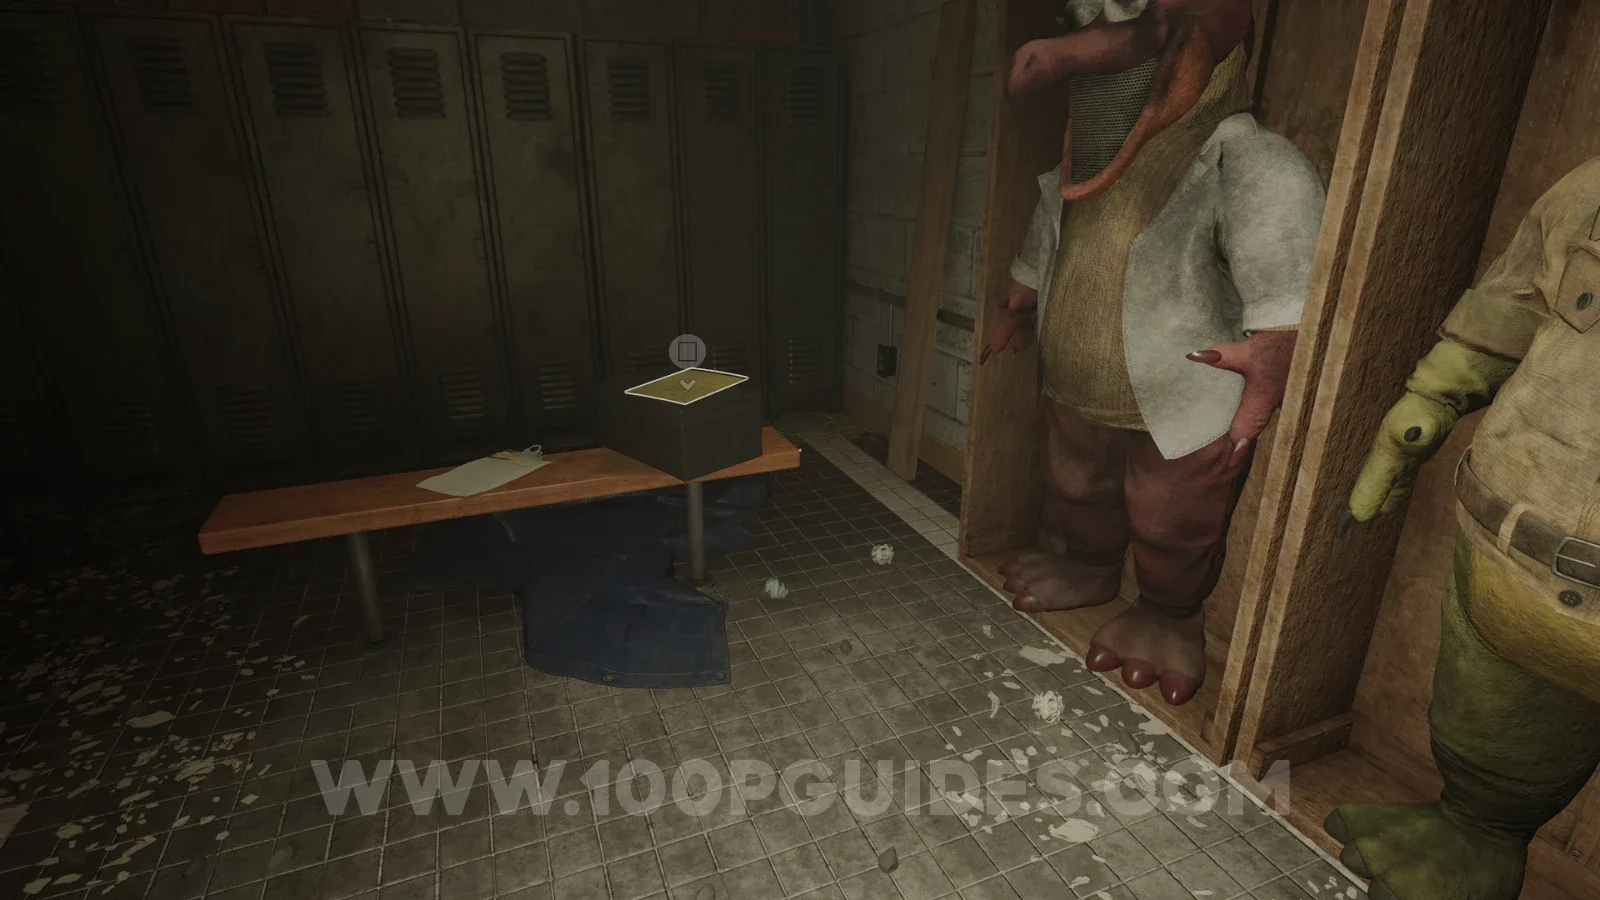
NoteNote from mascot suit guyImage reviewed |
Mascot storage room: check the box on the bench in front of the lockers, beside the hanging costumes. Location image ↗ Open collection entry ↗ |
Chapter 1: Raised exhibits and flashlight
Story objective: Activate the exhibit switches, use the main lever and redeem the flashlight token. Open the steps.
Checkpoint: You have the flashlight before entering the dark attraction. Collectible detours below may span the approach and return route.
| Stop | Location and reference |
|---|---|
AmberAmber 02 |
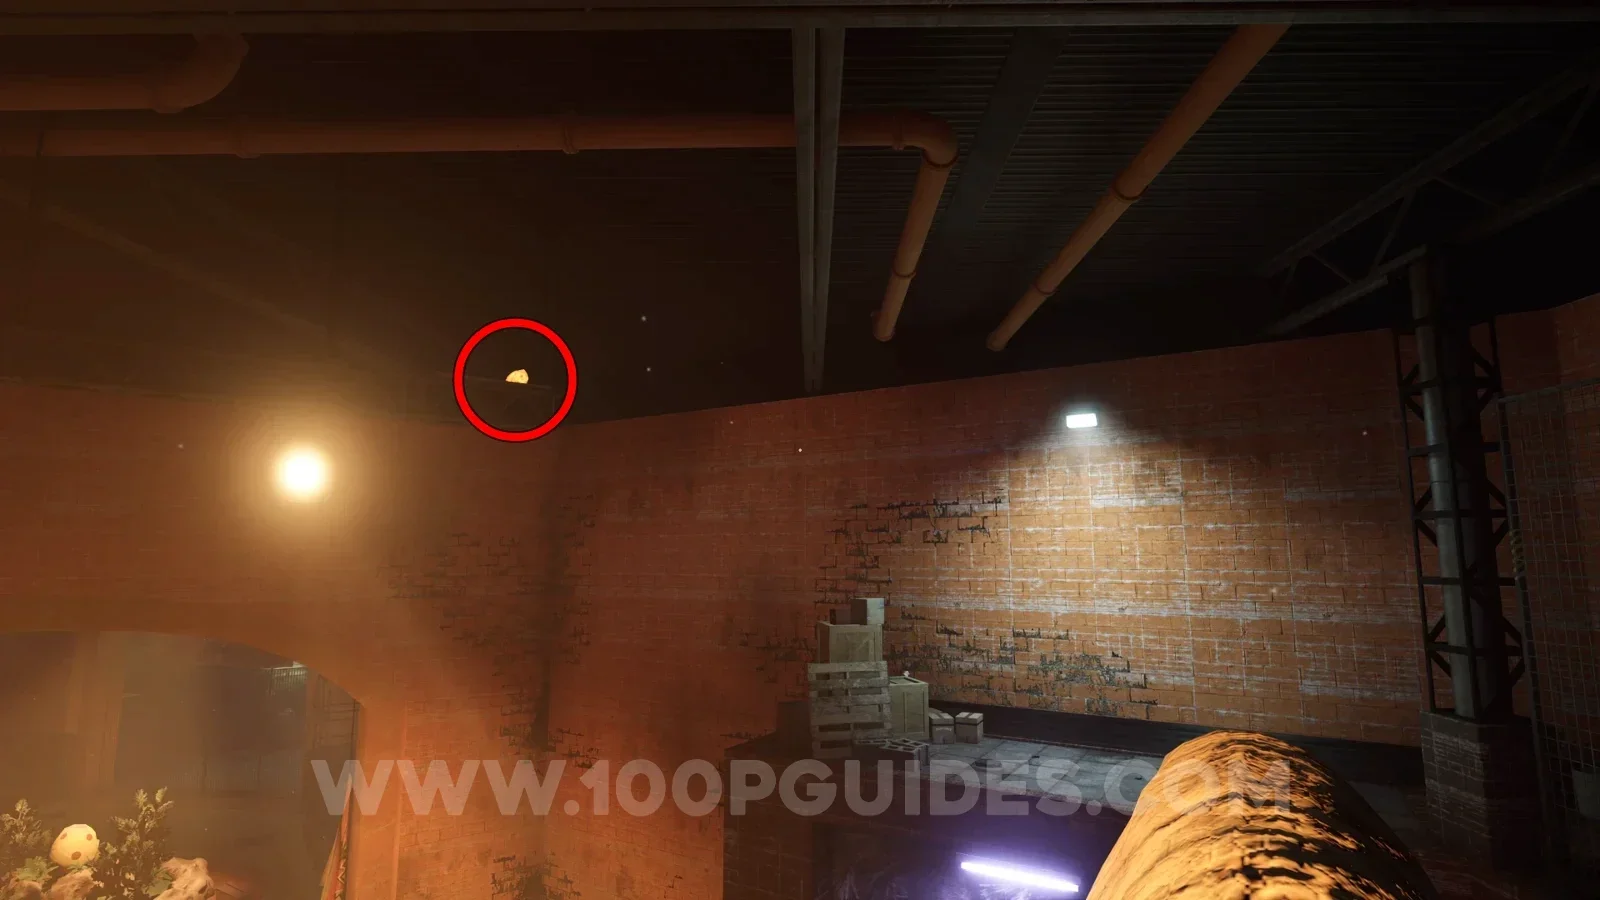
Hanging beam above the second moving dinosaur. View 02 ↗ Open collection entry ↗ |
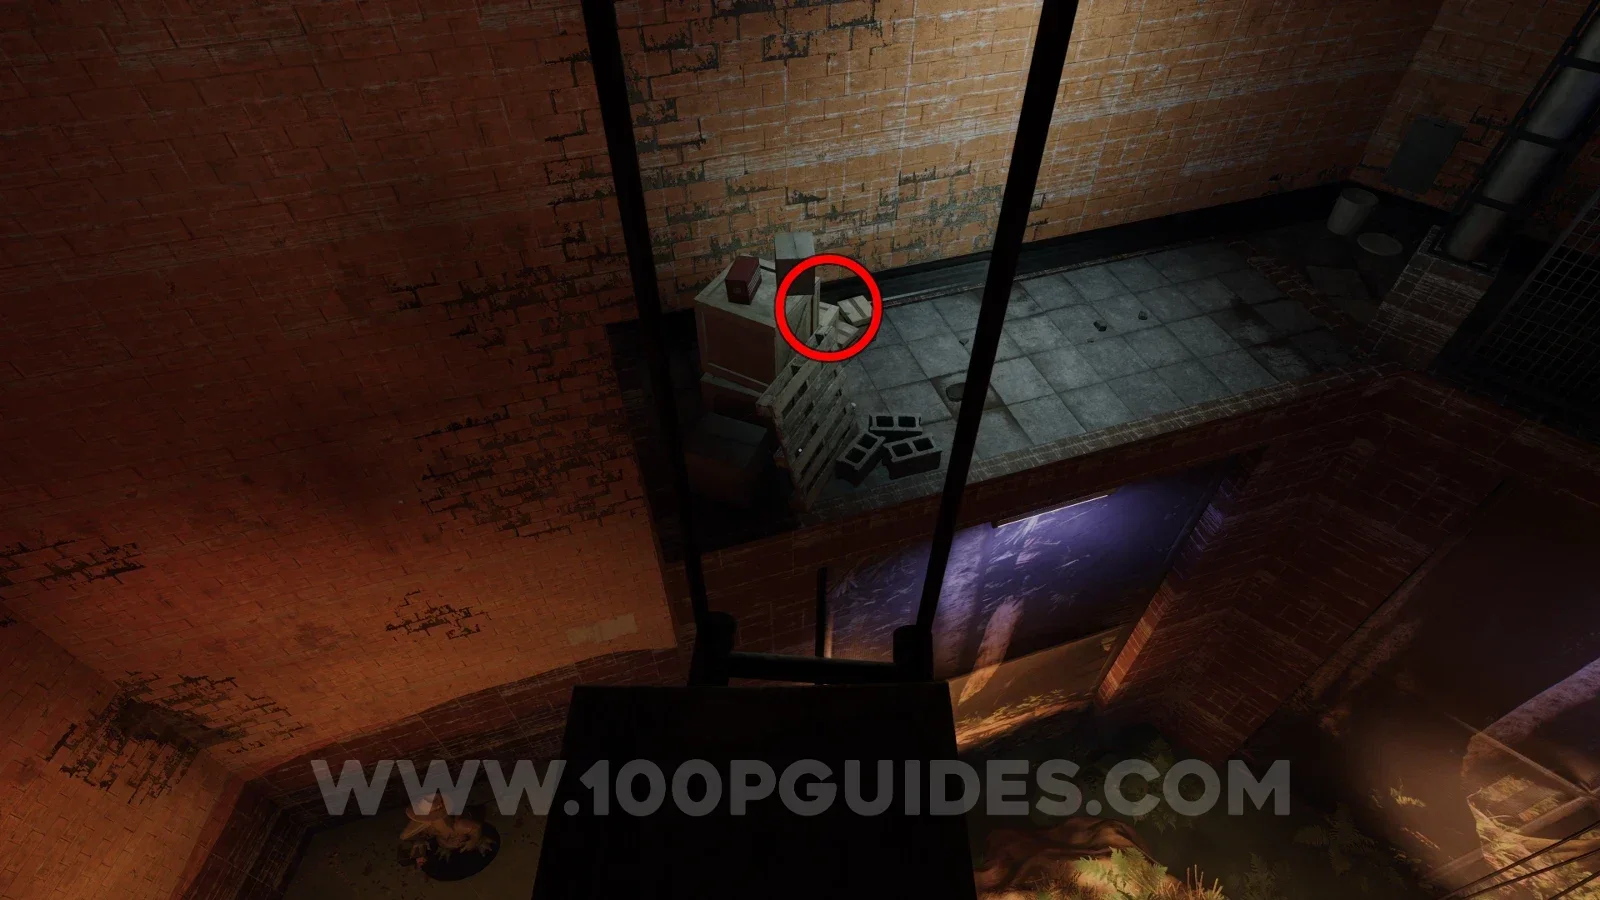
Audio tapeCheryl: OnboardingImage reviewed |
Upper exhibition route: look down toward the crate beside the upright pallet and loose concrete blocks. Descend to that crate. Location image ↗ Open collection entry ↗ |
NoteDalton Journal Entry: Feb 27 1983Community report |
Reported route: Upper tree-platform route: crates before the wall opening. Final pickup not confirmed here. Reference image ↗ Report this location ↗ Open collection entry ↗ |
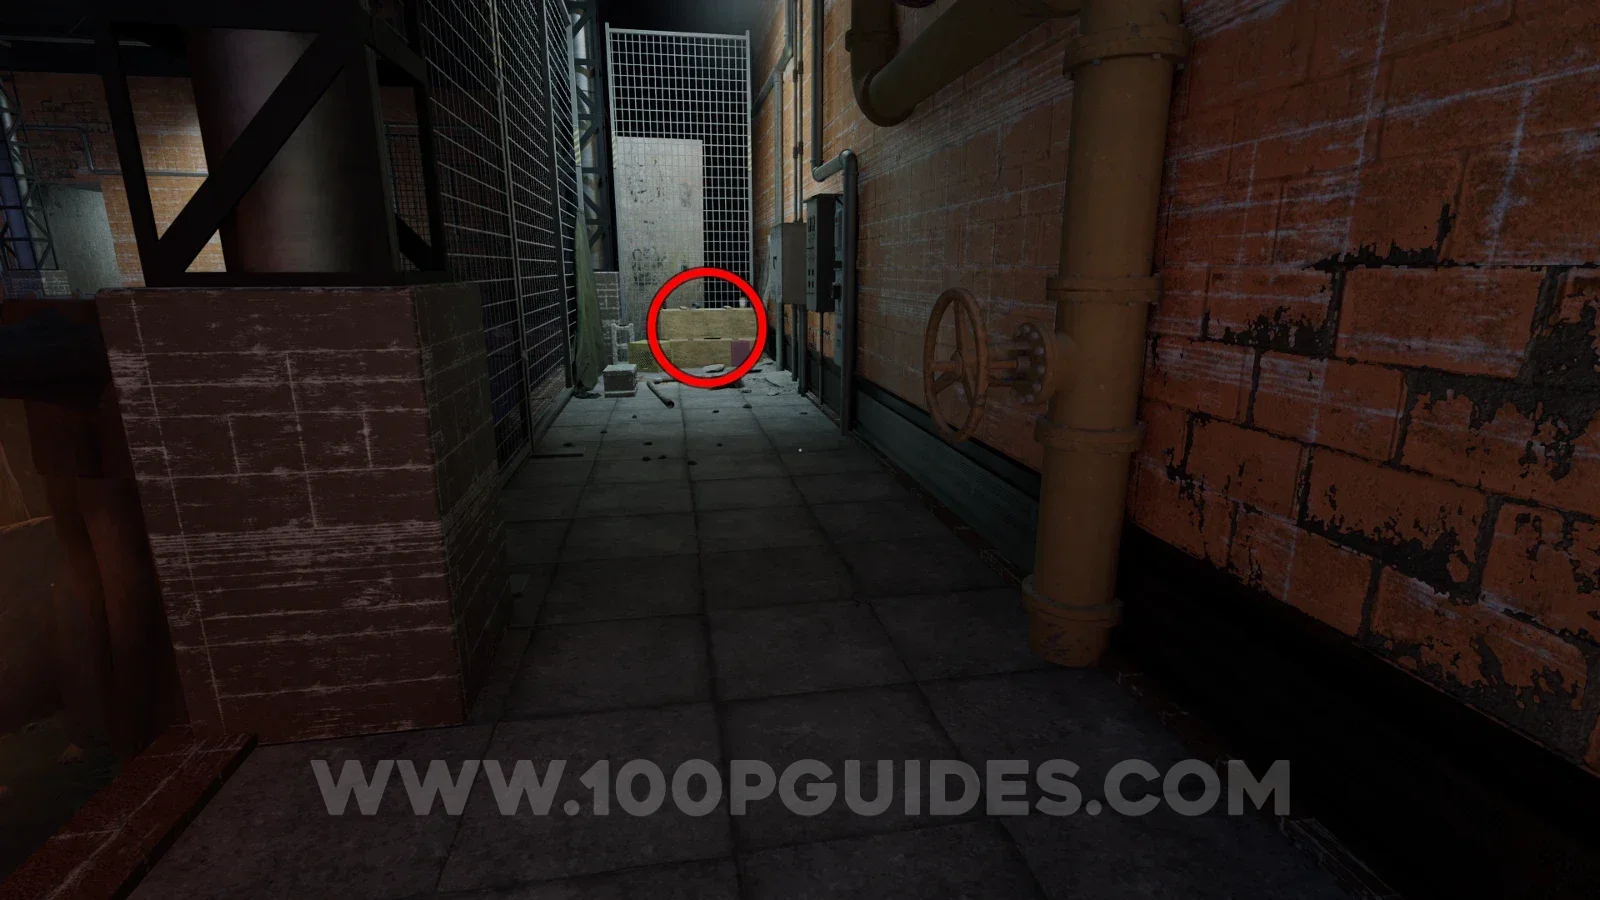
Audio tapeElena Coolidge: I'm Going to New YorkImage reviewed |
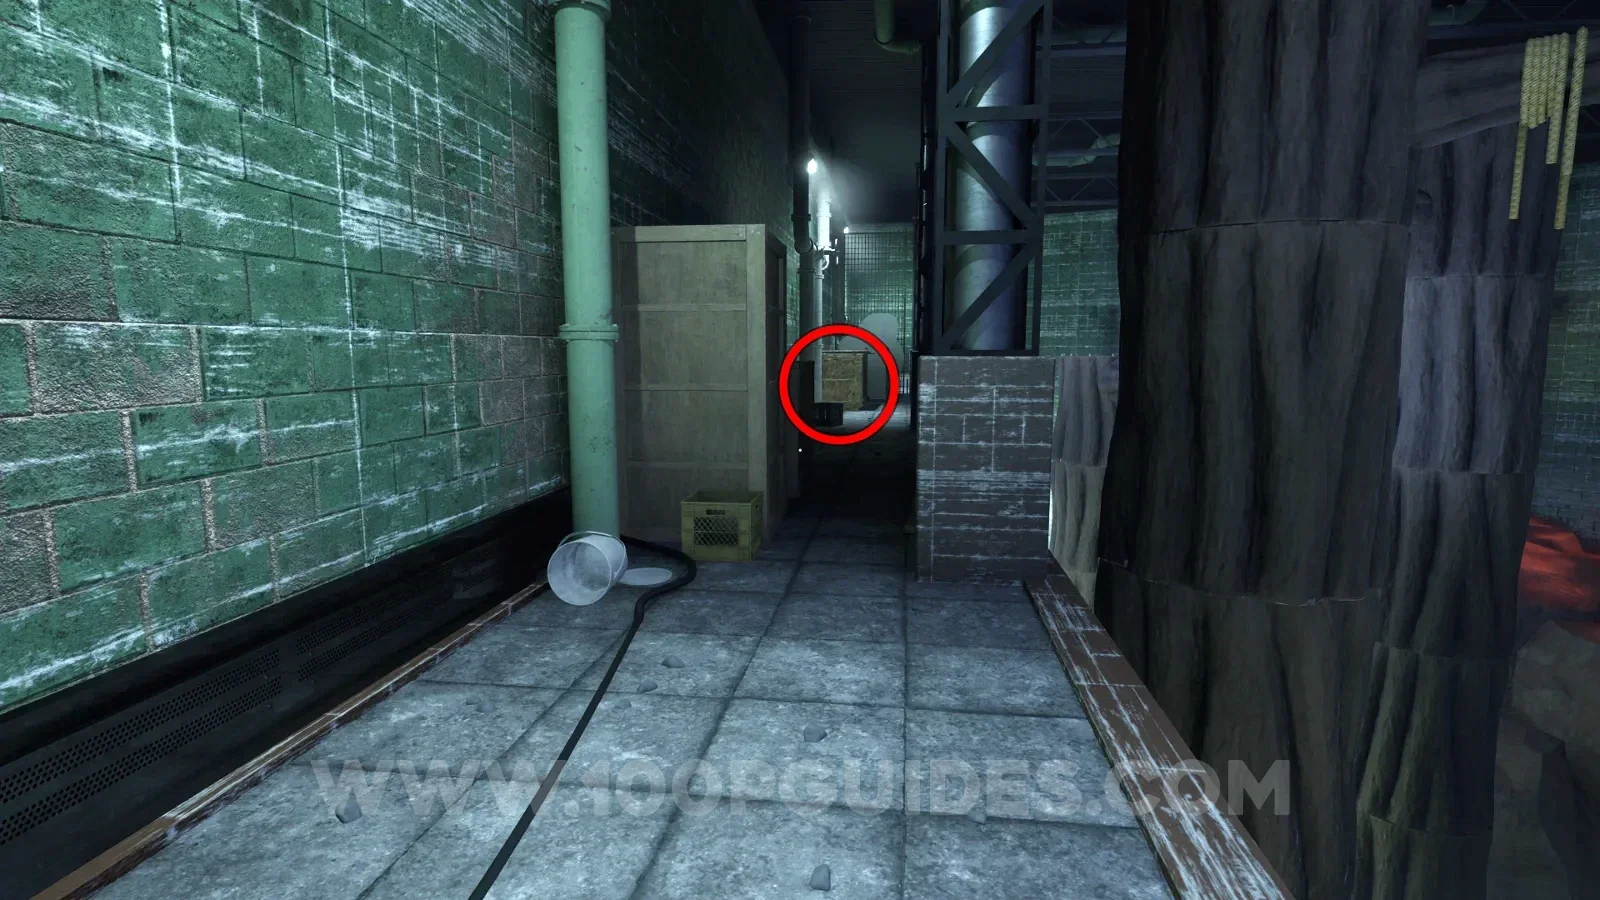
Watering Hole upper service path: check the crate beyond the vertical pipe and utility cabinet, beside the steel support. Location image ↗ Open collection entry ↗ |
NoteNote from Security GuardImage reviewed |
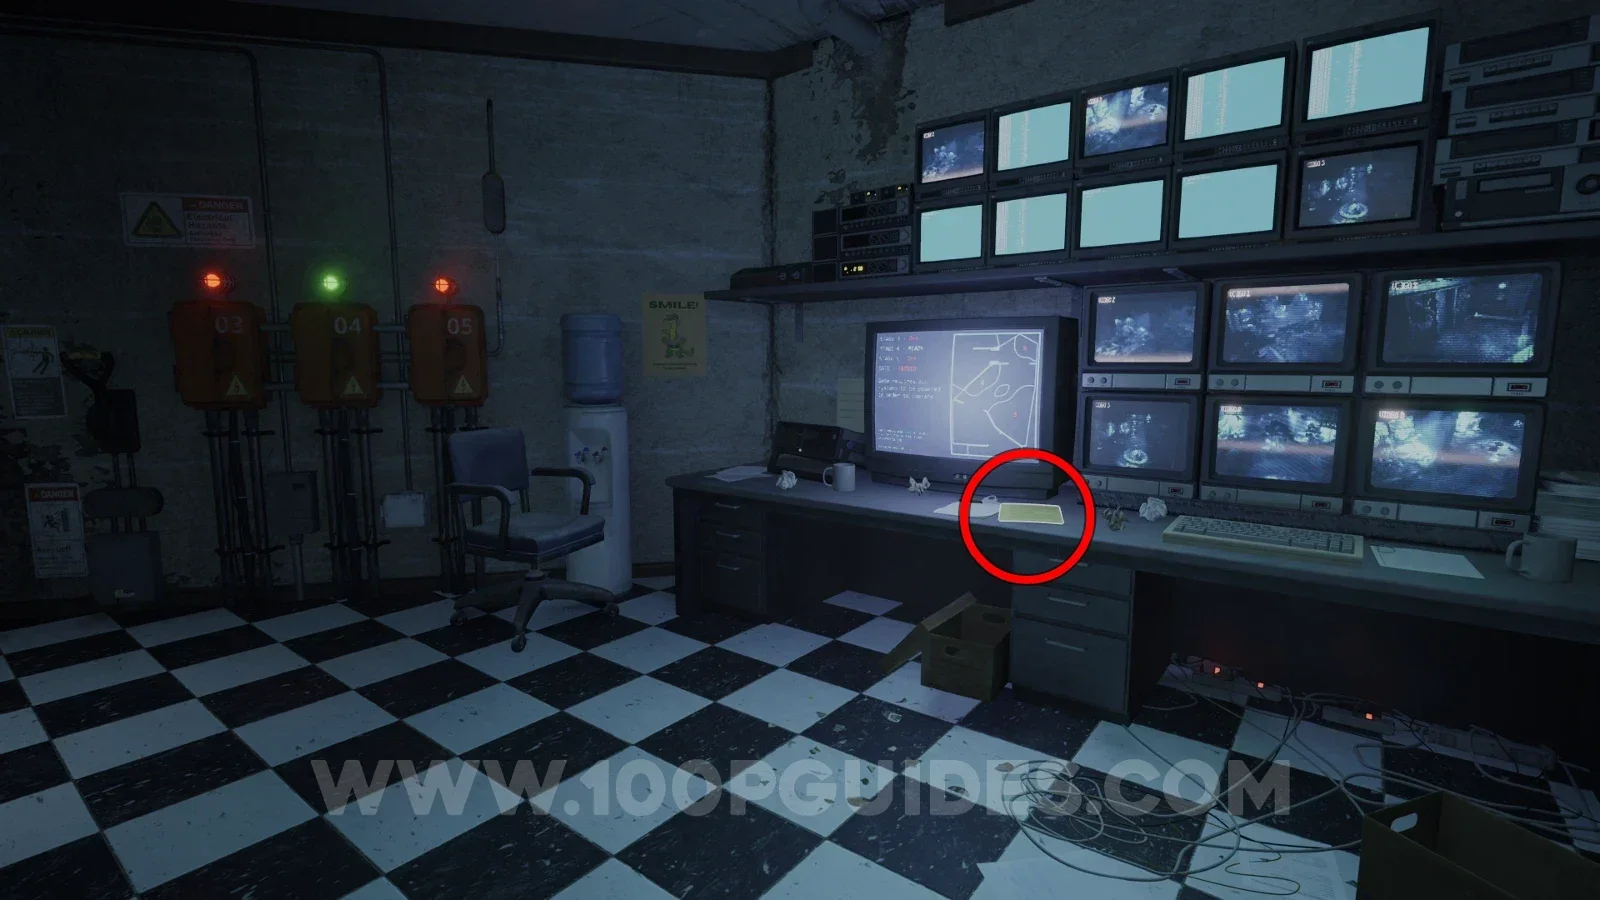
Watering Hole control room: look on the desk in front of the bank of security monitors. Location image ↗ Open collection entry ↗ |
NoteNewspaperCommunity report |
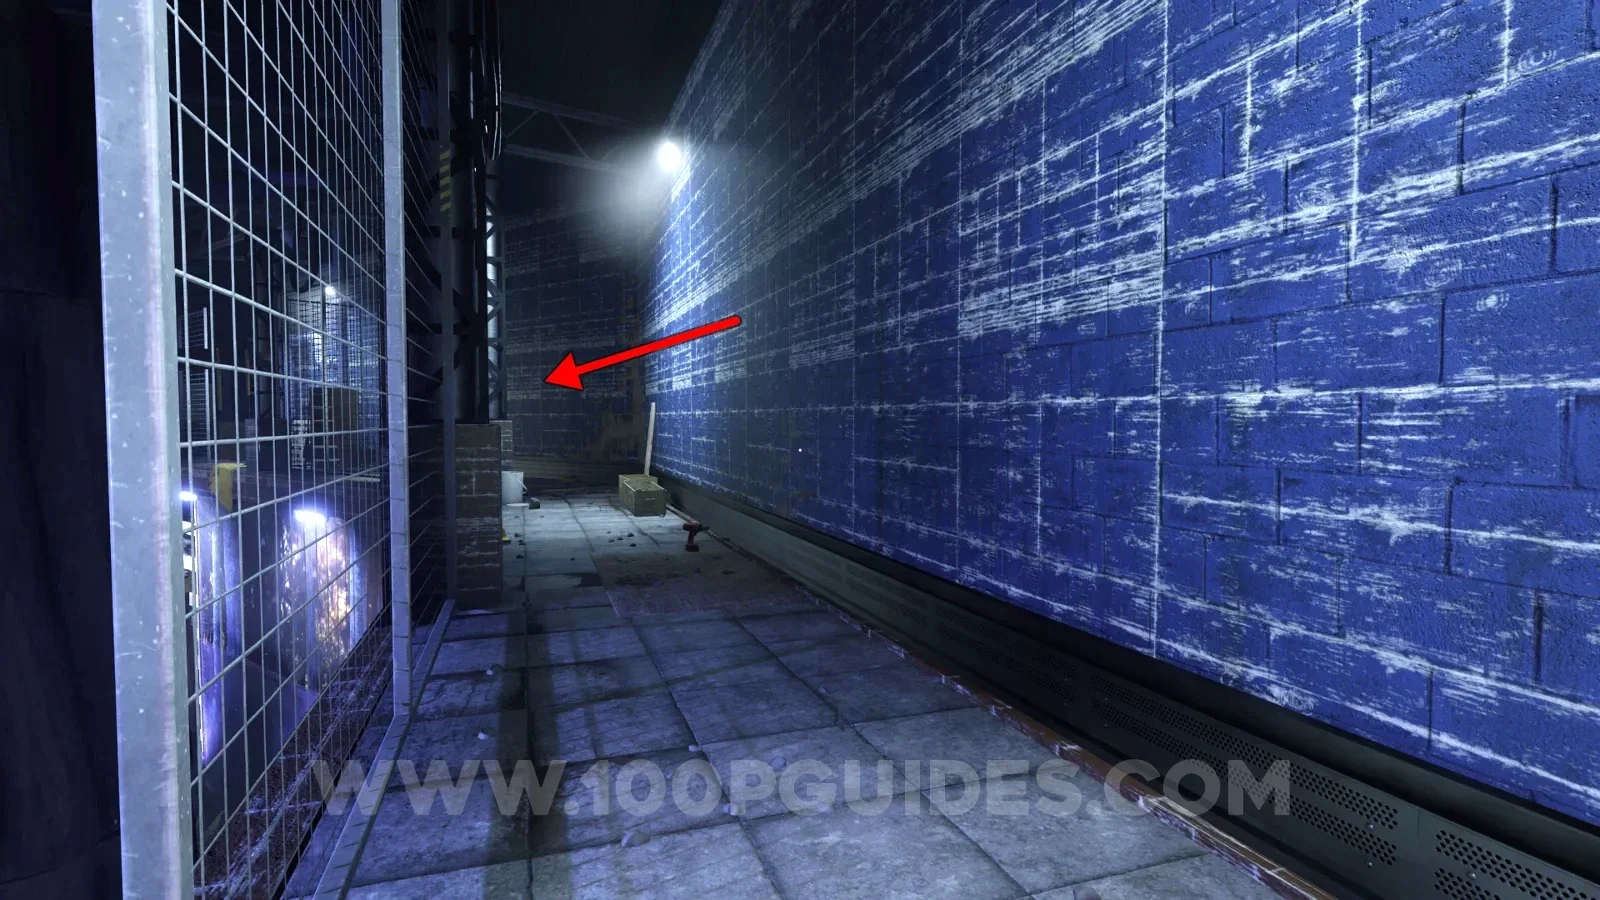
Reported route: Beyond the control room: follow the left elevated path to its end crate. Final pickup not confirmed here. Reference image ↗ Report this location ↗ Open collection entry ↗ |
AmberAmber 03 |
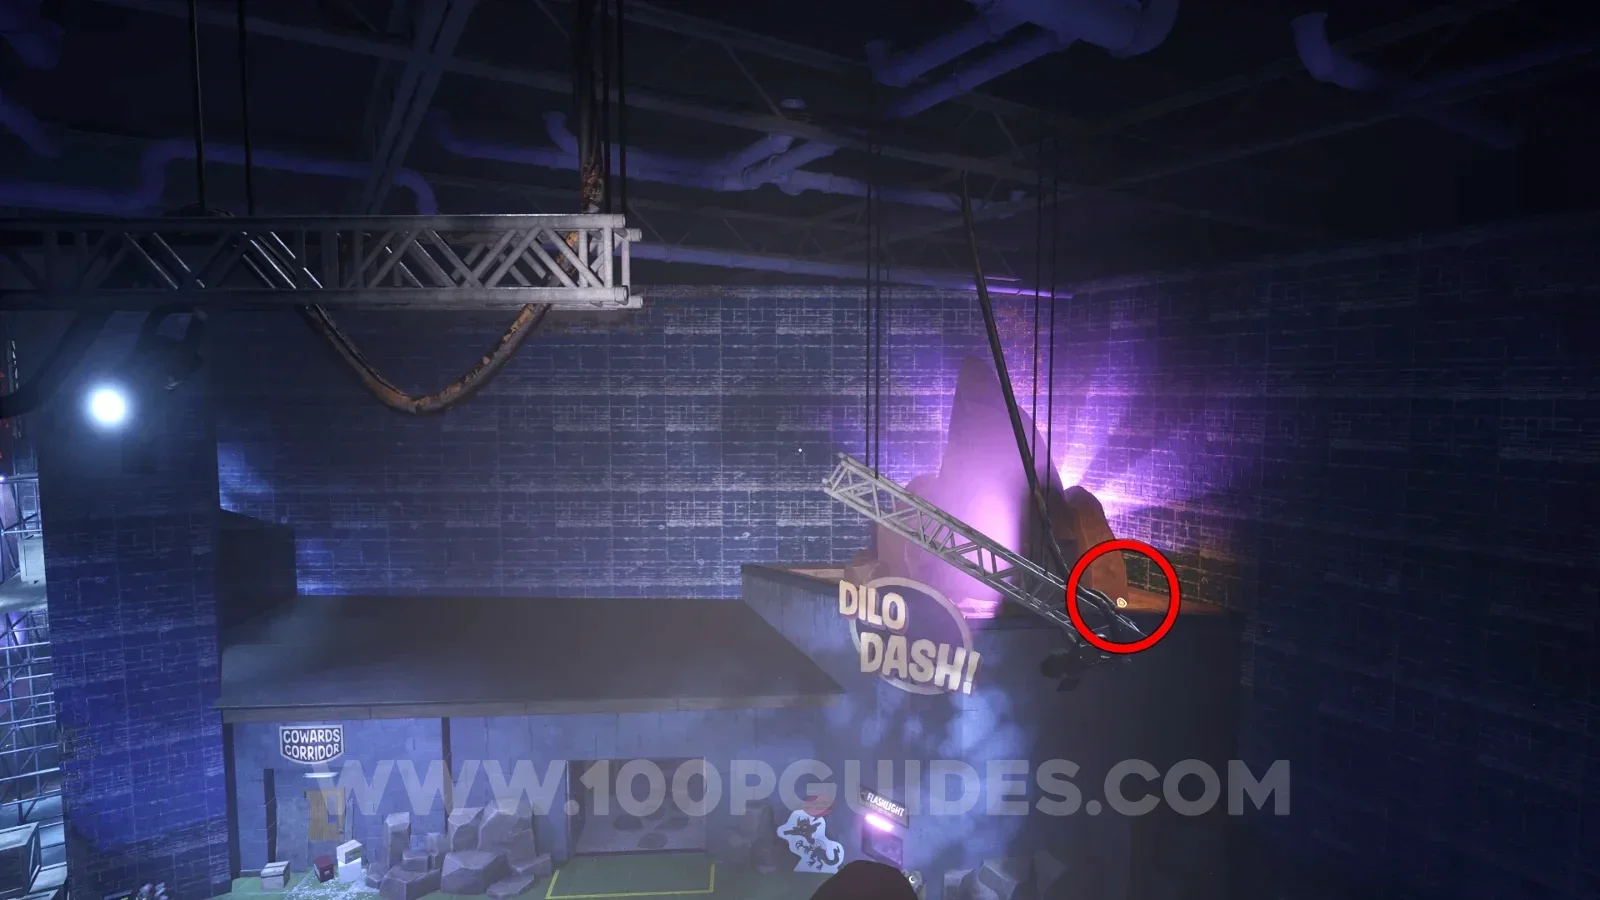
Above the flashlight-token room; use overhead structures. View 03 ↗ Open collection entry ↗ |
Chapter 1: Backstage and gift shop
Story objective: Replace the meteor button, then complete the three floodlight power stages. Open the steps.
Checkpoint: Reverse into the basement when Bronto blocks the exit. Collectible detours below may span the approach and return route.
| Stop | Location and reference |
|---|---|
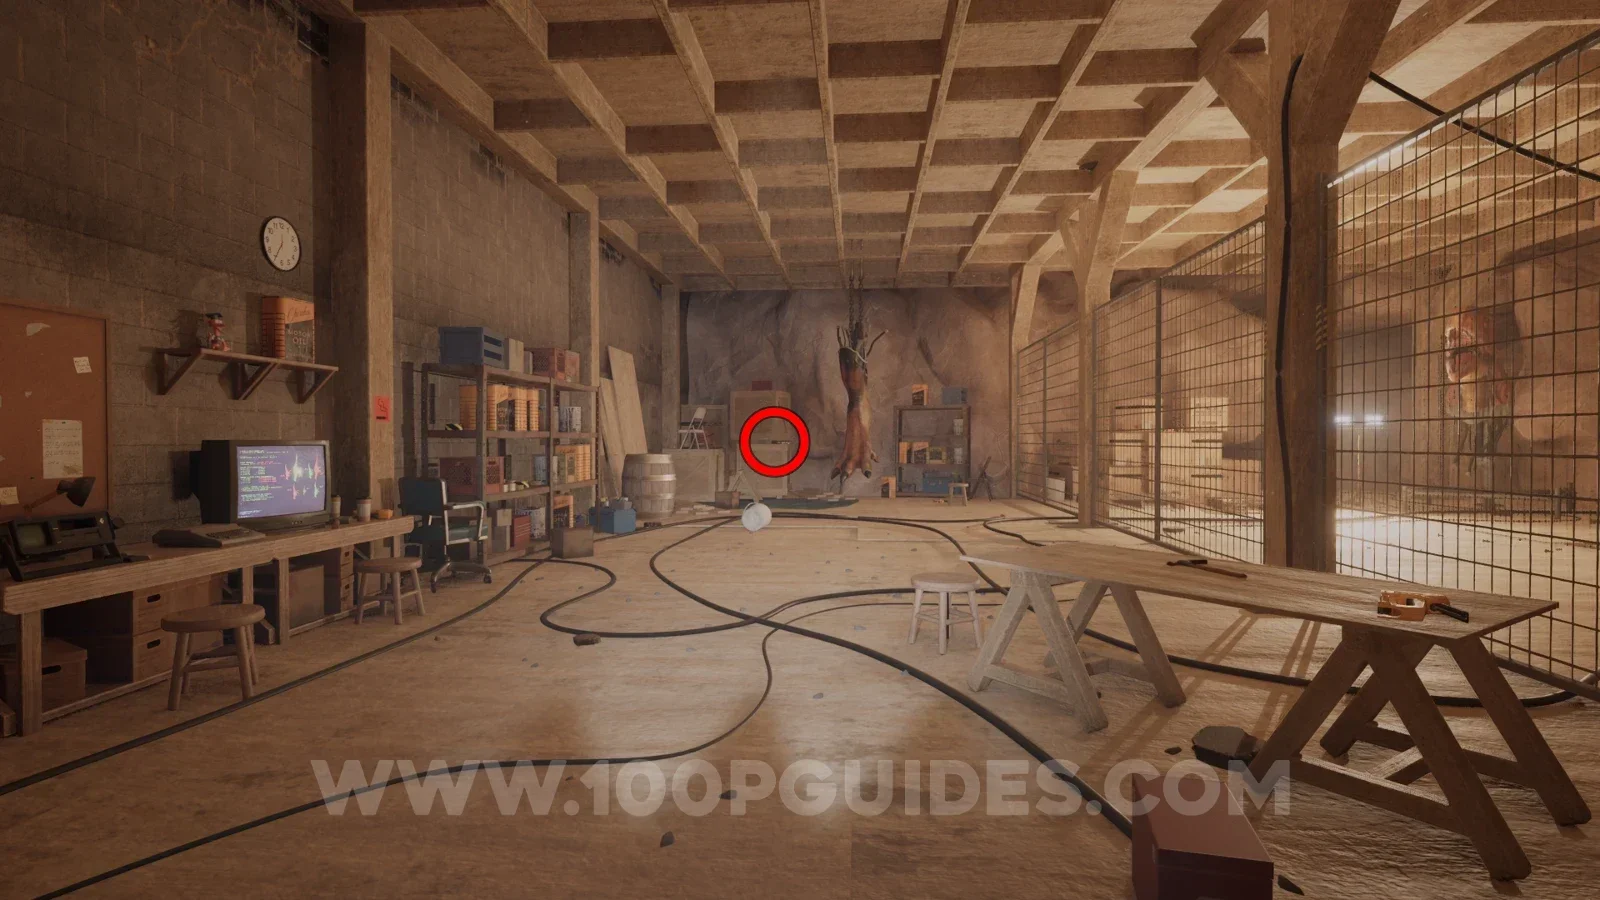
Audio tapeDalton Coolidge: The New SiteImage reviewed |
Exhibition workshop: search the far end near the upright crate and hanging dinosaur prop, opposite the fenced display. Location image ↗ Open collection entry ↗ |
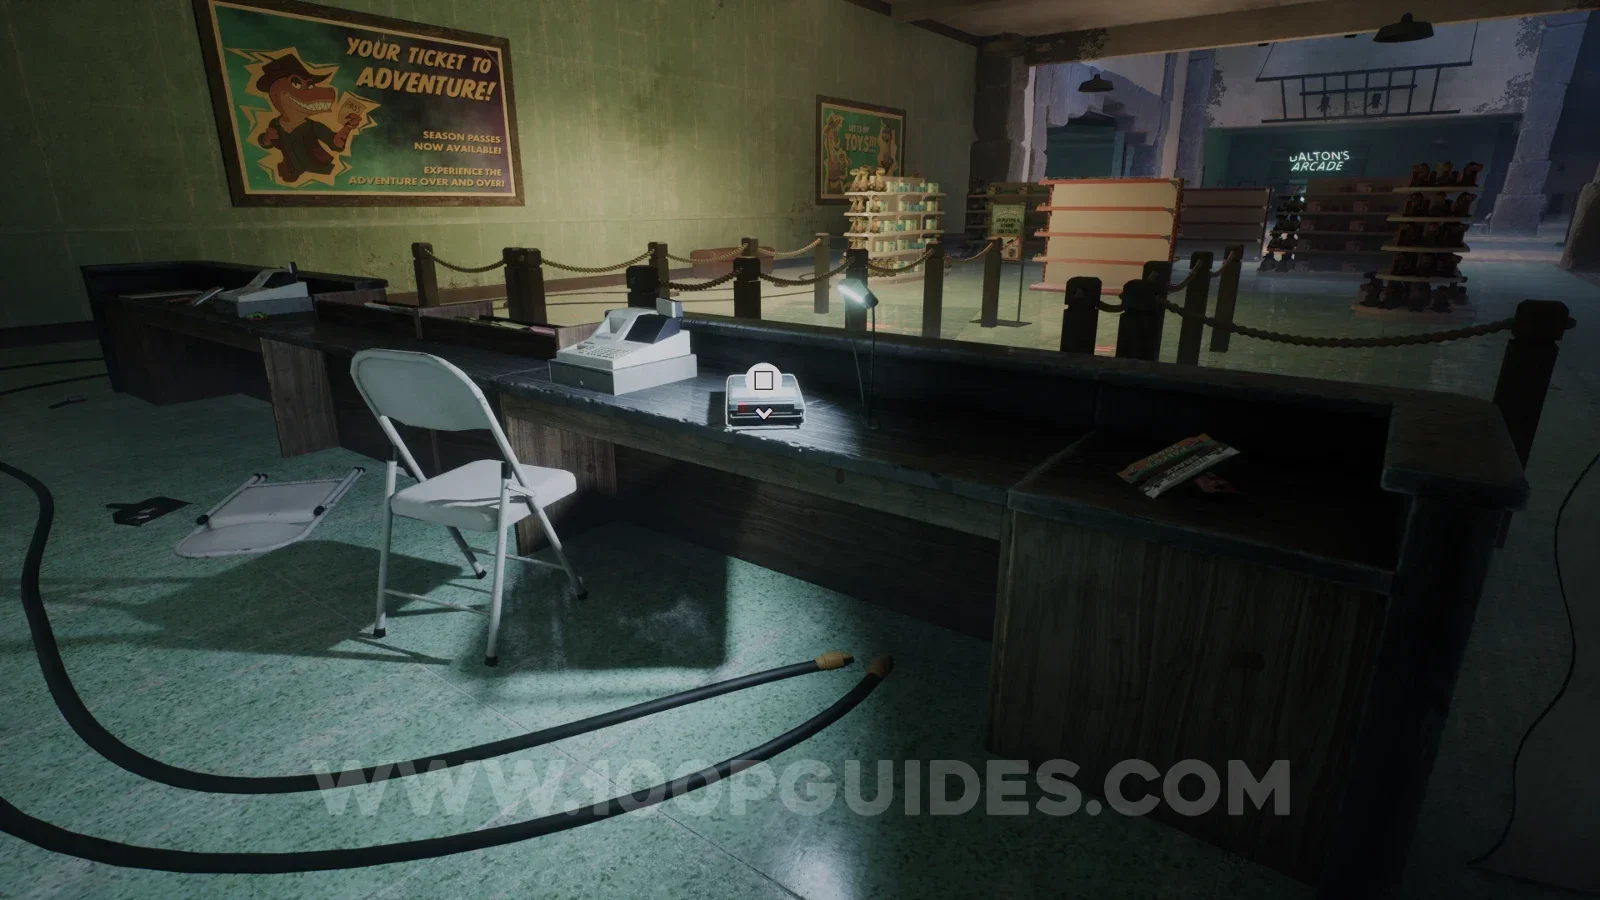
Audio tapeStella Banks: Instructions for WillyImage reviewed |
Gift shop: go behind the counter facing Dalton’s Arcade. Check beside the cash register and desk lamp. Location image ↗ Open collection entry ↗ |
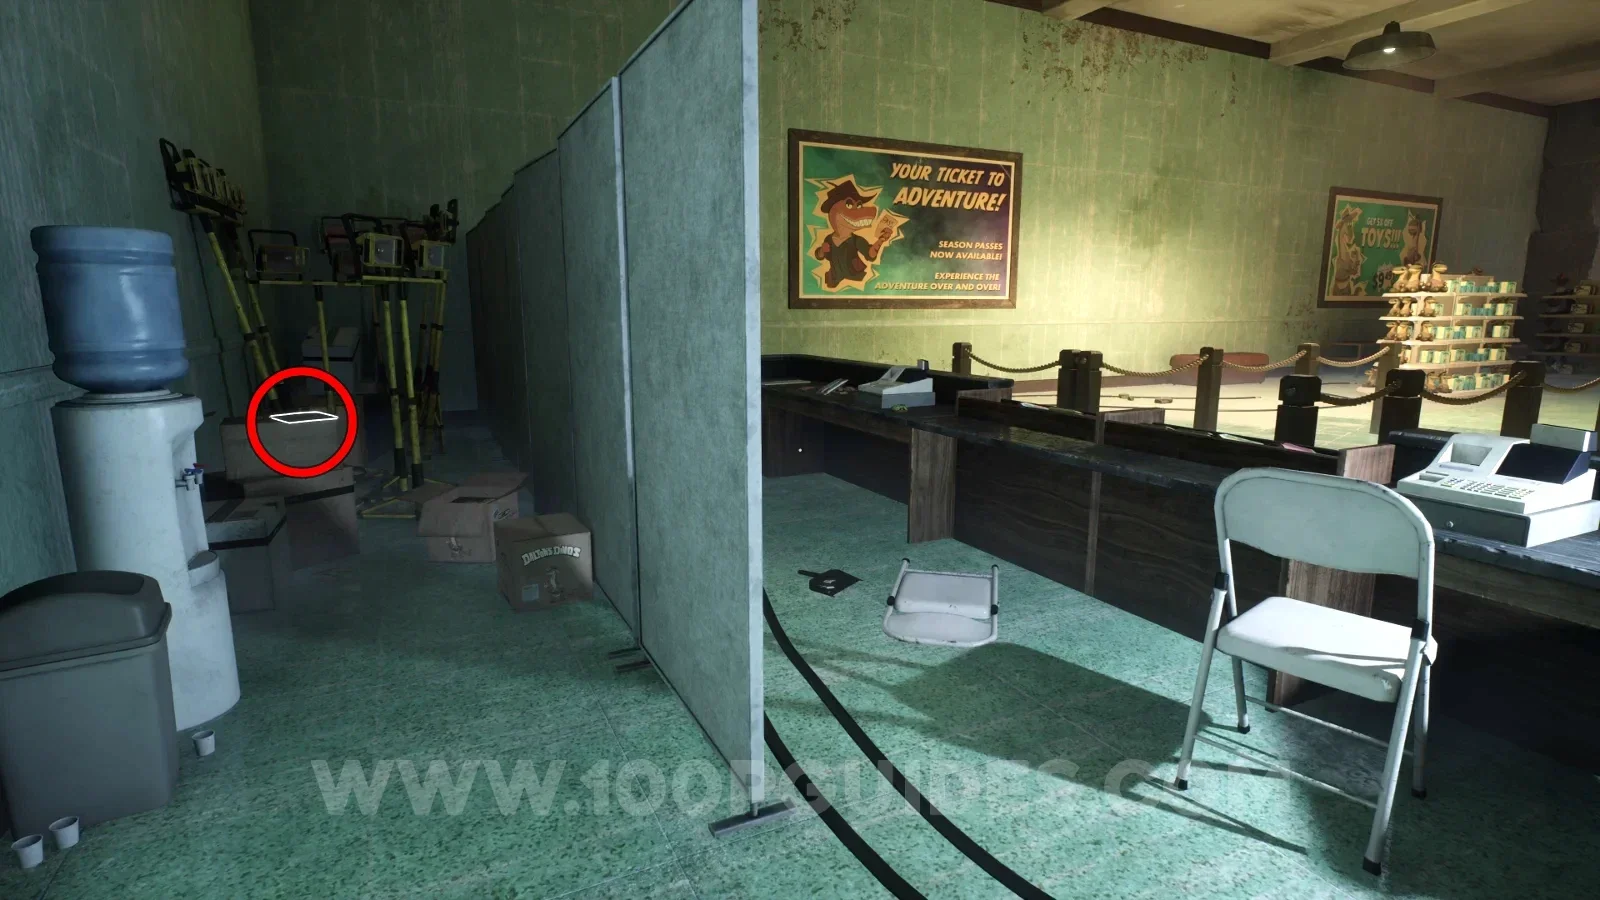
NoteDennis Merch ShrinkageImage reviewed |
Behind the gift-shop counter divider, inspect the box beside the water cooler and stored floodlight stands. Location image ↗ Open collection entry ↗ |
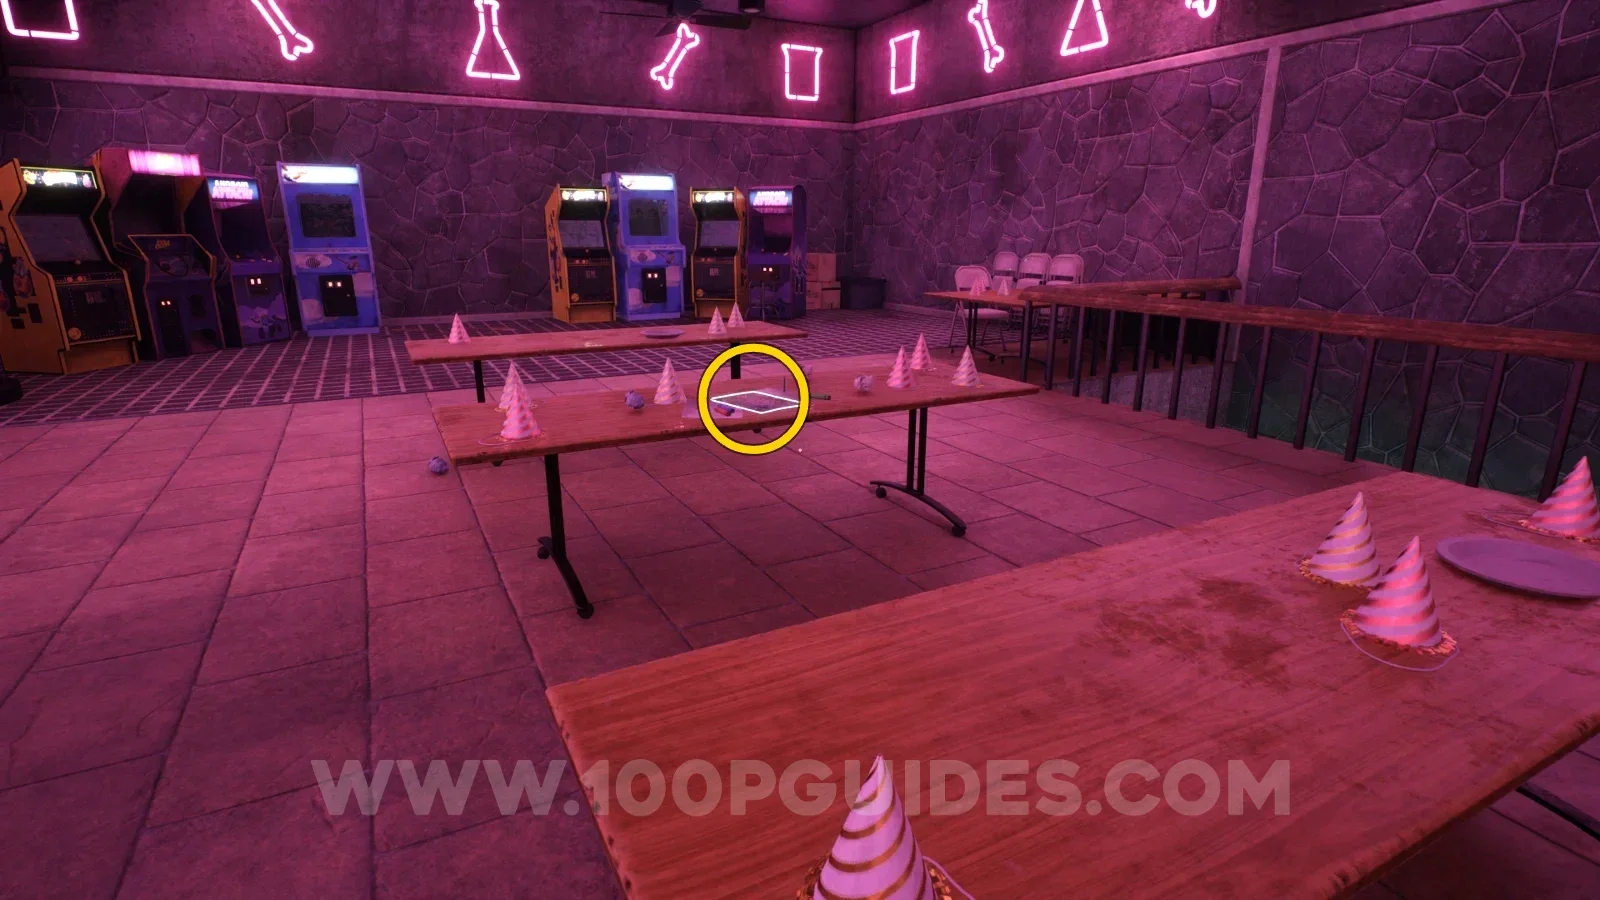
NoteDalton Jr. Journal Entry: Sick DennisImage reviewed |
Arcade upper area: examine the party table with paper hats in the purple-lit room. Location image ↗ Open collection entry ↗ |
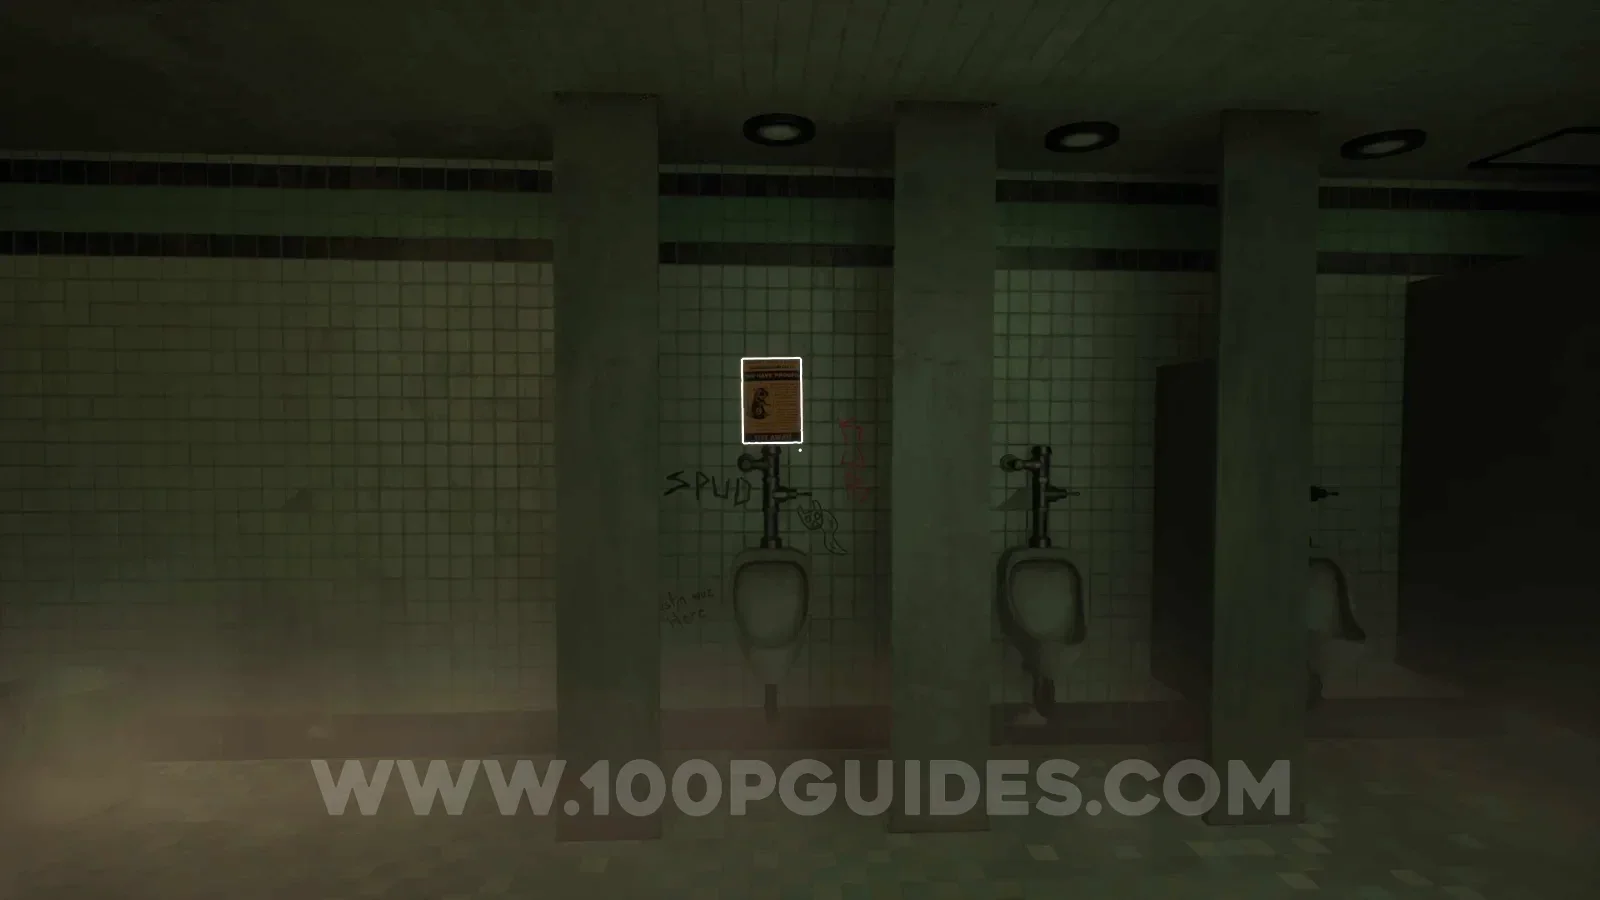
NoteCrumpled FlyerImage reviewed |
In the restroom, look for the highlighted flyer on the wall between the two urinals. Location image ↗ Open collection entry ↗ |
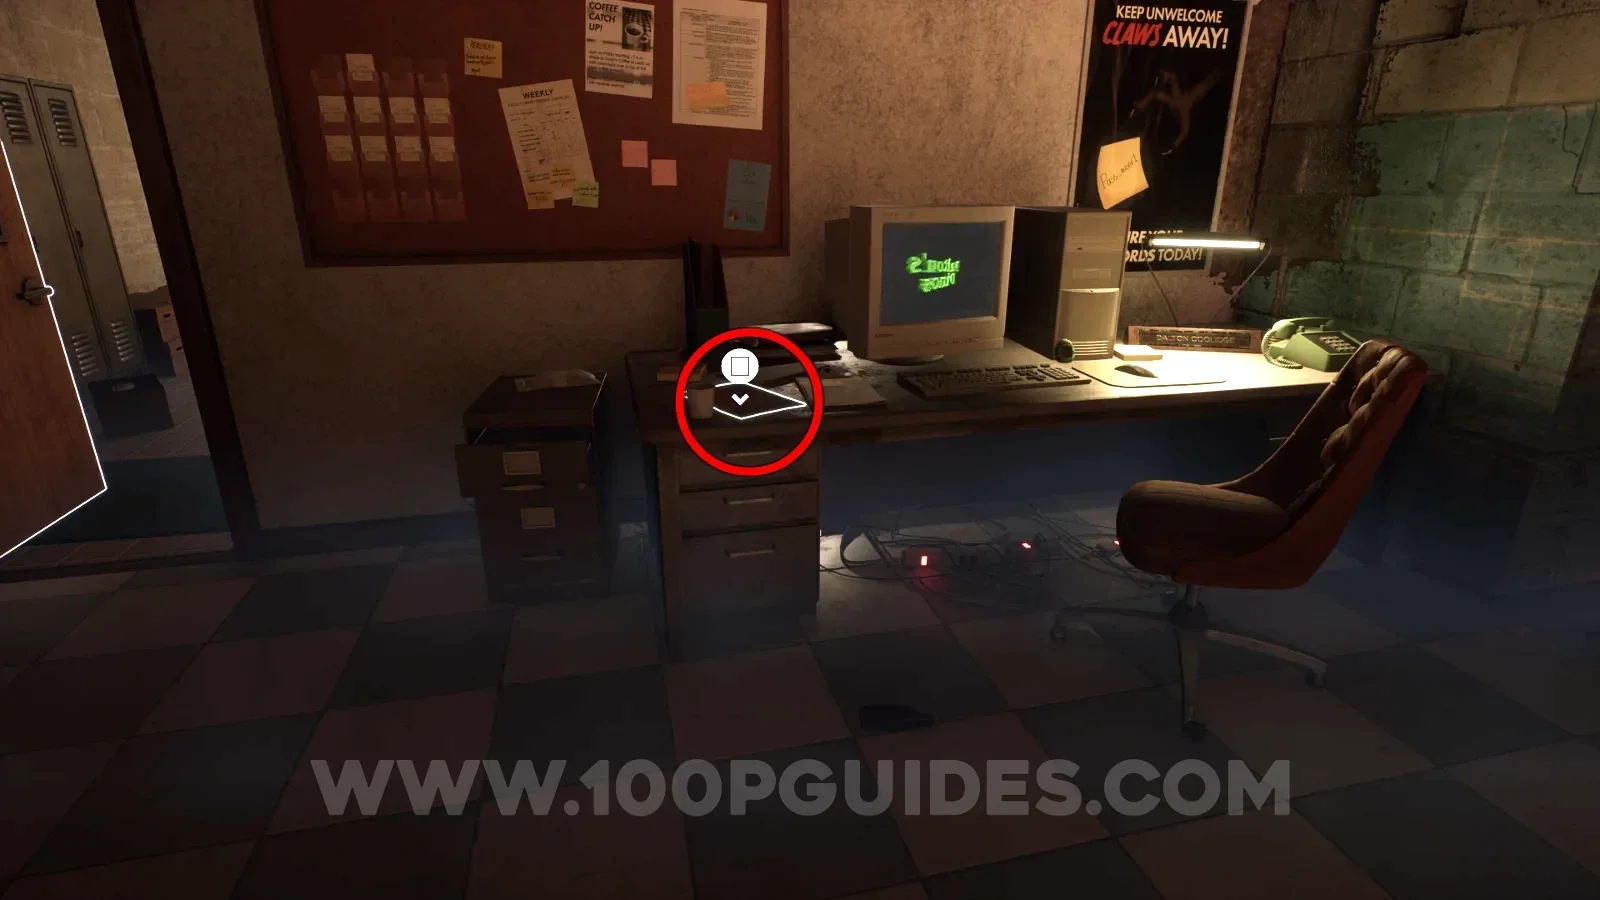
NoteLetter from Elena to DaltonImage reviewed |
Gift-shop office: check the desk beside the computer keyboard and mug, beneath the noticeboard. Location image ↗ Open collection entry ↗ |
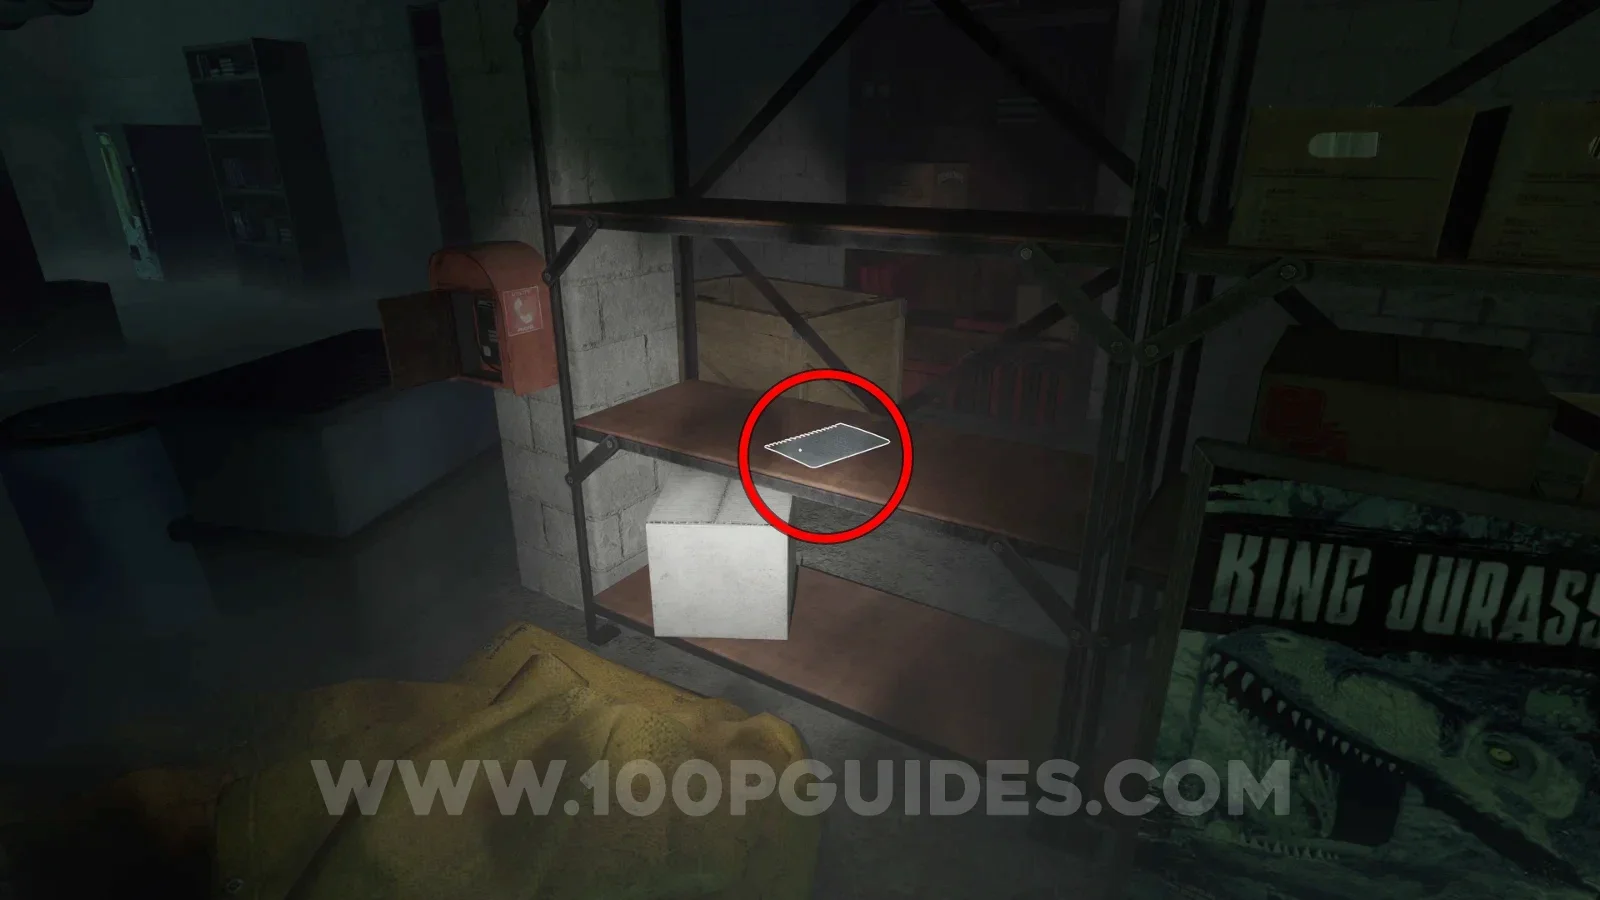
NoteDalton Journal Entry: March 15 1981Image reviewed |
Gift-shop fuse basement: inspect the metal shelving beside the wall-mounted fire box and stacked exhibition signs. Location image ↗ Open collection entry ↗ |
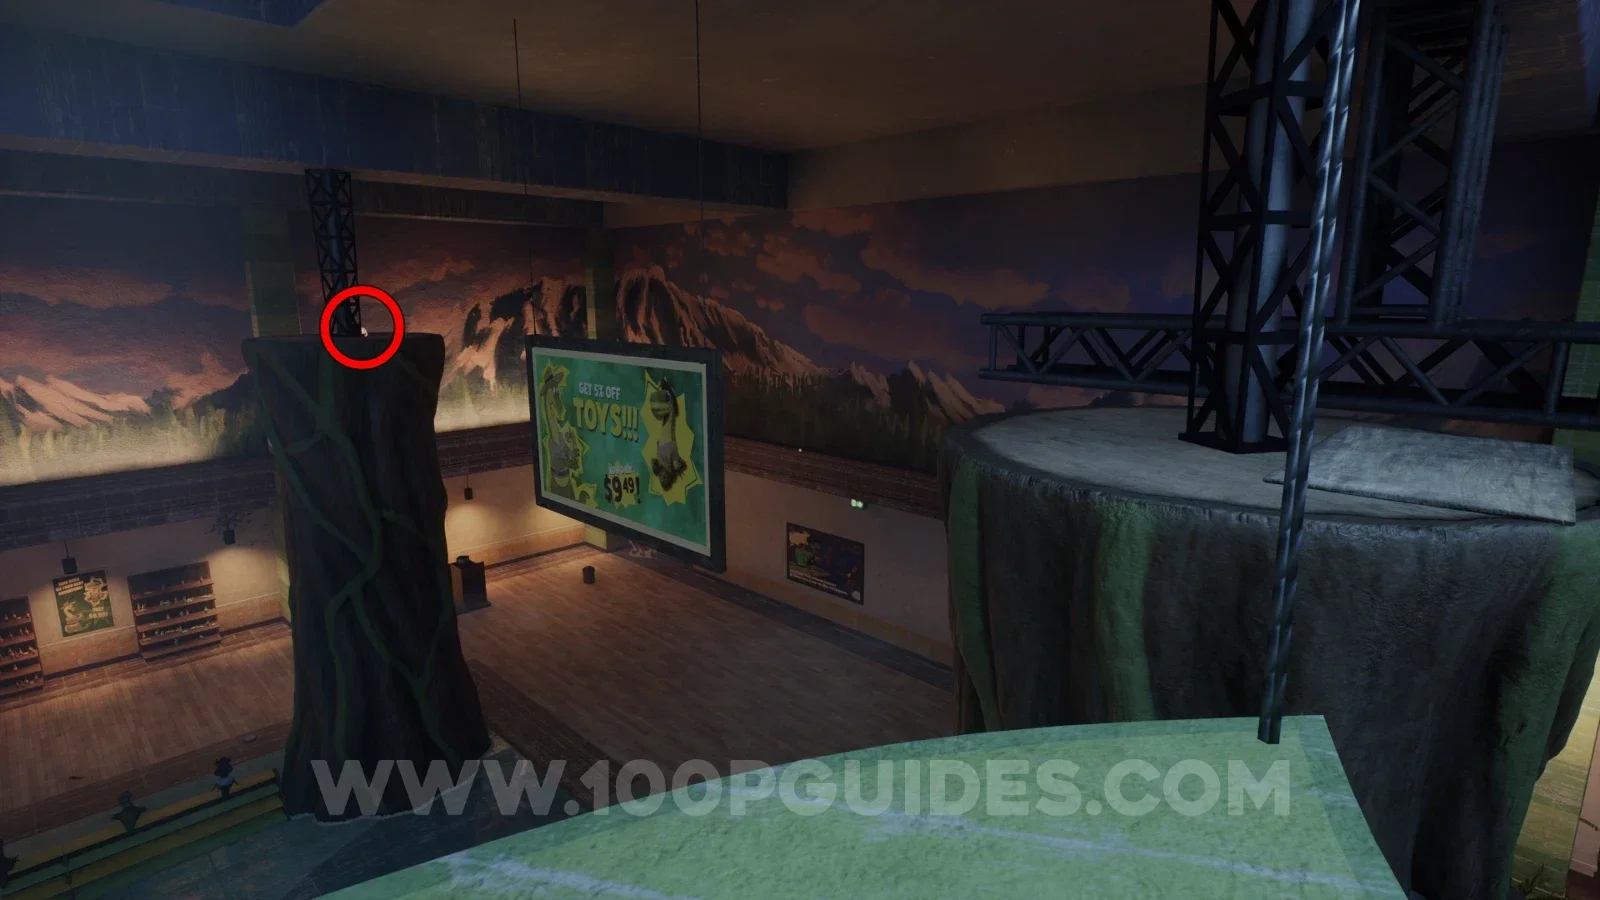
AmberAmber 04 |
Gift-shop upper circular platform, left before second connector. View 04 ↗ Open collection entry ↗ |
Continue your route
After these listed detours, continue the Chapter 1 story and escape steps. Finishing this checklist does not mean the chapter or its achievements are complete.
Chapter 2 collection run · Chapter 3 collection run · Chapter 4 collection run