Before you start
This chapter lists 4 amber, 28 notes and 7 tapes (39 stops). Entries follow the published collection reference’s order, grouped into broad story stages. These groups are navigation aids, not a promise that every stop is immediately accessible or that no backtracking is needed. Follow your active objective and use the Chapter 4 walkthrough between detours.
Checks are shared with the amber, note and tape guides on this browser. Image reviewed means the linked source image was compared with the route; Community report means the final pickup remains unconfirmed here. Item names are reported labels. Seven notes remain unmapped across the game; this is not a complete 97-note achievement route. Toy deliveries remain in the separate pickup and pedestal list.
Chapter 4: Expedition and DJ approach
Story objective: Use the counterweight and climb toward the crying voice. Open the steps.
Checkpoint: Speak to DJ to receive the tooth objective. Collectible detours below may span the approach and return route.
| Stop | Location and reference |
|---|---|
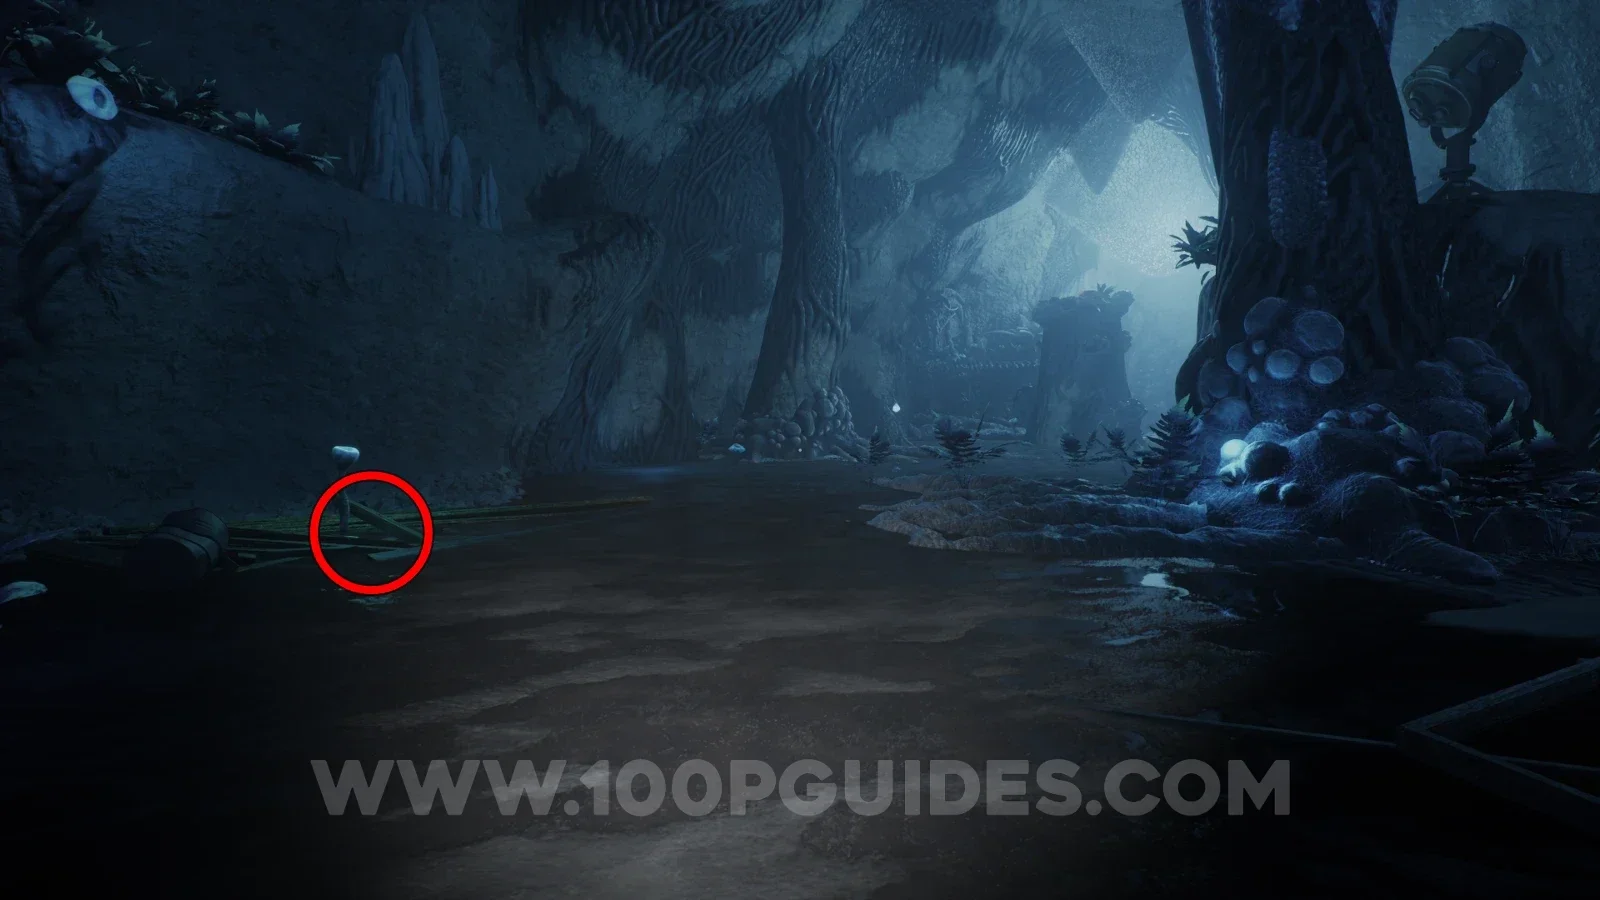
NoteIt's everywhereImage reviewed |
Opening blue cavern after the chase: inspect the wooden planks along the left side of the path. Location image ↗ Open collection entry ↗ |
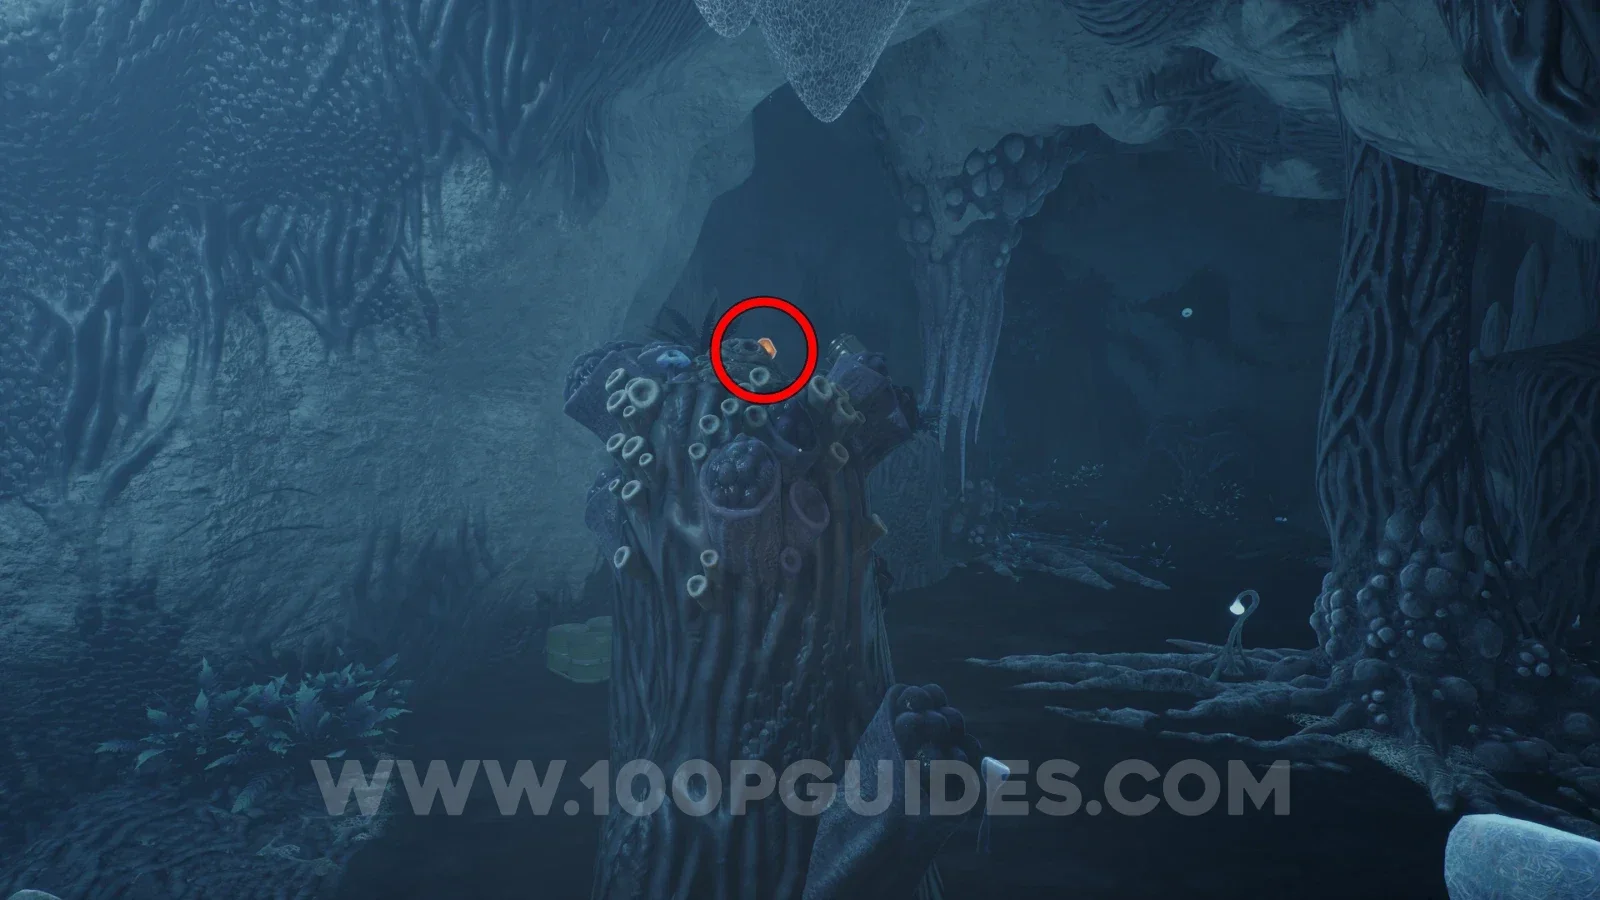
AmberAmber 13 |
Opening path’s pillar; jump from left platform. View 13 ↗ Open collection entry ↗ |
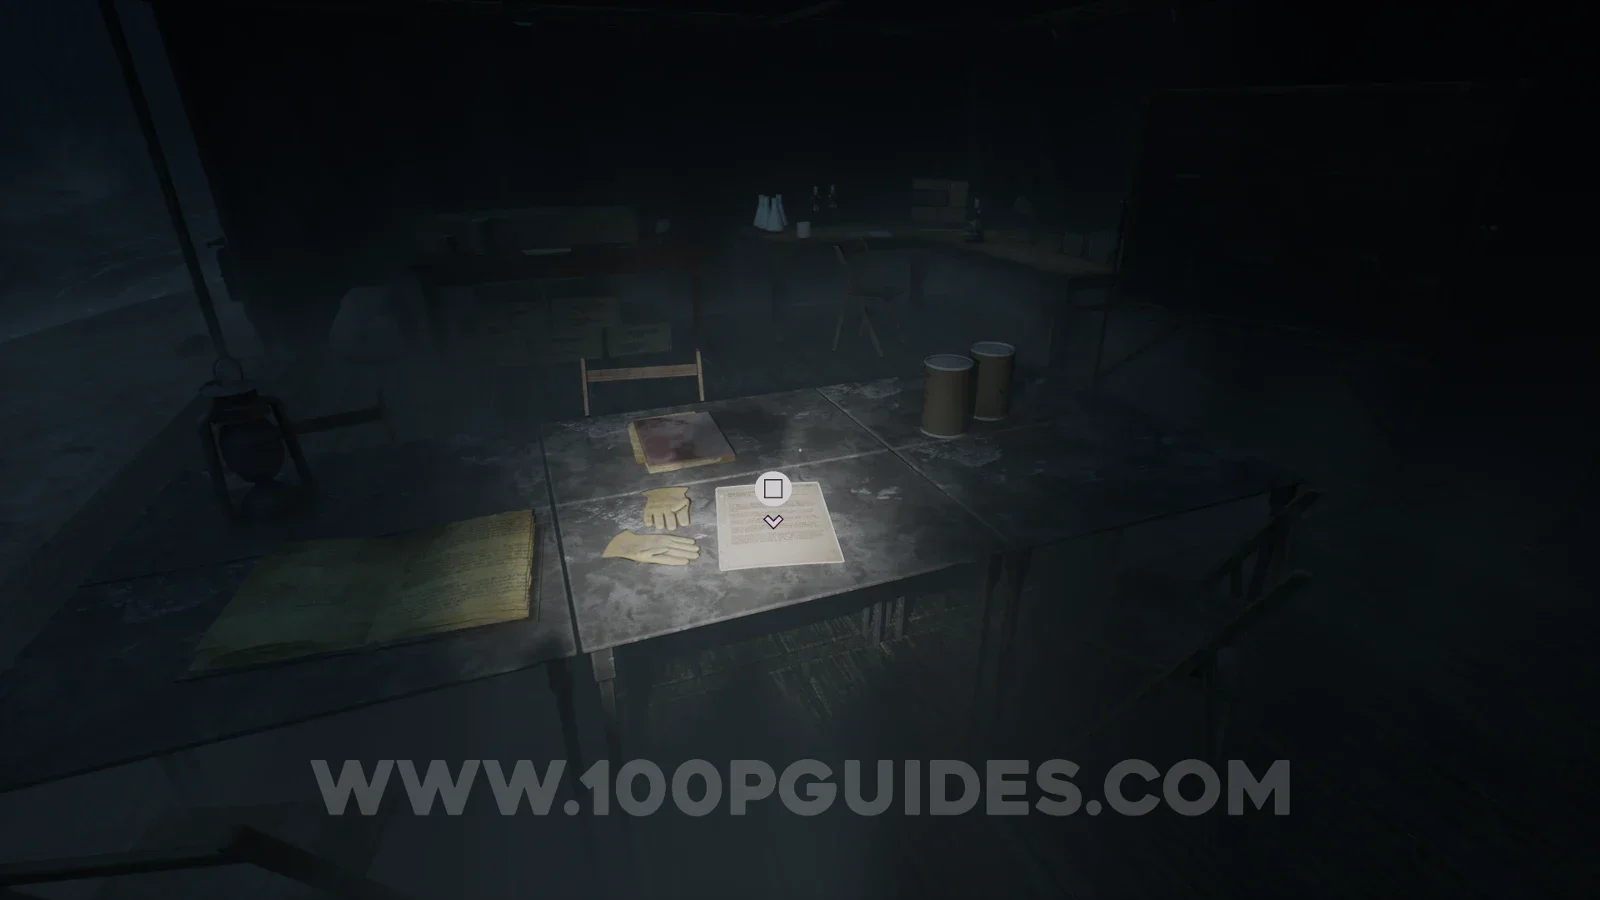
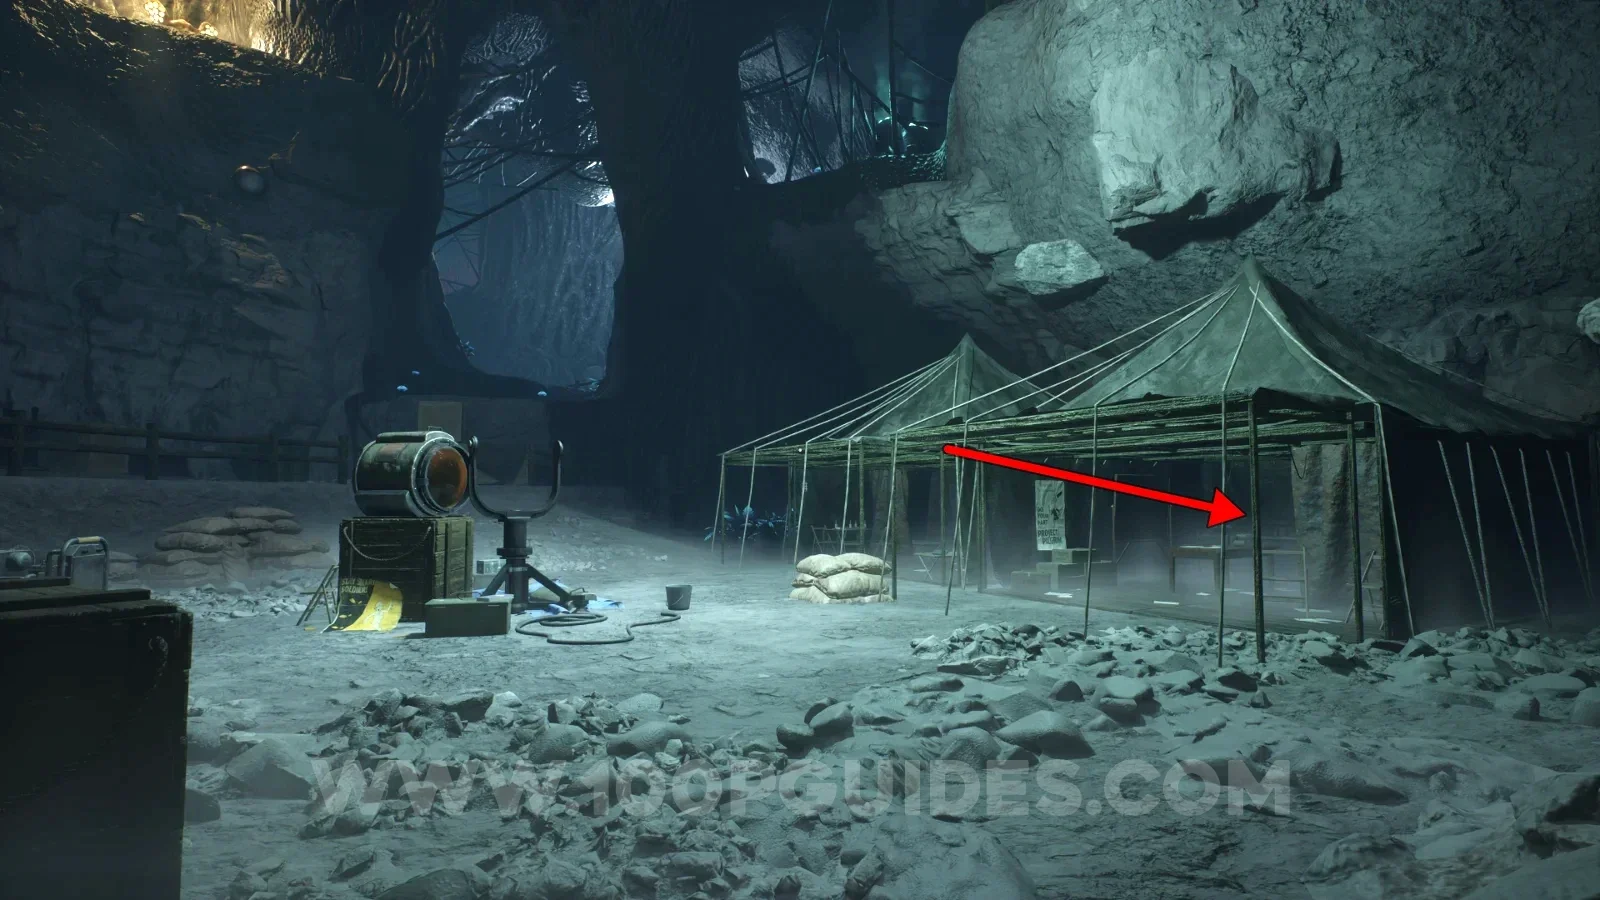
NoteDr. Jane Hicks: Research ReportImage reviewed |
Opening tent camp: search the first tent on the left. Check the metal table beside the yellow gloves and folder. Location image ↗ Open collection entry ↗ |
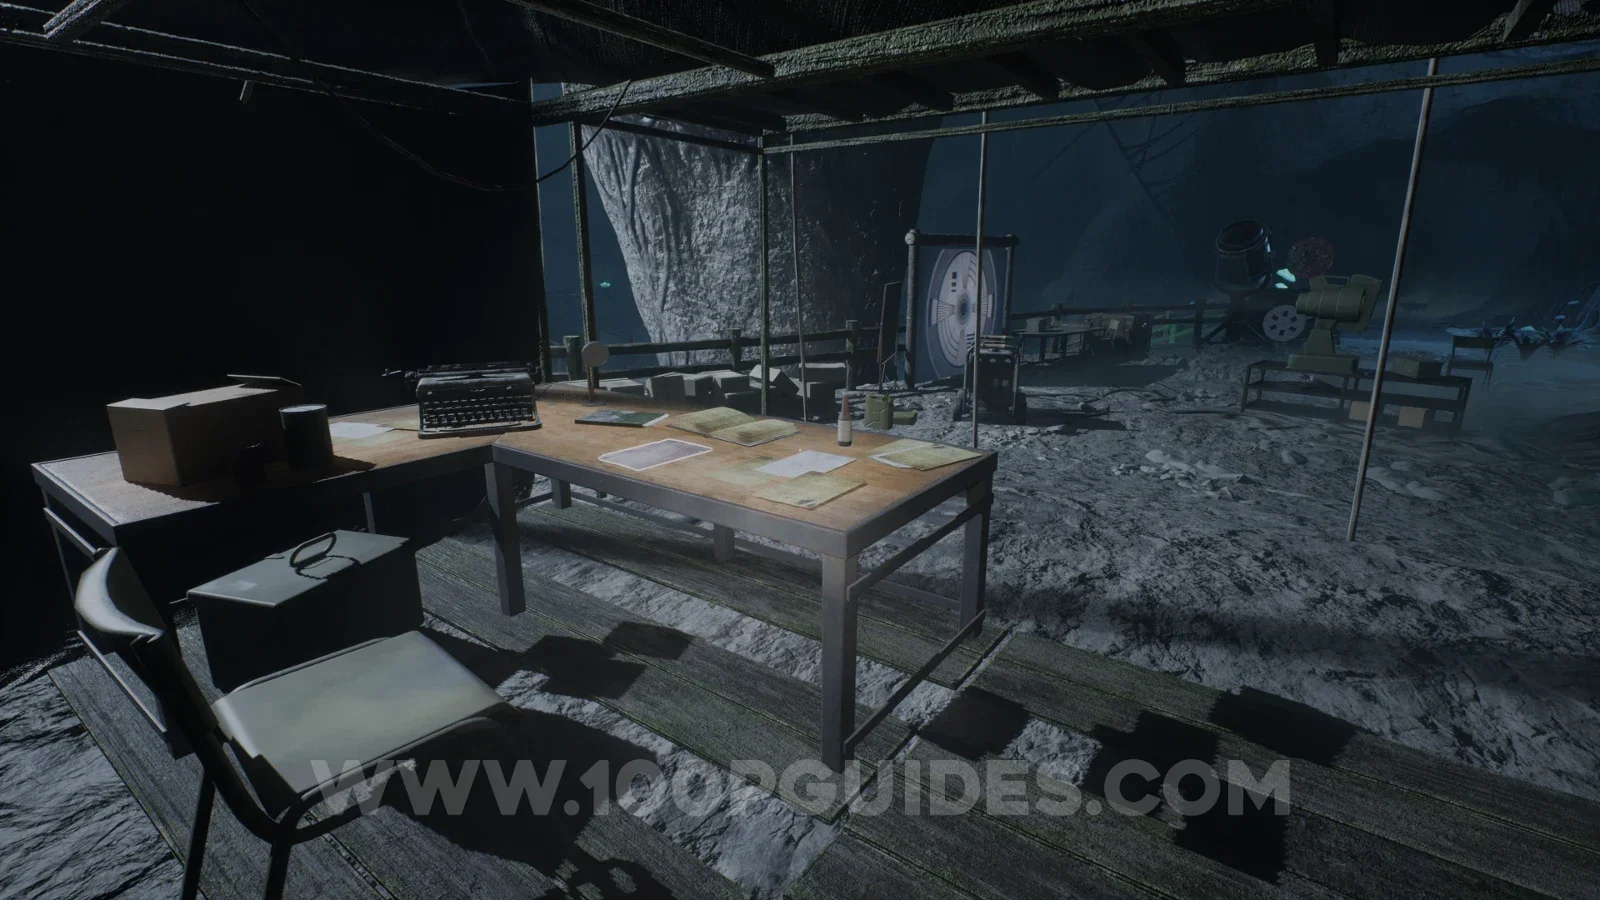
NoteMissing manImage reviewed |
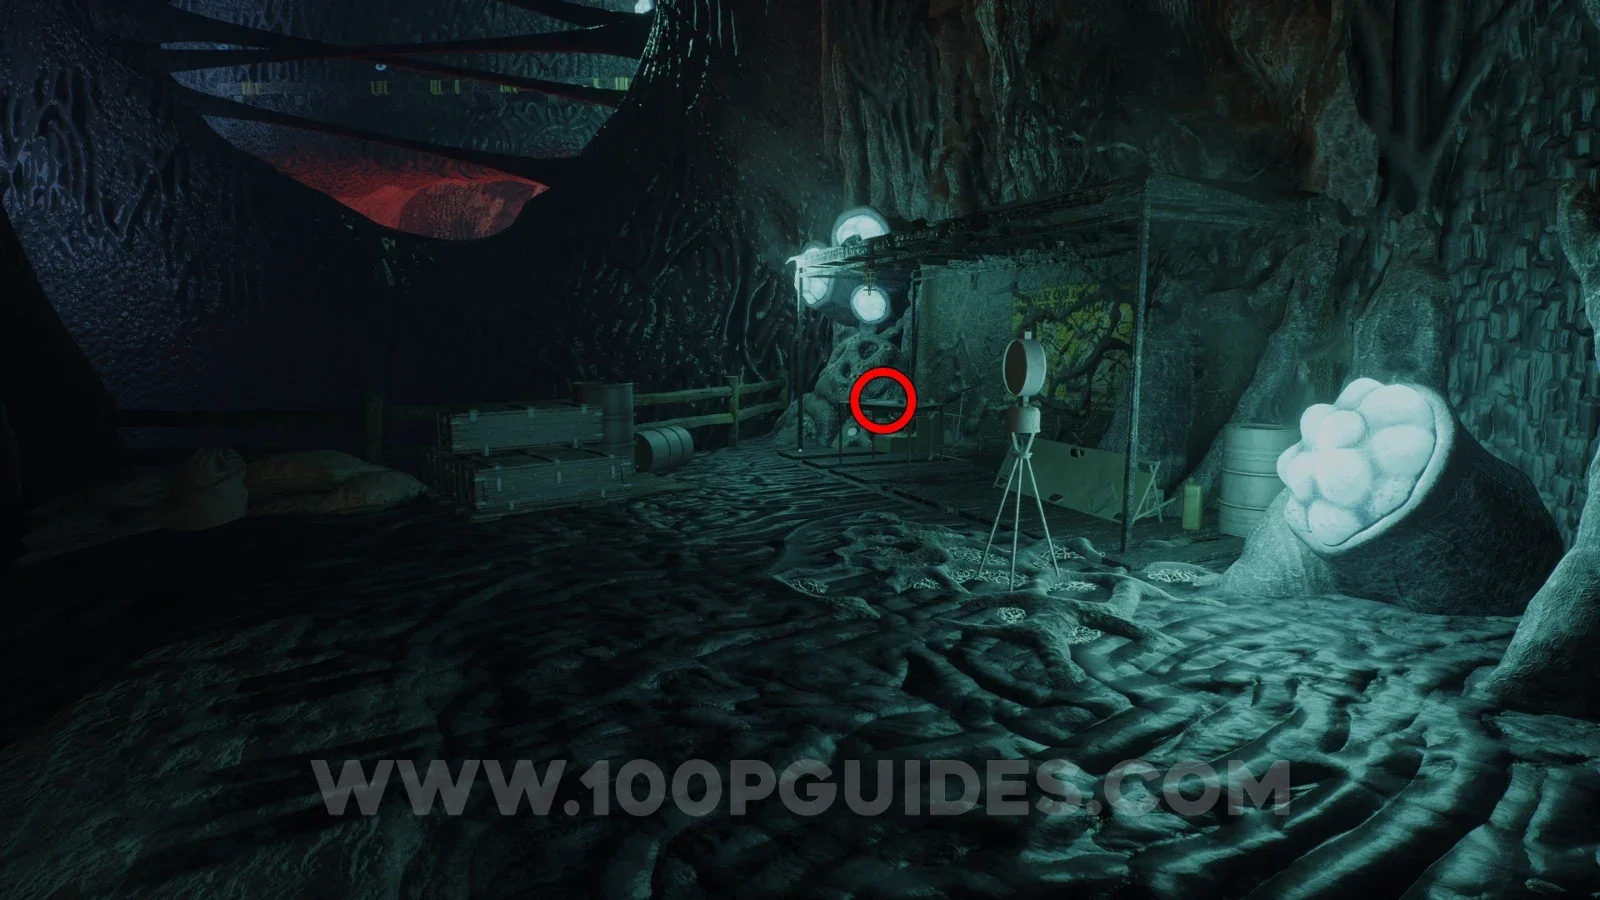
Tent left of the projector: inspect the writing table by the typewriter, facing the shooting target and projector equipment. Location image ↗ Open collection entry ↗ |
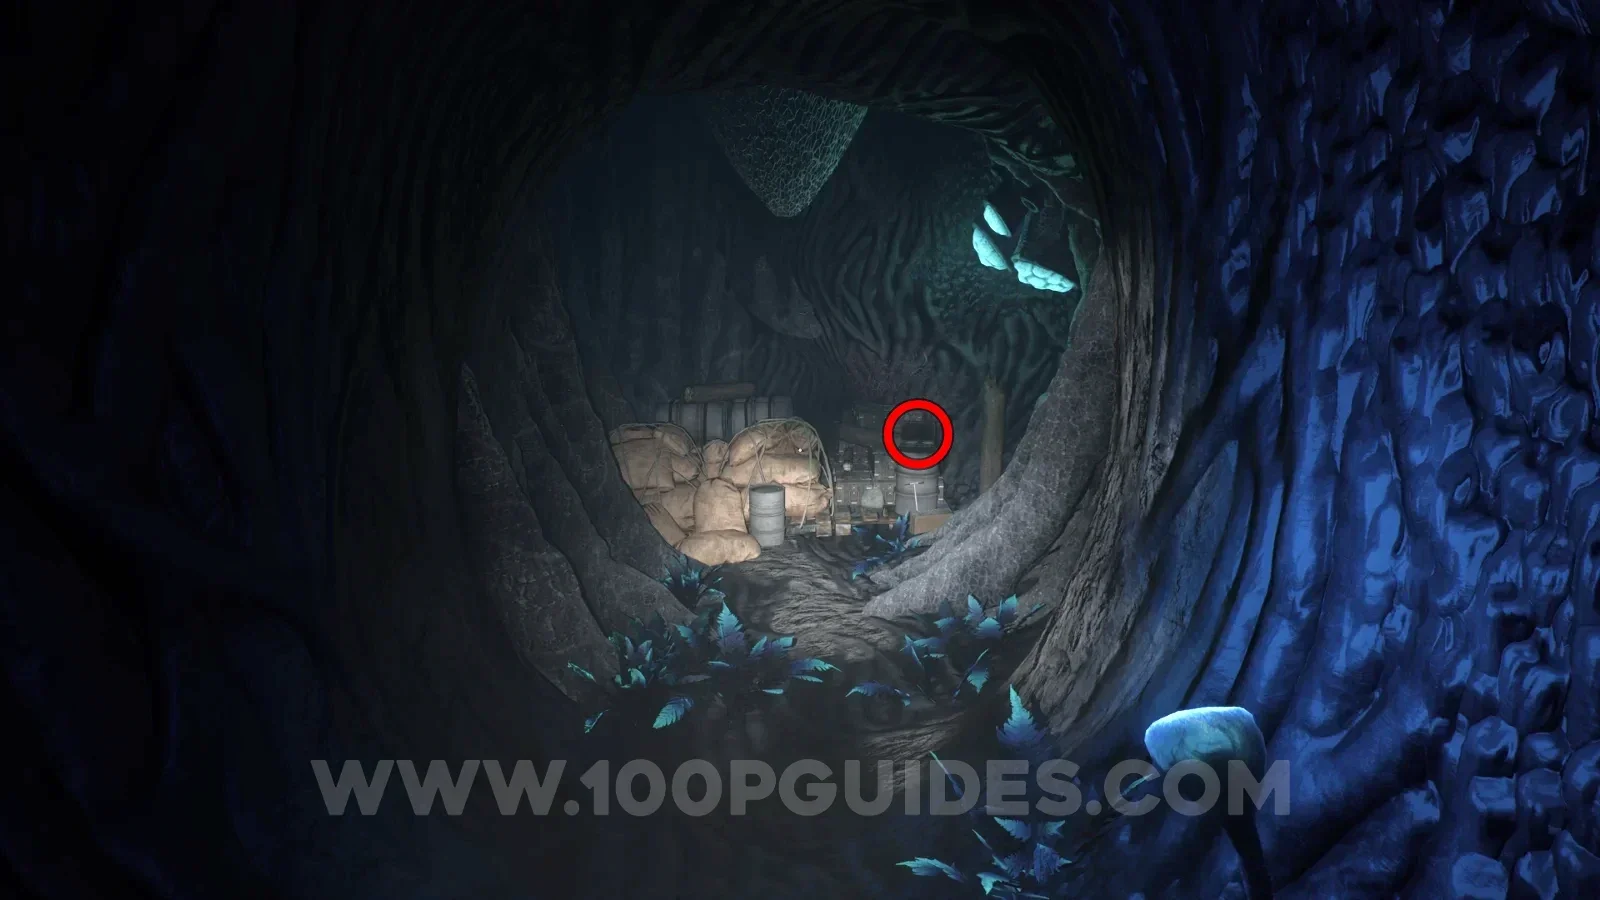
Audio tapeCommander Ridgewater: Expedition SetupImage reviewed |
Opening expedition camp: follow the yellow-lit passage to its end. Check the supply stack among sandbags and metal cases. Location image ↗ Open collection entry ↗ |
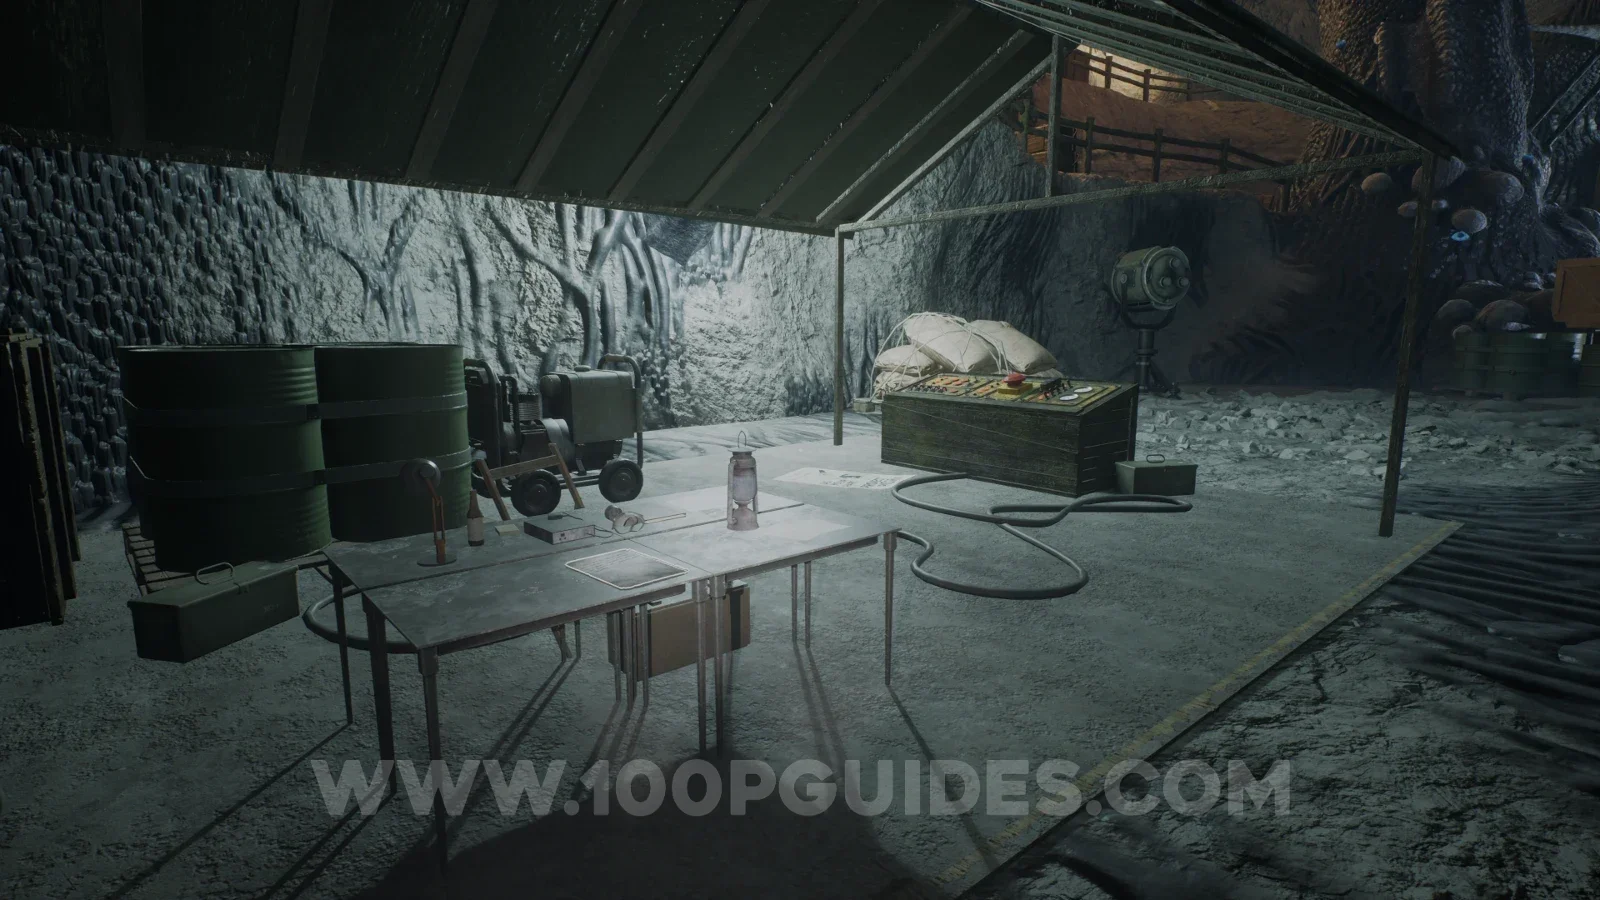
NoteBeen through itImage reviewed |
Counterweight control: check the folding table next to the machinery console, lantern and two large green barrels. Location image ↗ Open collection entry ↗ |
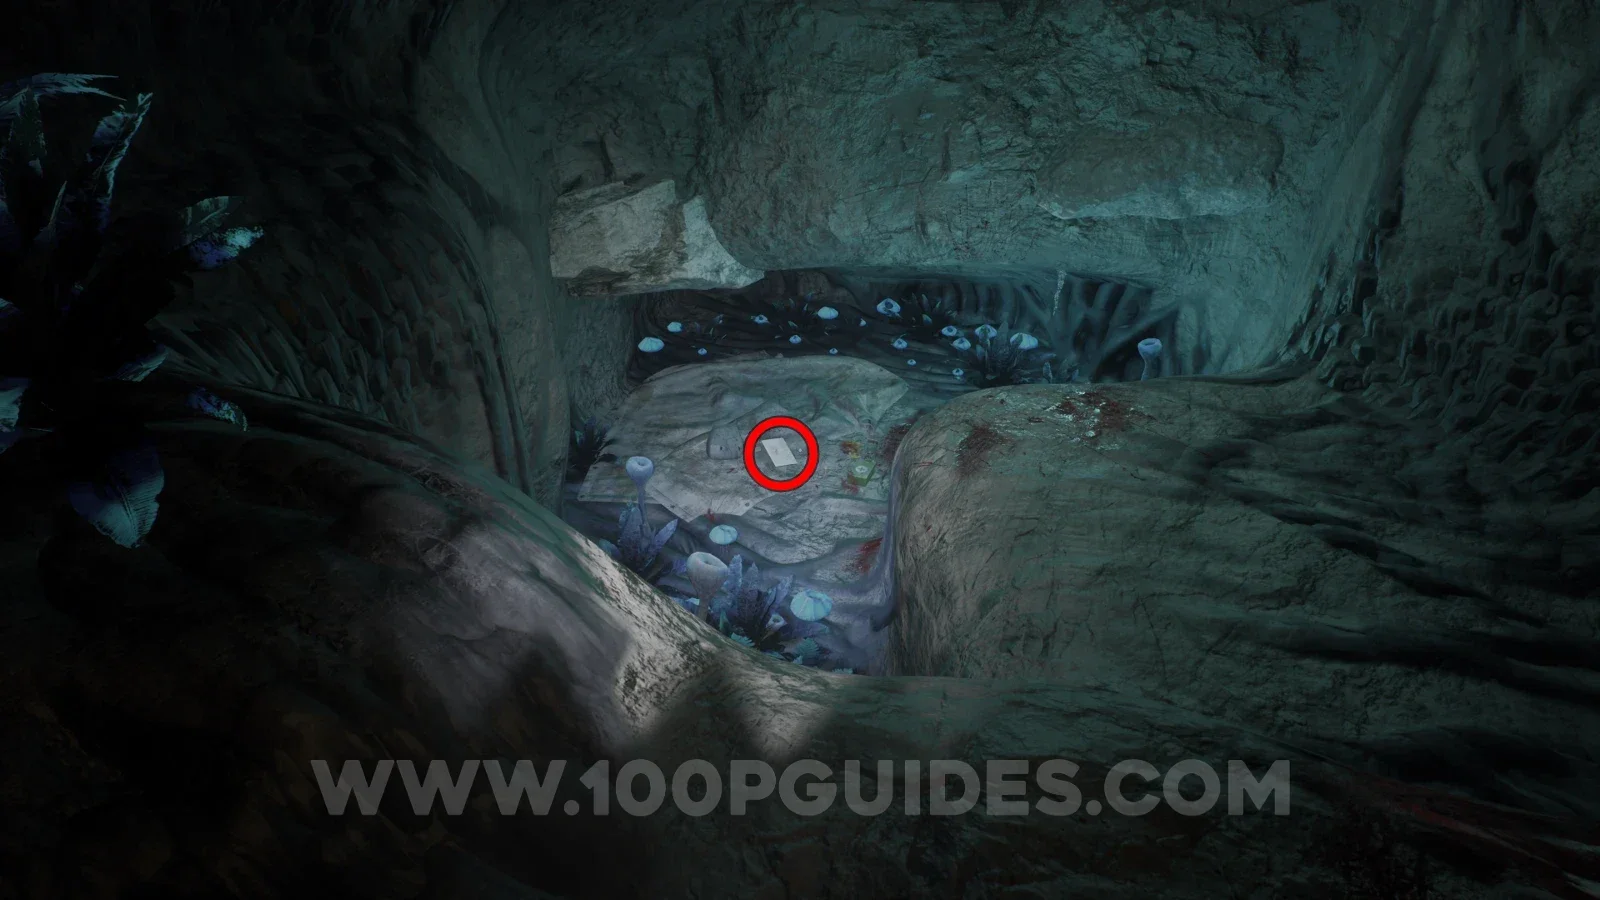
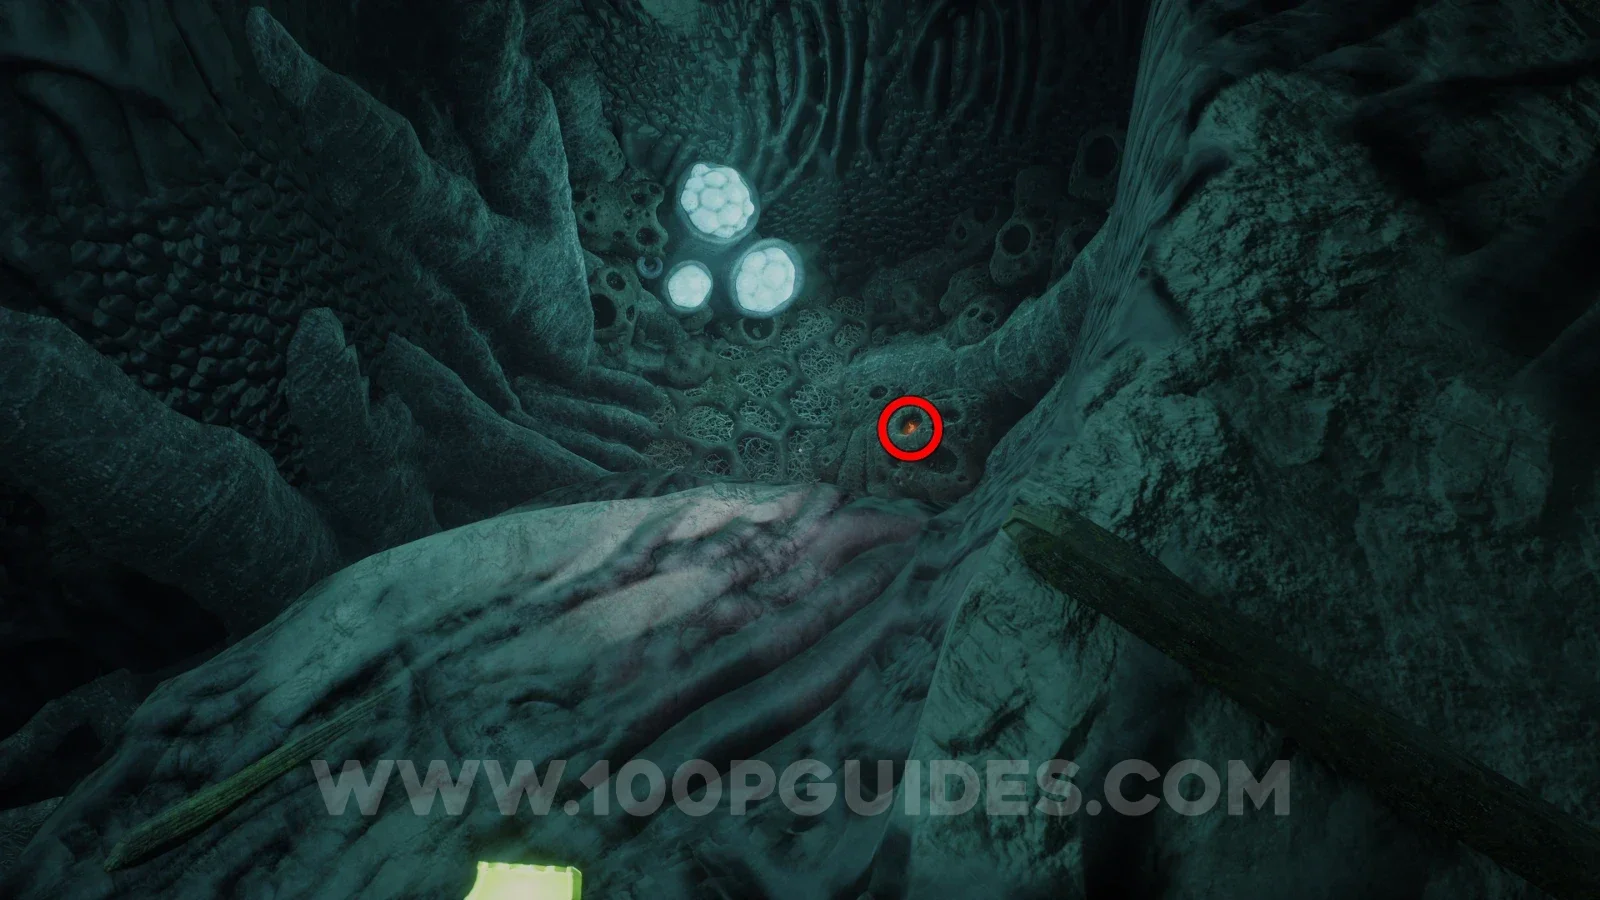
NoteHybrid survivorImage reviewed |
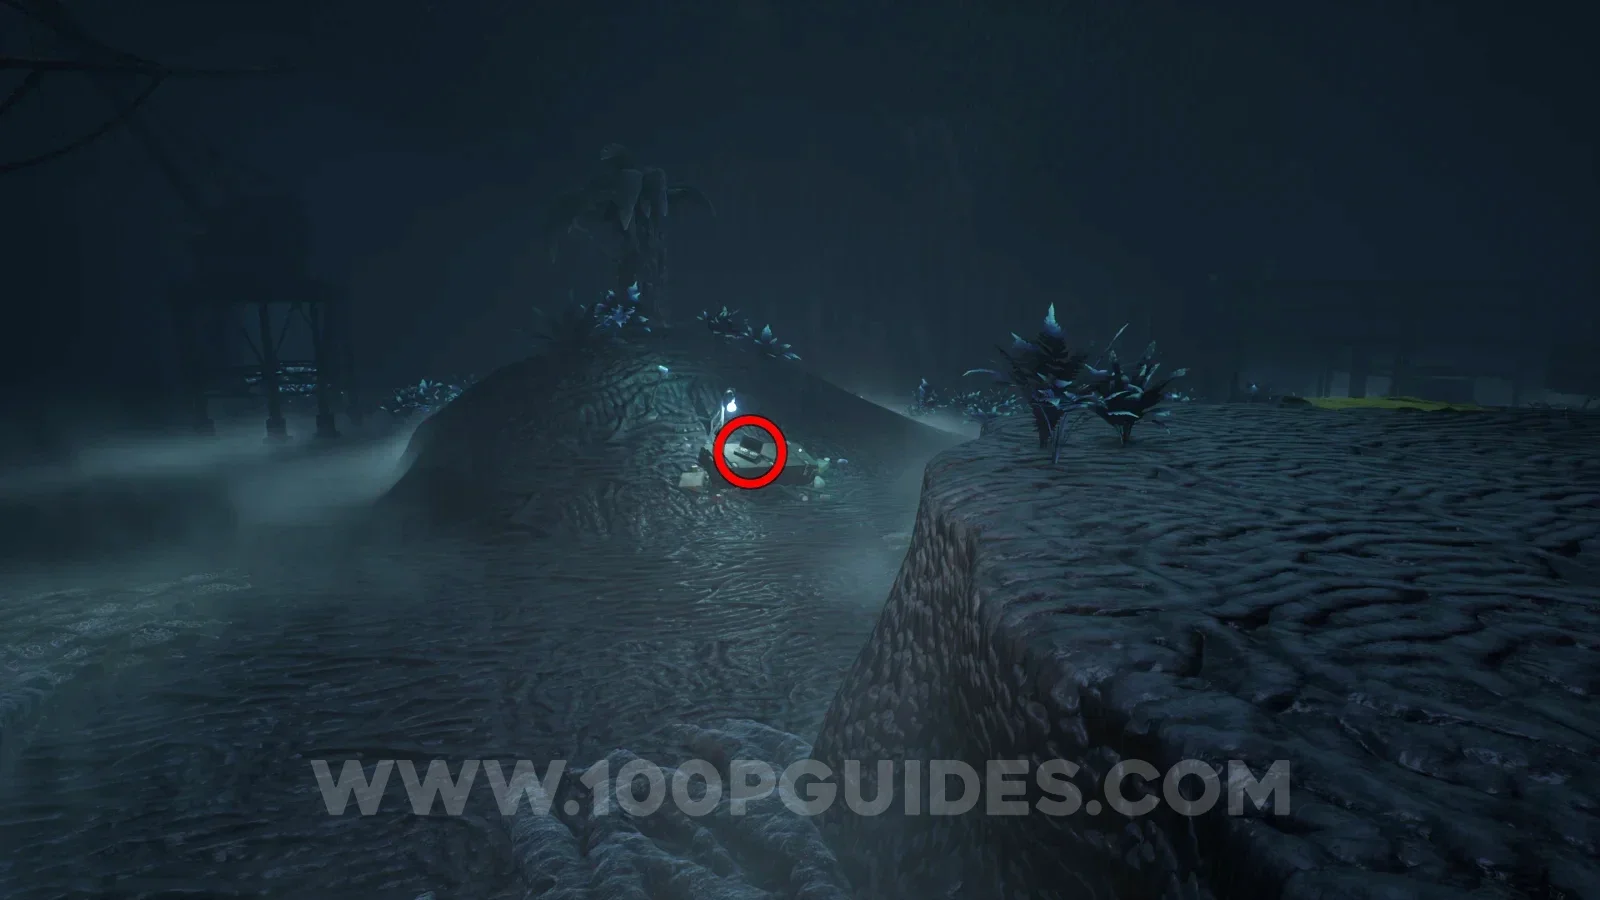
In the blue cavern near the small generator area, take the right-hand opening and look down from the ledge. A pale page lies on the rock below, beside colorful markings and blue growths. Location image ↗ Open collection entry ↗ |
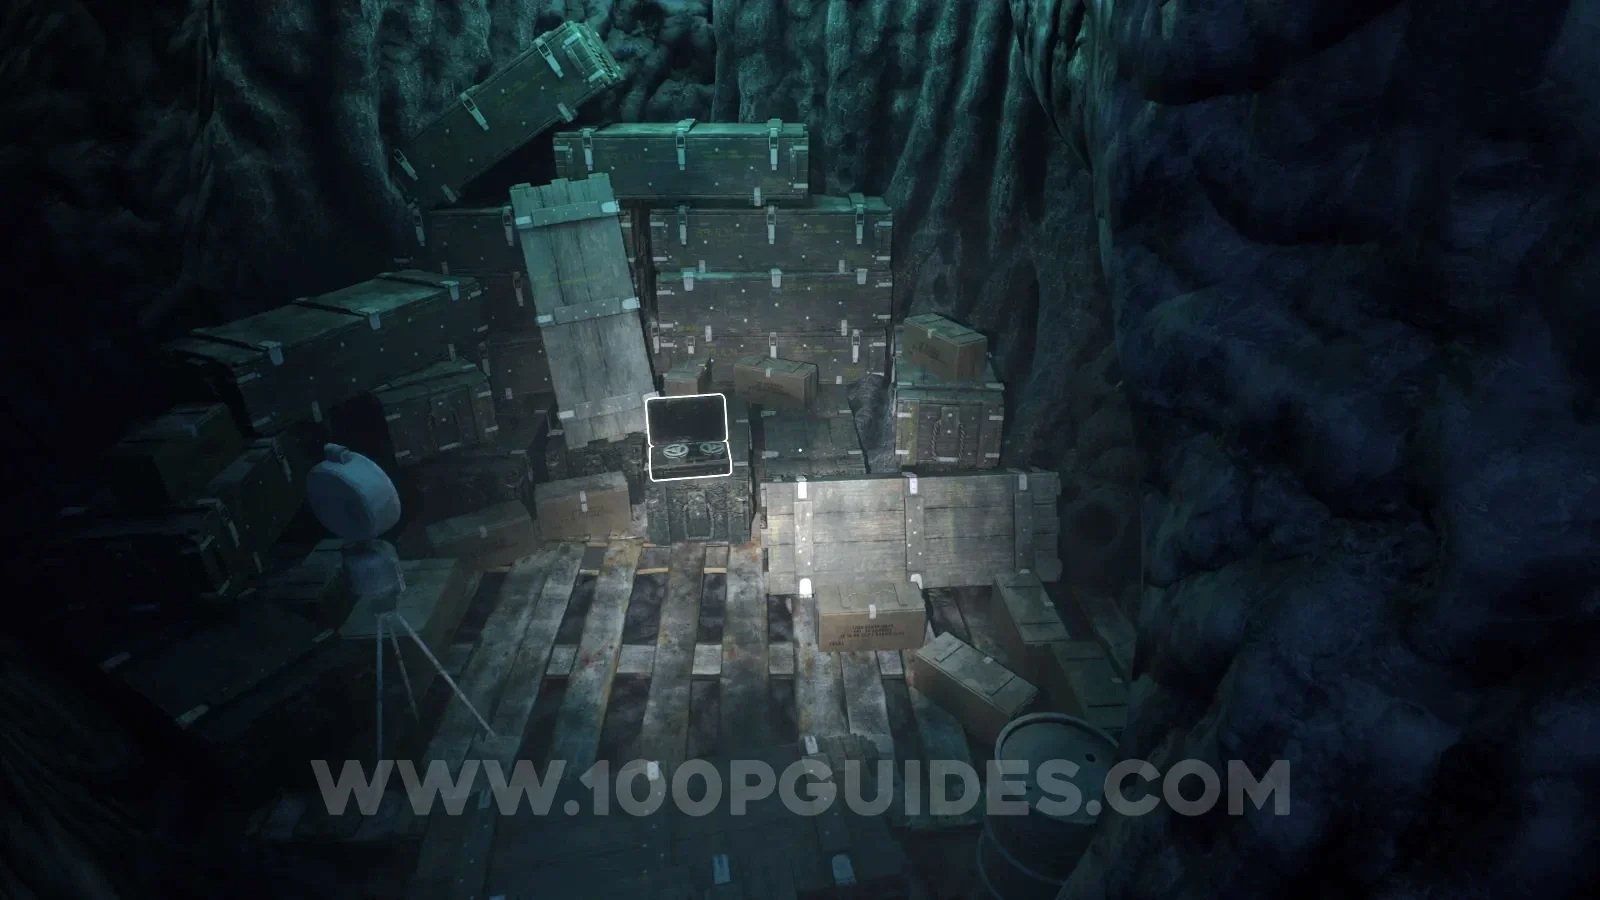
Audio tapeLt. Maxwell: After Action ReportImage reviewed |
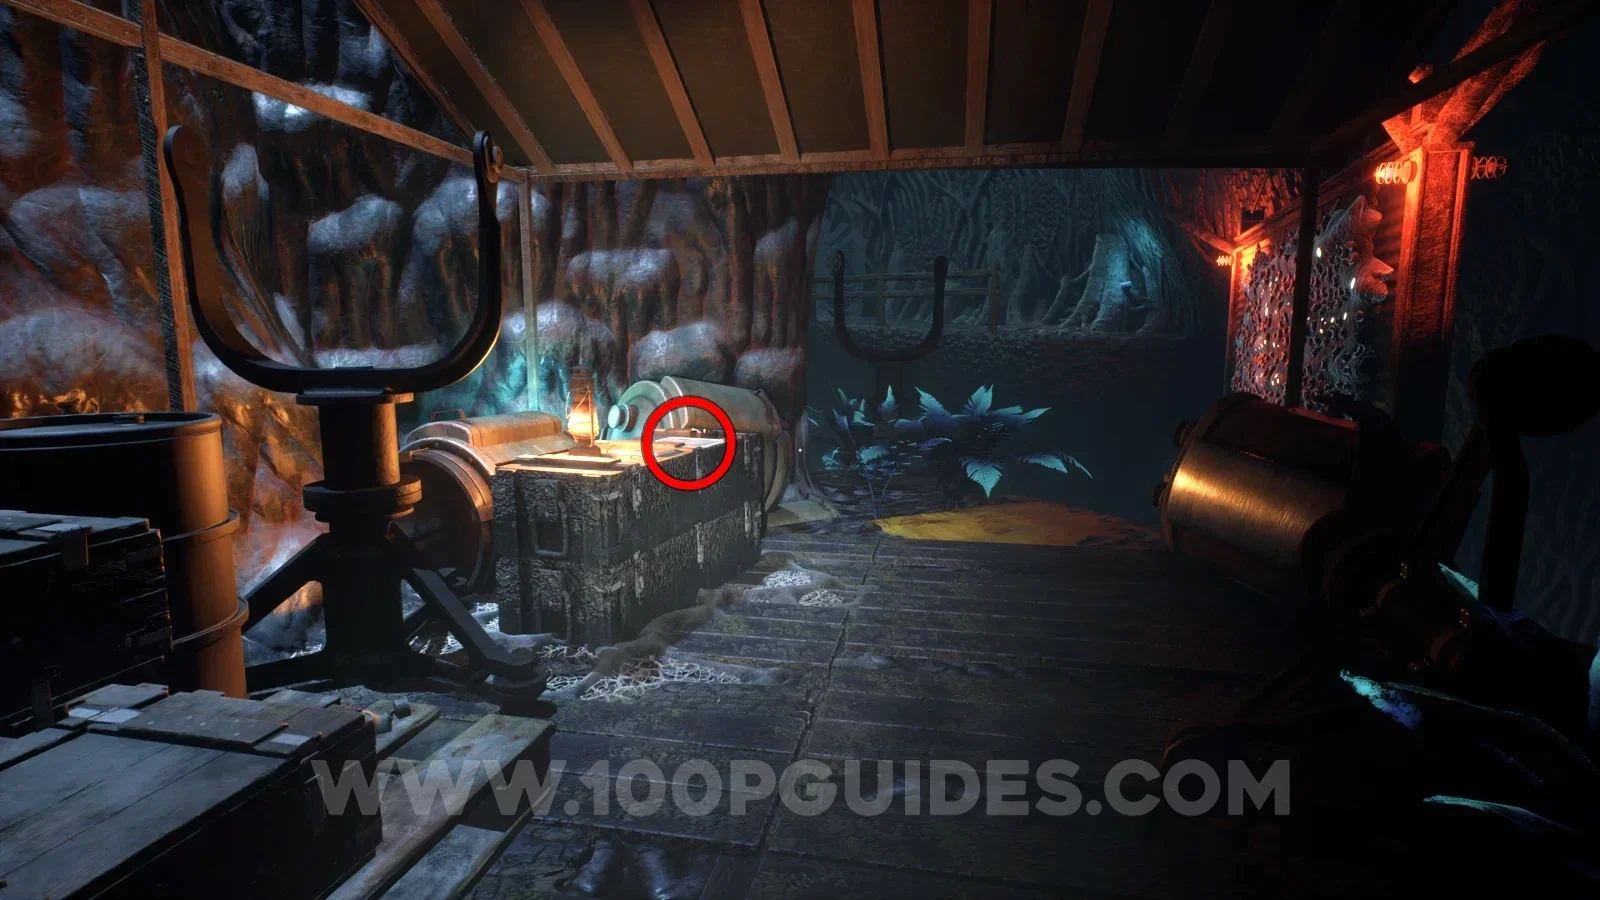
Generator-side detour near the Hybrid survivor note: climb to the supply platform. Look among stacked military cases above the wooden floor. Location image ↗ Open collection entry ↗ |
Chapter 4: Tooth encounter and expedition camp
Story objective: Return the tooth, follow the chase and restore the special-spectrum lights. Open the steps.
Checkpoint: DJ directs you toward the Crew Lift safety key. Collectible detours below may span the approach and return route.
| Stop | Location and reference |
|---|---|
NoteTommy GunsImage reviewed |
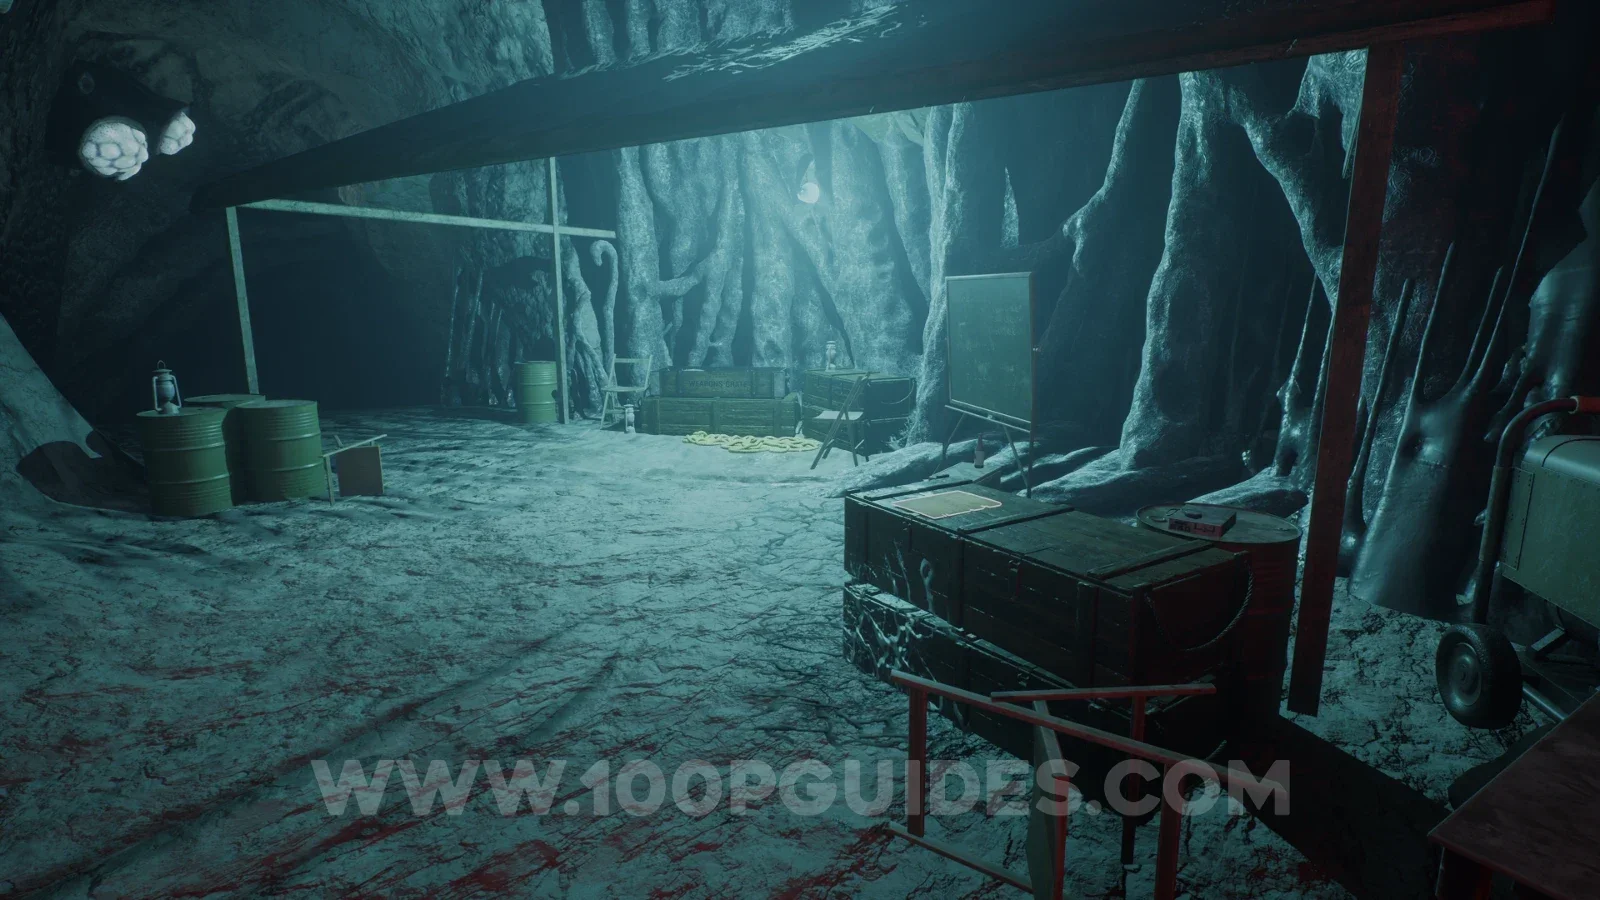
Small weapon camp: examine the military chest beside the makeshift awning and red support post, near the blood trail. Location image ↗ Open collection entry ↗ |
NoteShooting at ghostsImage reviewed |
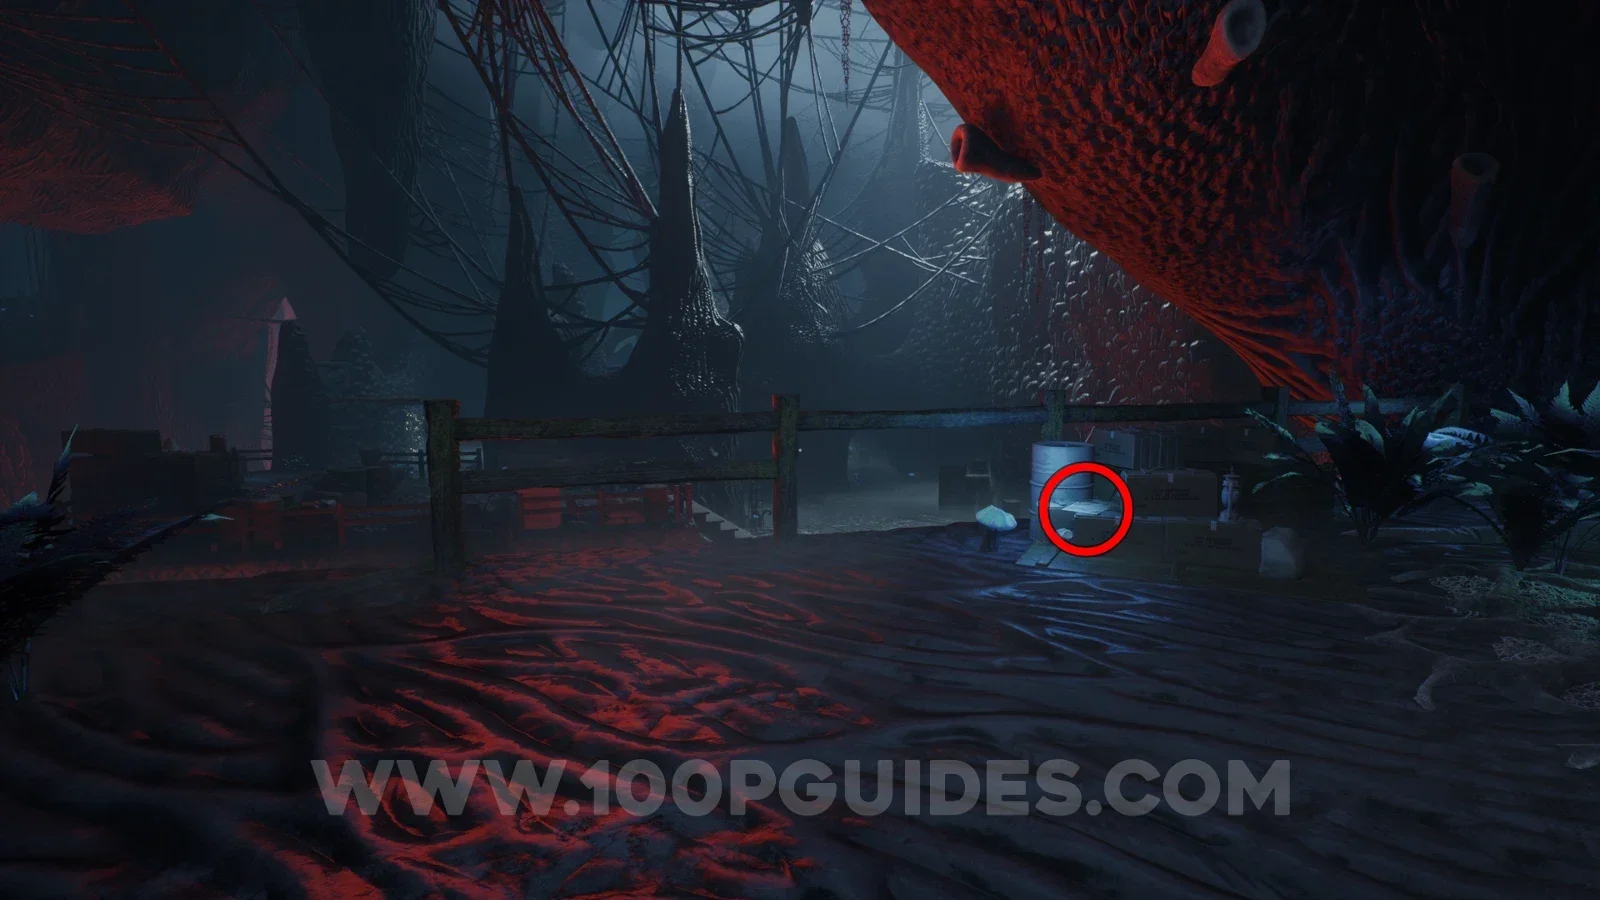
After the slide, inspect the supplies on the right-hand side of the walkway. The paper sits on the small green box beside the blue barrel and stacked cartons, below the red-lit cavern growth. Location image ↗ Open collection entry ↗ |
NoteSustained volume of FireImage reviewed |
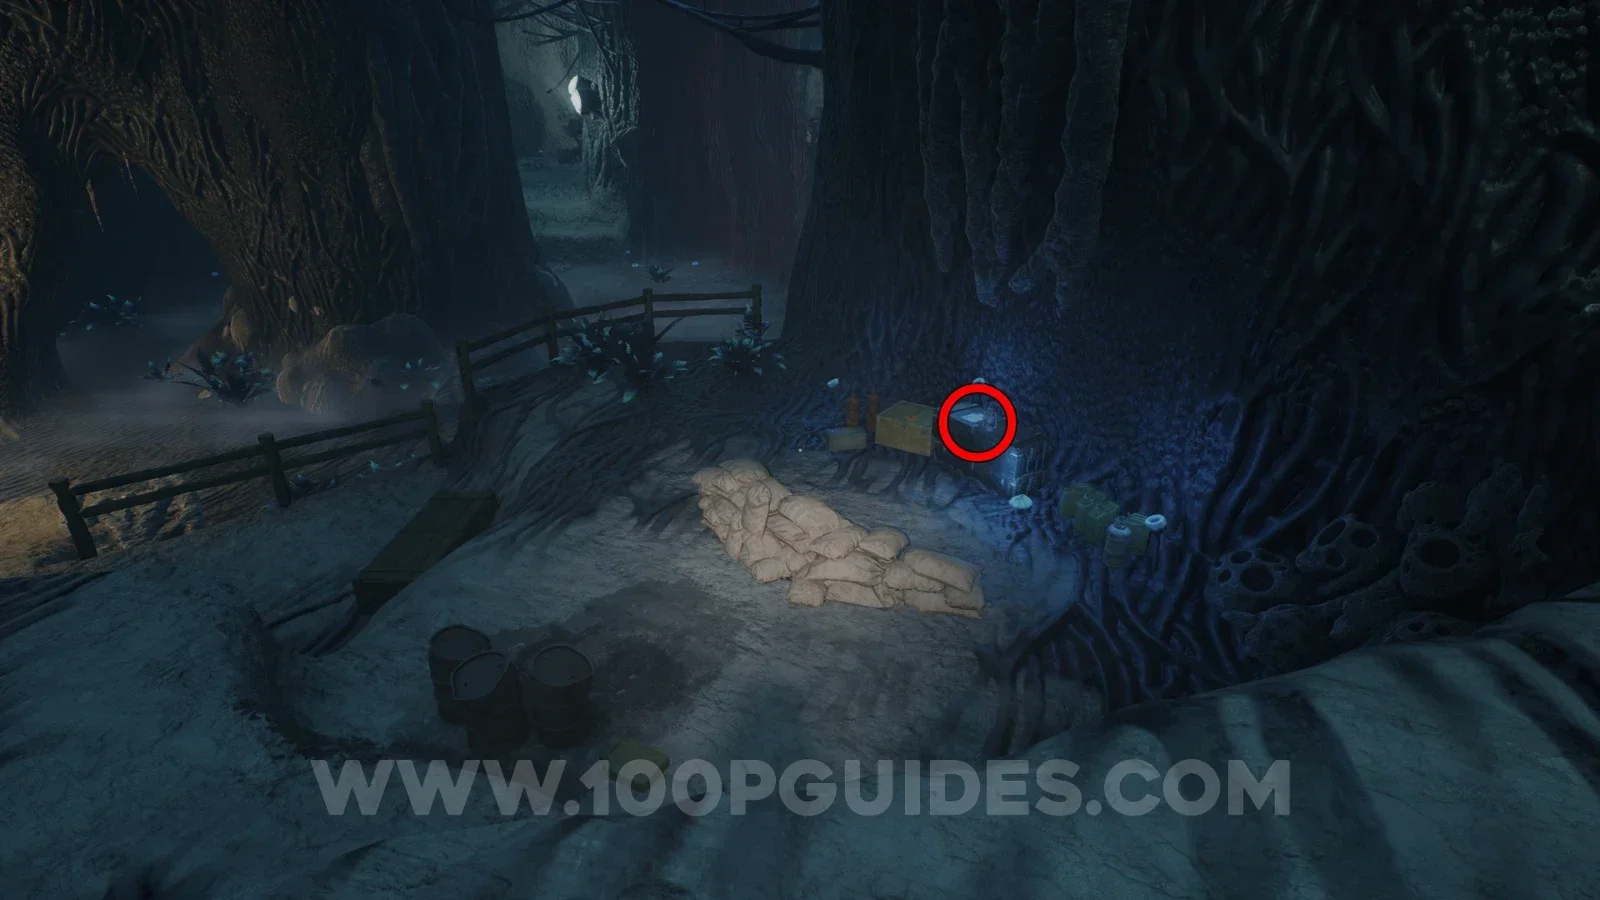
Beyond the first conversation with DJ and the right-hand swing route, look down to the right-hand supply ledge. The paper rests on the blue case beside the yellow crate and jerry cans. Location image ↗ Open collection entry ↗ |
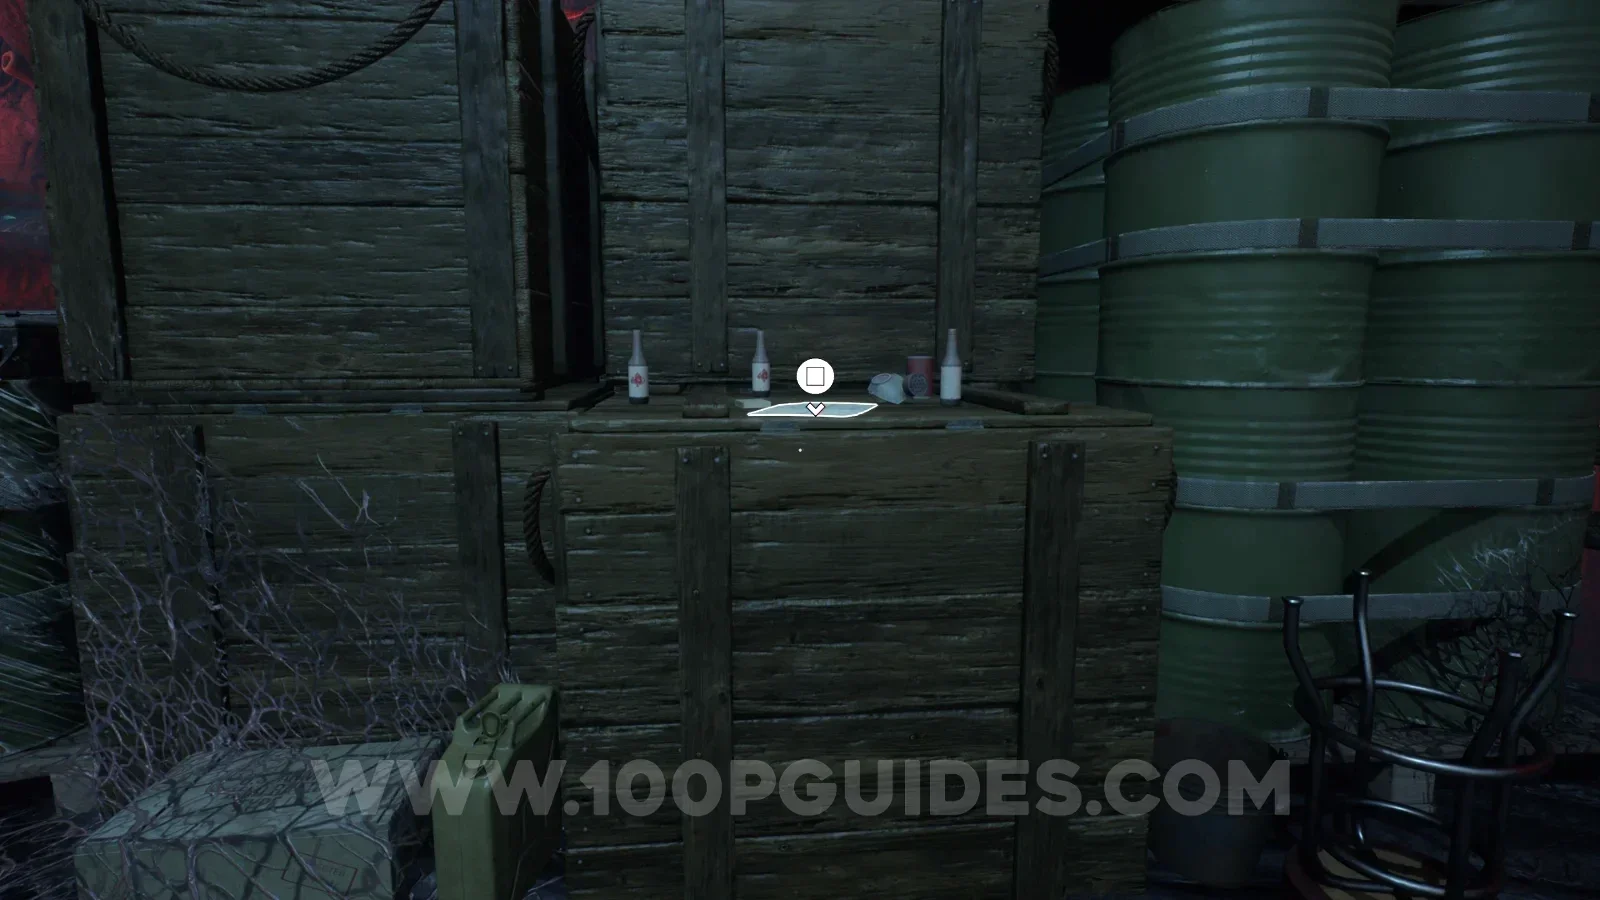
NoteHunting CommiesImage reviewed |
In the weapon-encounter area, search the raised recorder area. Inspect the highlighted sheet on the stacked dark wooden crates, beside bottles and strapped green barrels. Location image ↗ Open collection entry ↗ |
NoteSoldier's letter homeCommunity report |
Reported route: Camp after the chase: inspect the right-hand tent. Final pickup not confirmed here. Reference image ↗ Report this location ↗ Open collection entry ↗ |
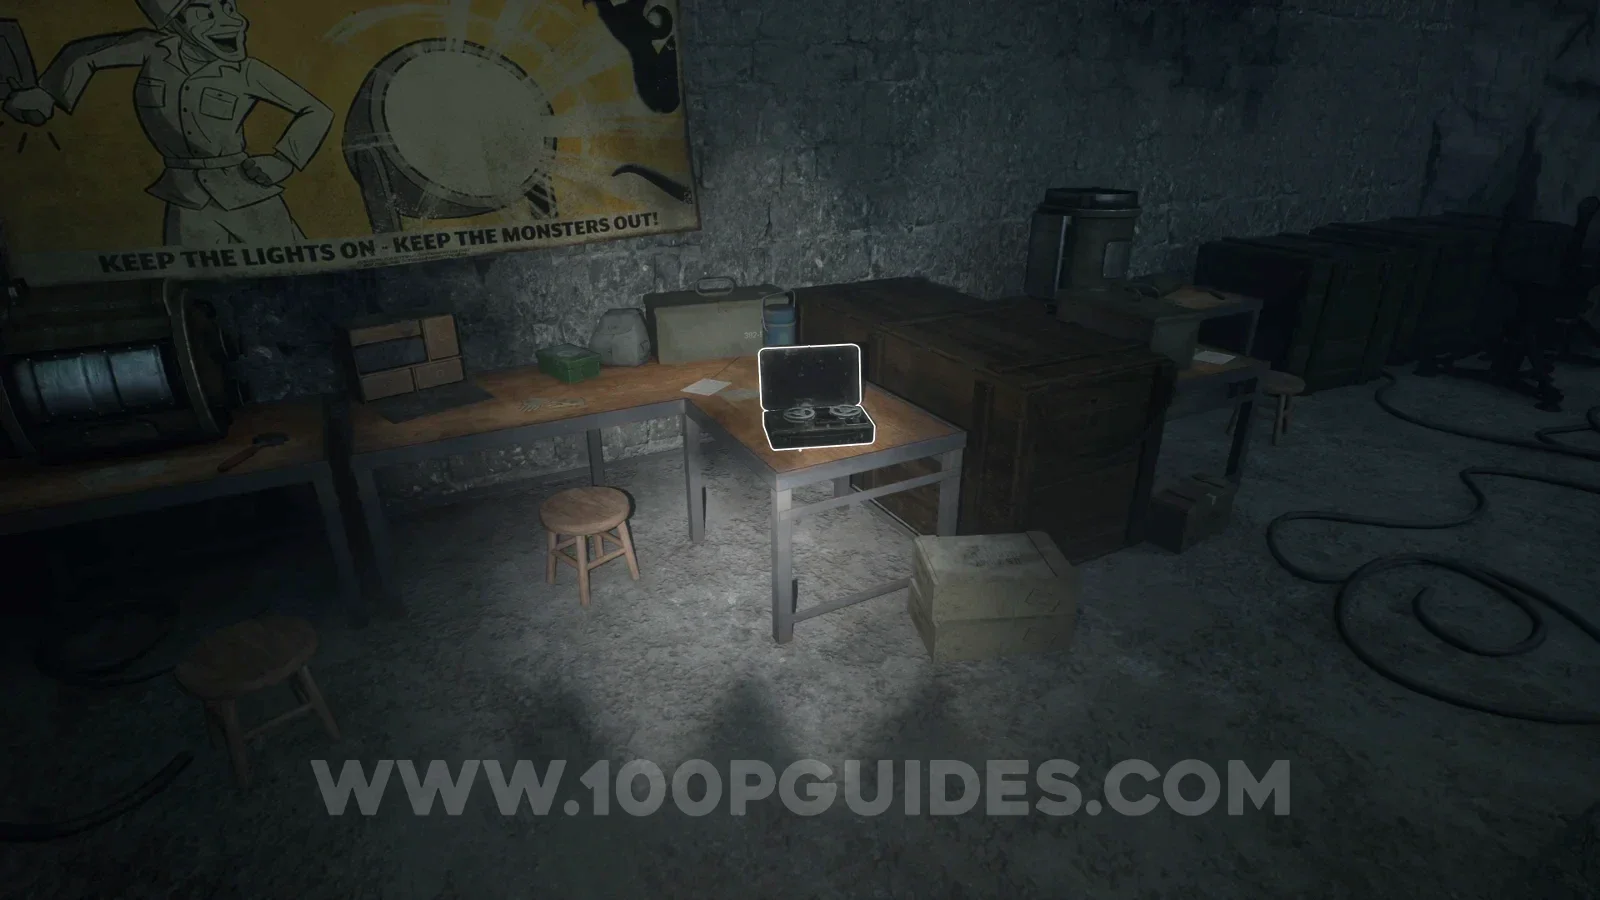
Audio tapeCommander Ridgewater: The Special Light SpectrumImage reviewed |
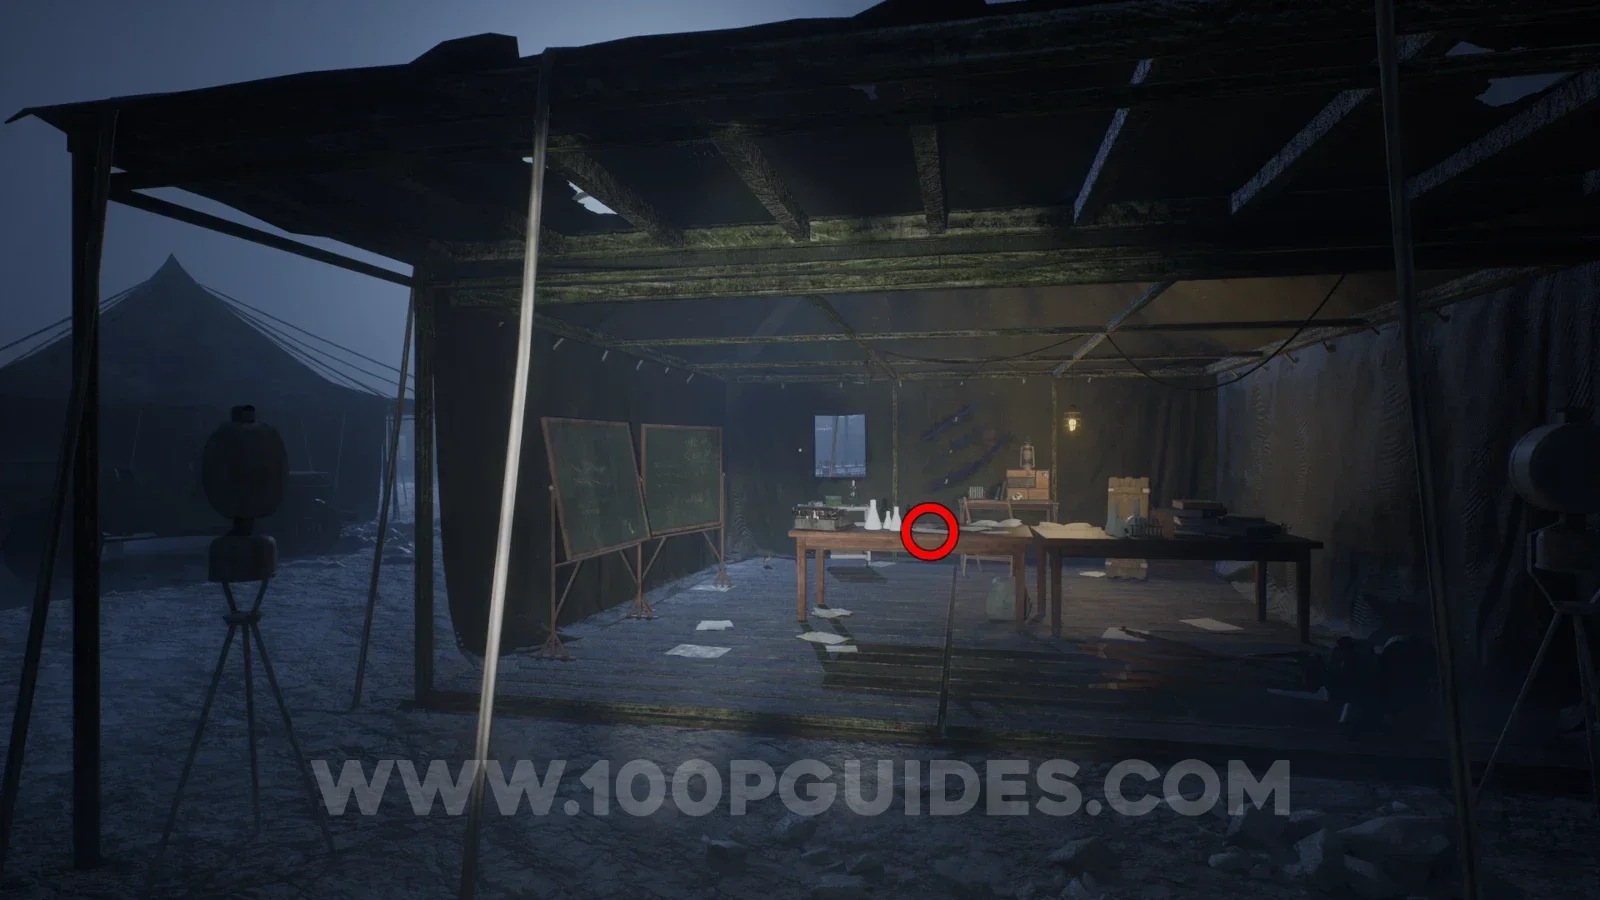
Camp after the chase: search the worktables beneath the Keep the Lights On poster, beside the large wooden crate. Location image ↗ Open collection entry ↗ |
AmberAmber 14 |
Hole left after two yellow swing poles. View 14 ↗ Open collection entry ↗ |
NoteMissing fossilsCommunity report |
Reported route: After the later bounce: check the right-hand tent table. Final pickup not confirmed here. Reference image ↗ Report this location ↗ Open collection entry ↗ |
NoteDinosaurs!?!?Image reviewed |
Immediately beyond the tight crawl passage, check the round stool behind the sandbags. The highlighted handwritten page is beside a blue-leafed plant and a lantern-topped crate. Location image ↗ View pickup screenshot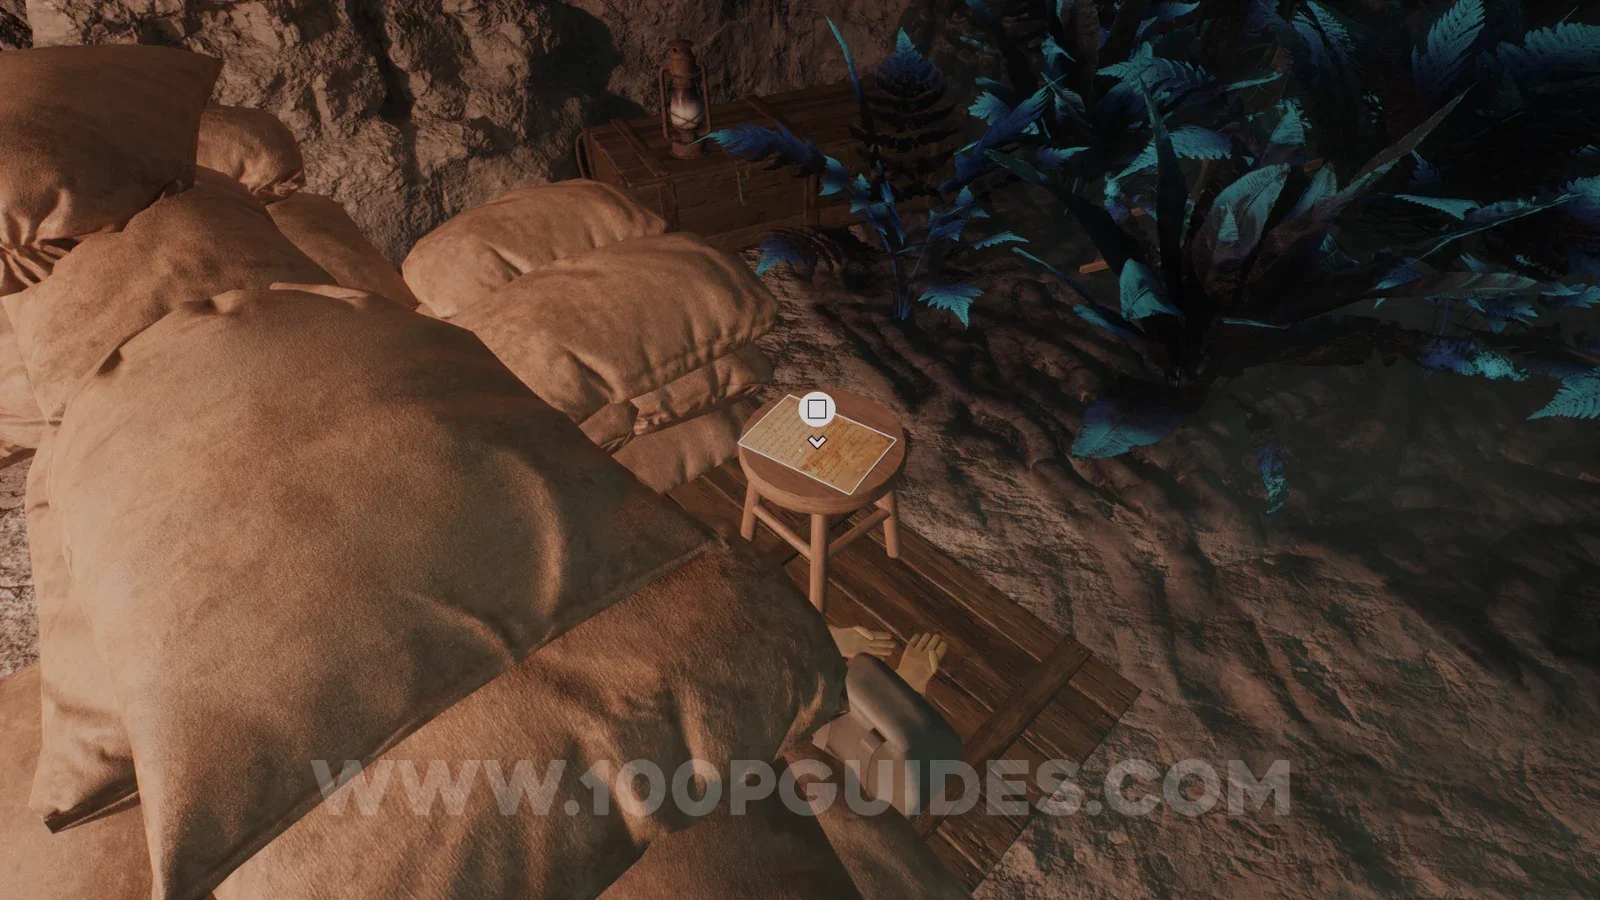 |
NotePatriotismCommunity report |
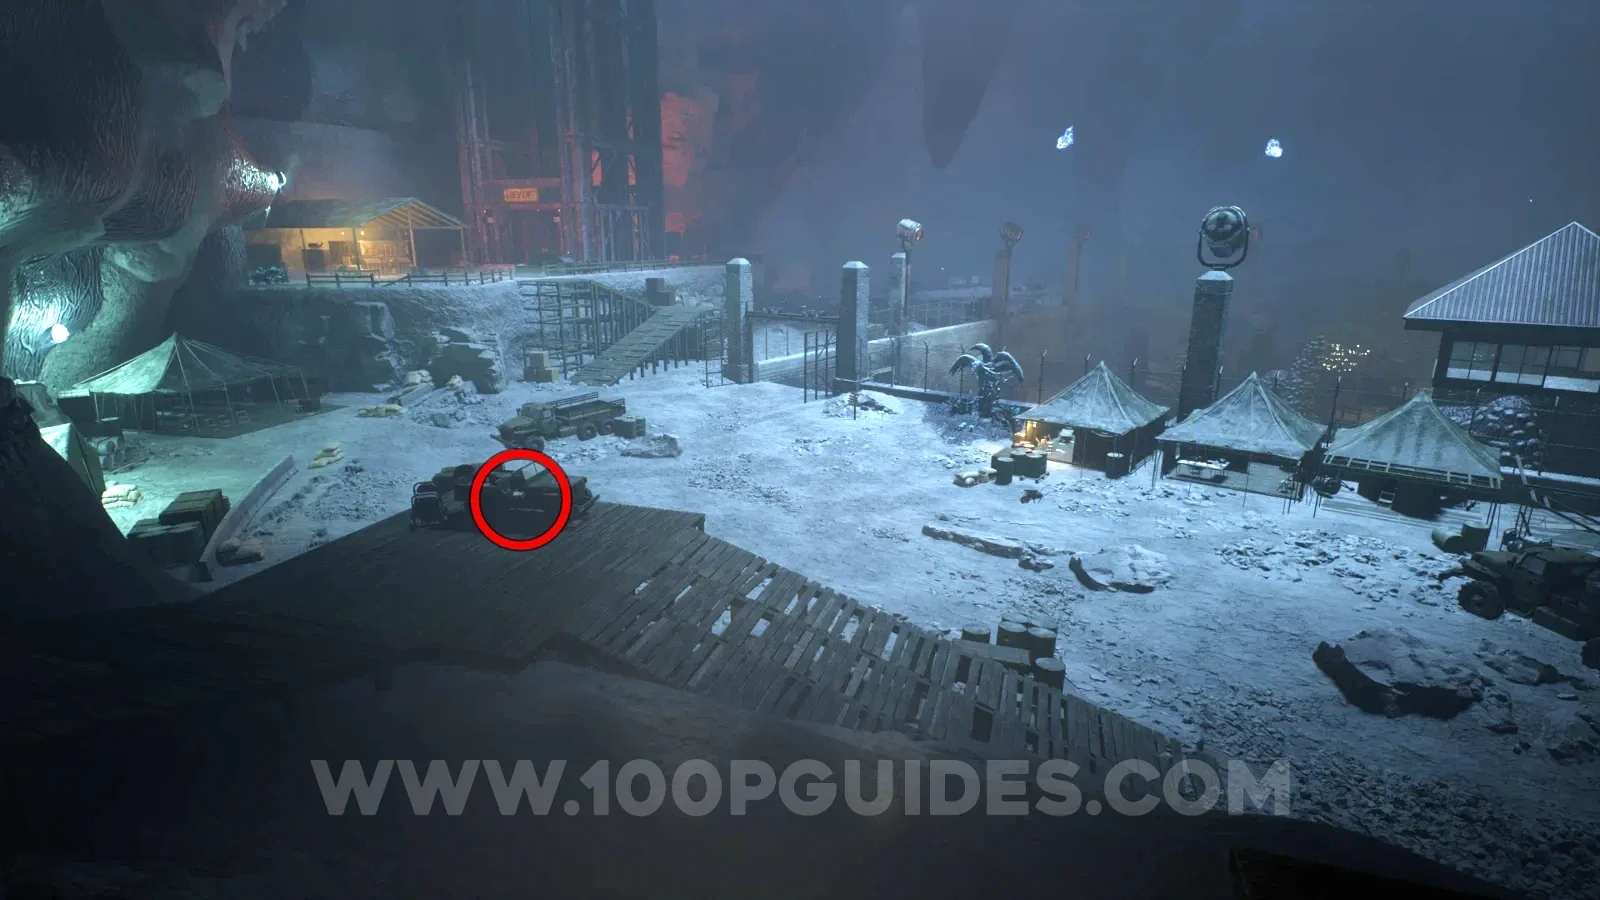
Reported route: Main tent camp: inspect the vehicle on the wooden ramp. Final pickup not confirmed here. Reference image ↗ Report this location ↗ Open collection entry ↗ |
NoteSitewide MemoCommunity report |
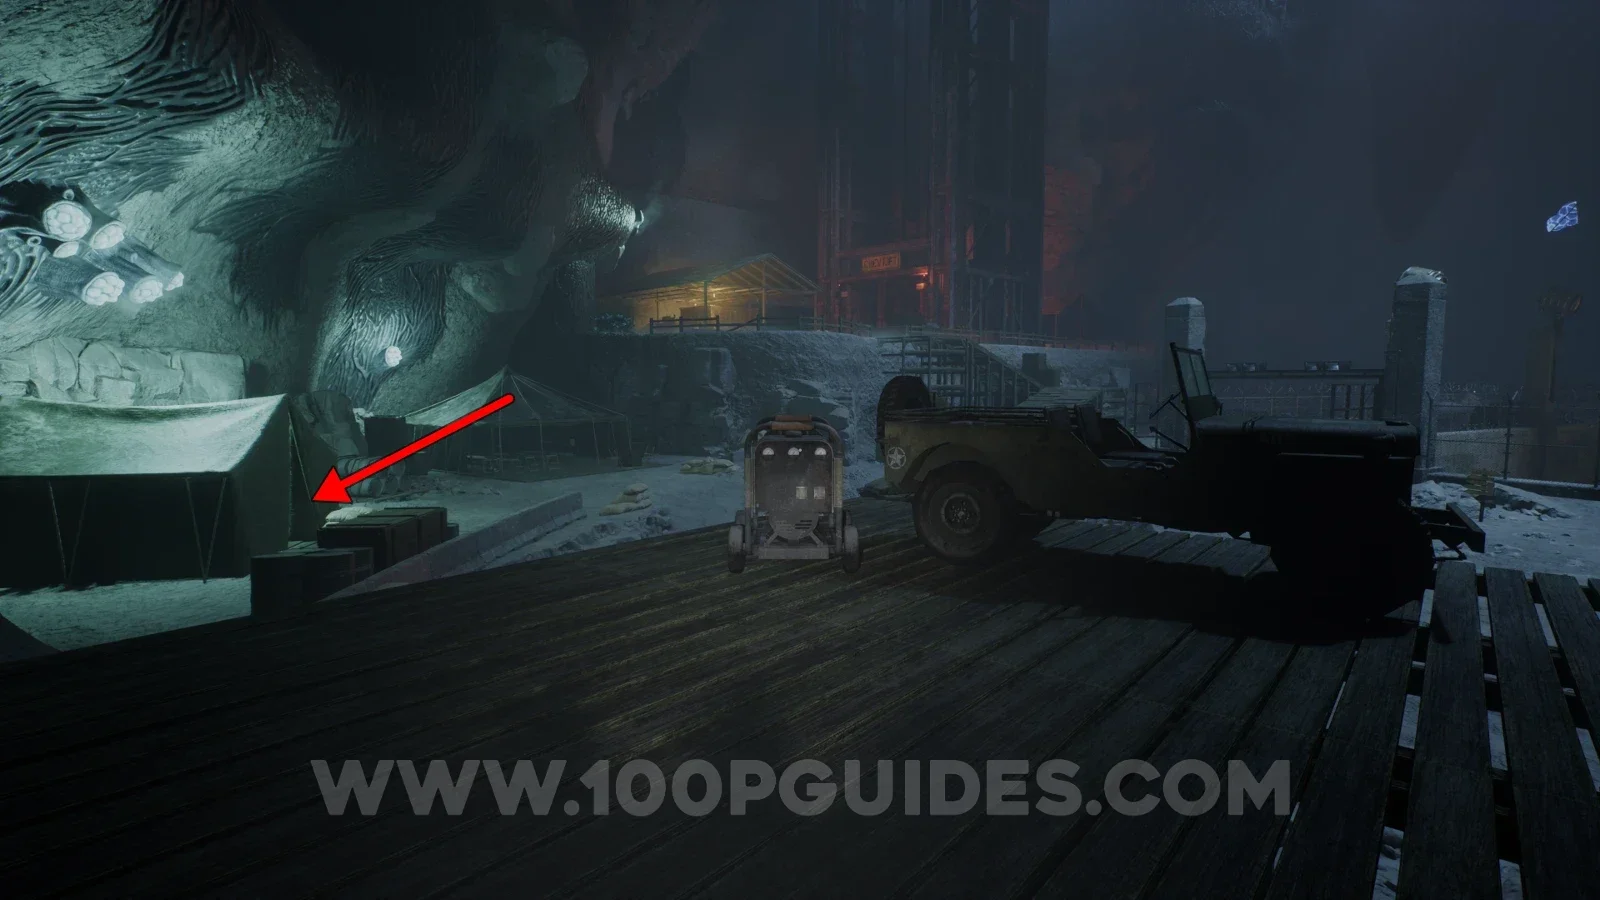
Reported route: Main camp: tent left of the ramp-mounted vehicle. Final pickup not confirmed here. Reference image ↗ Report this location ↗ Open collection entry ↗ |
NoteDon't eat itImage reviewed |
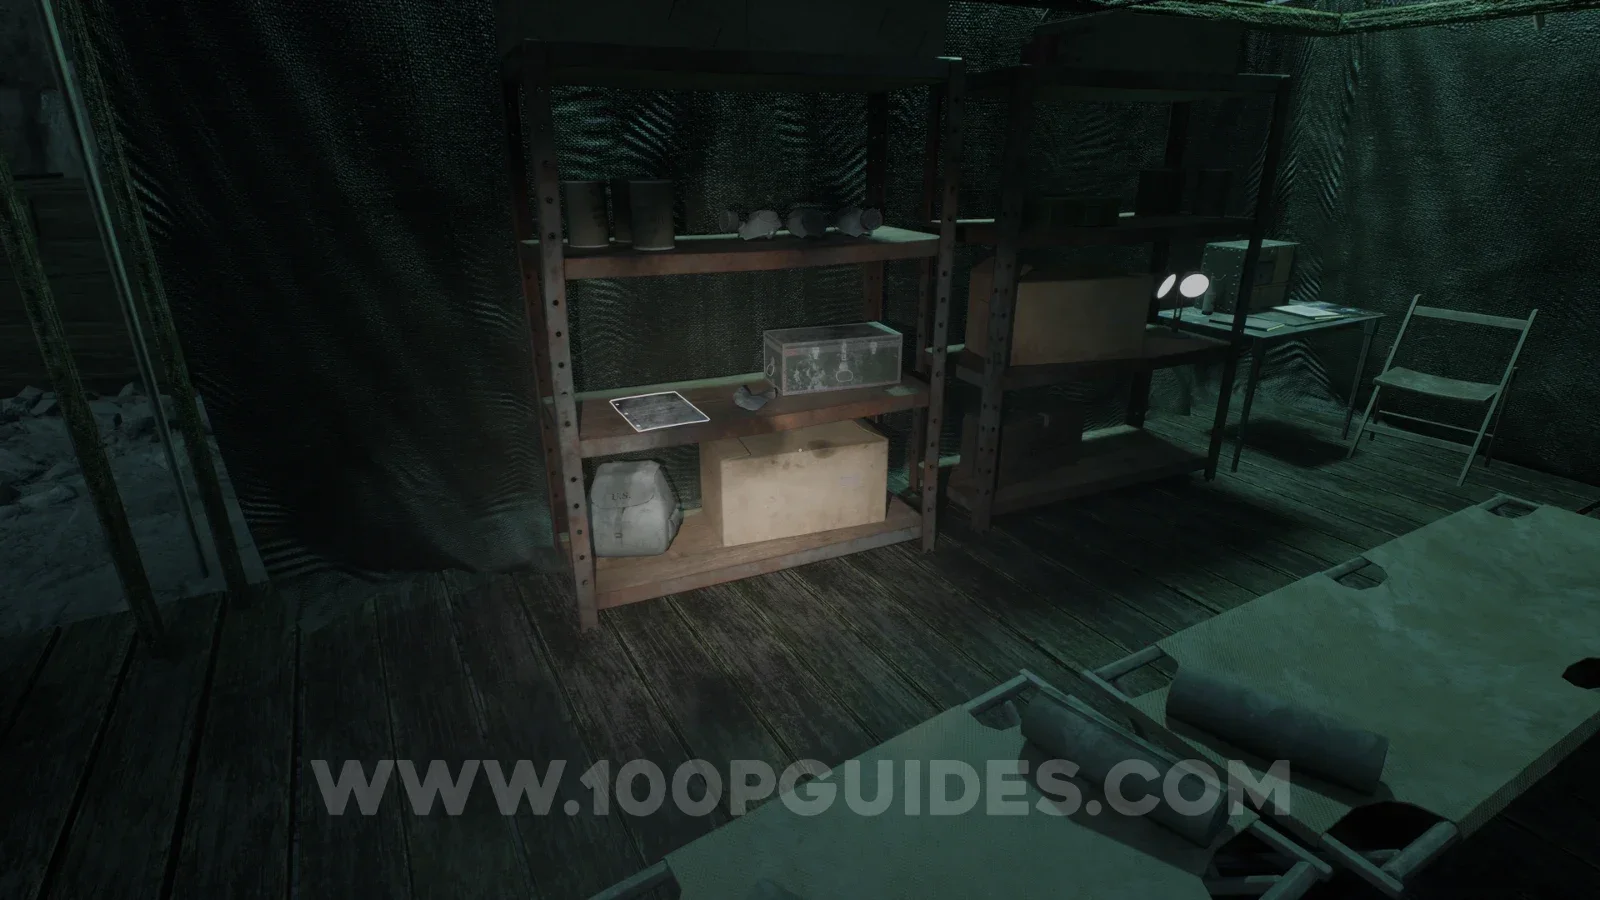
In the next camp tent after the Sitewide Memo tent, inspect the middle shelf of the metal rack beside the cot. The highlighted page is immediately left of the gray equipment case. Location image ↗ Open collection entry ↗ |
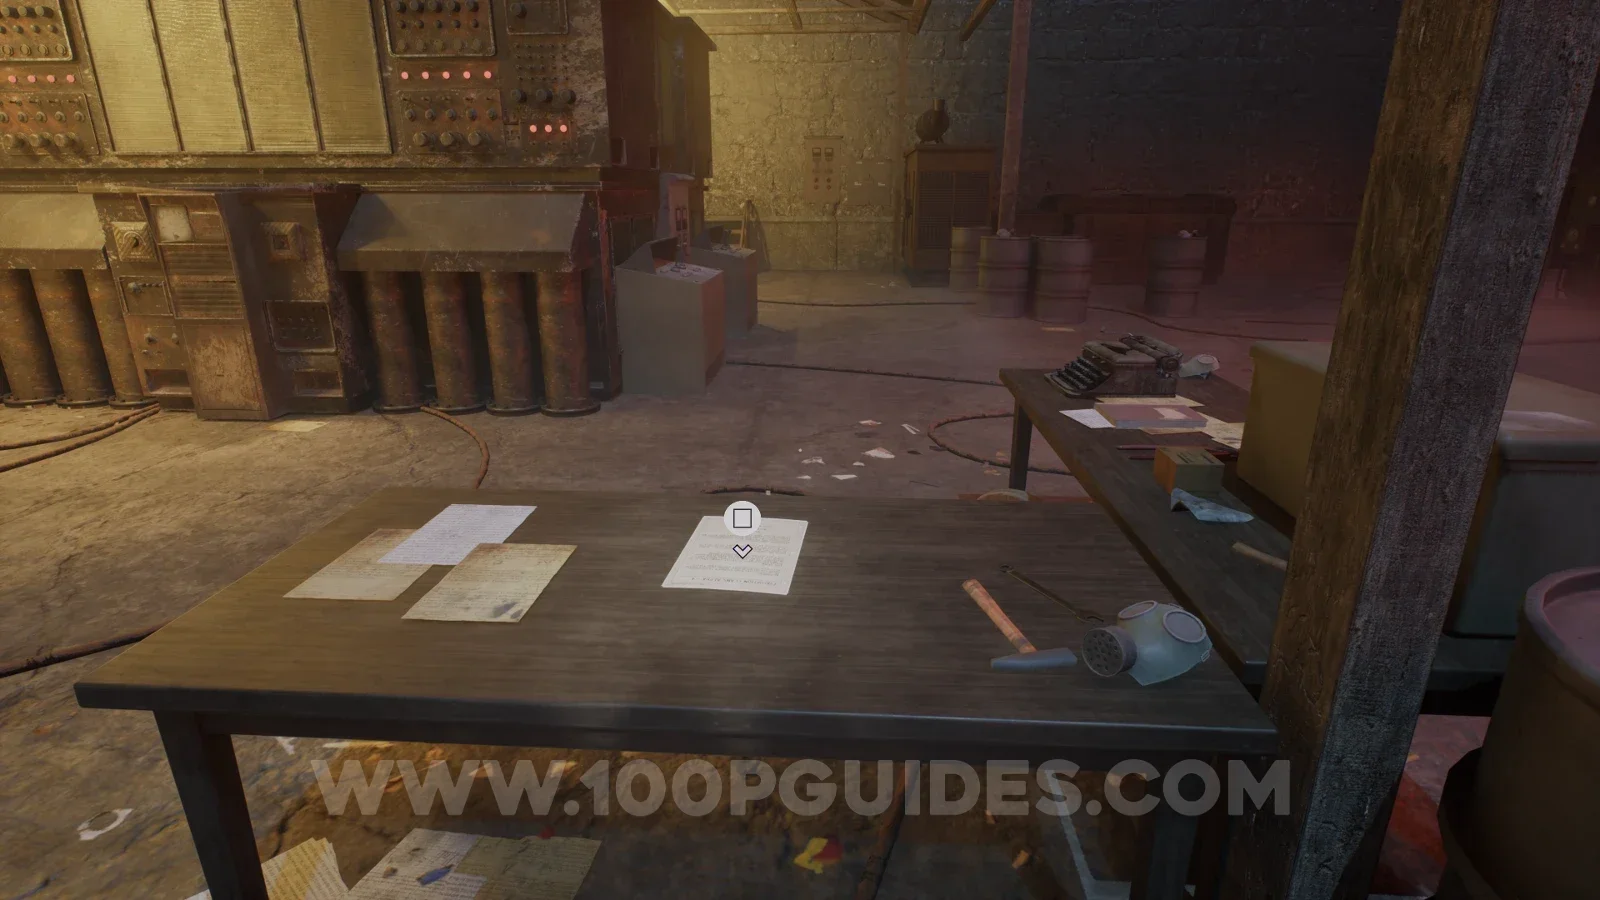
NoteEvacuation plansImage reviewed |
Crew Lift camp: check the wooden worktable beside the tall lift machinery, near the respirator and typewriter. Location image ↗ Open collection entry ↗ |
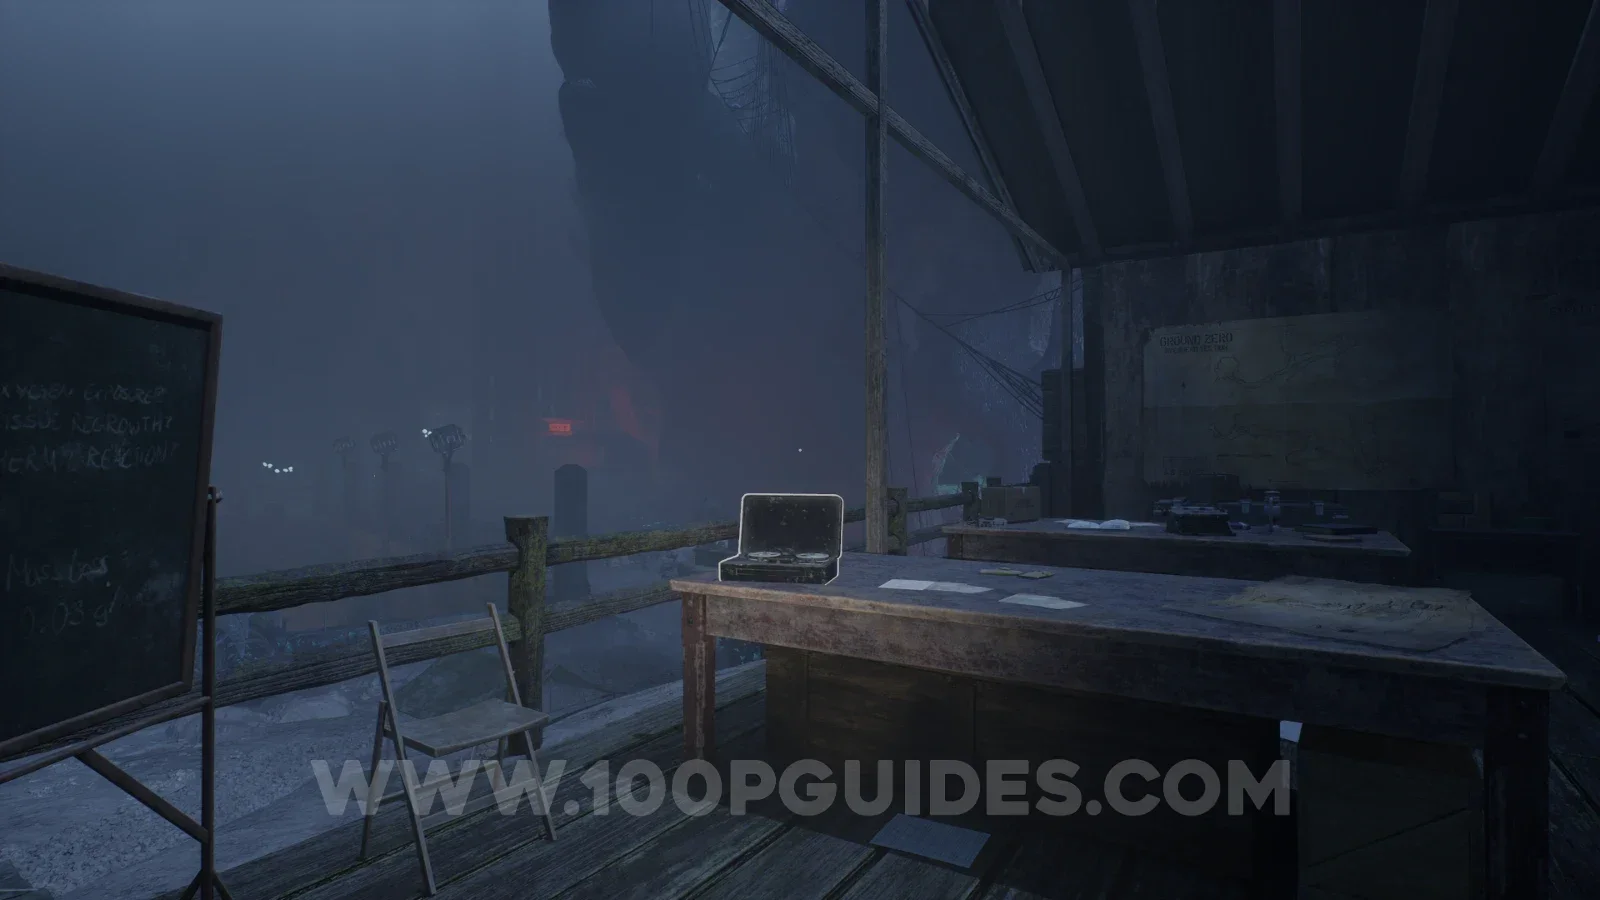
Audio tapeJim & Bob: The KeyImage reviewed |
Crew Lift camp upper canopy: look on the table by the blackboard and railing overlooking the camp. Location image ↗ Open collection entry ↗ |
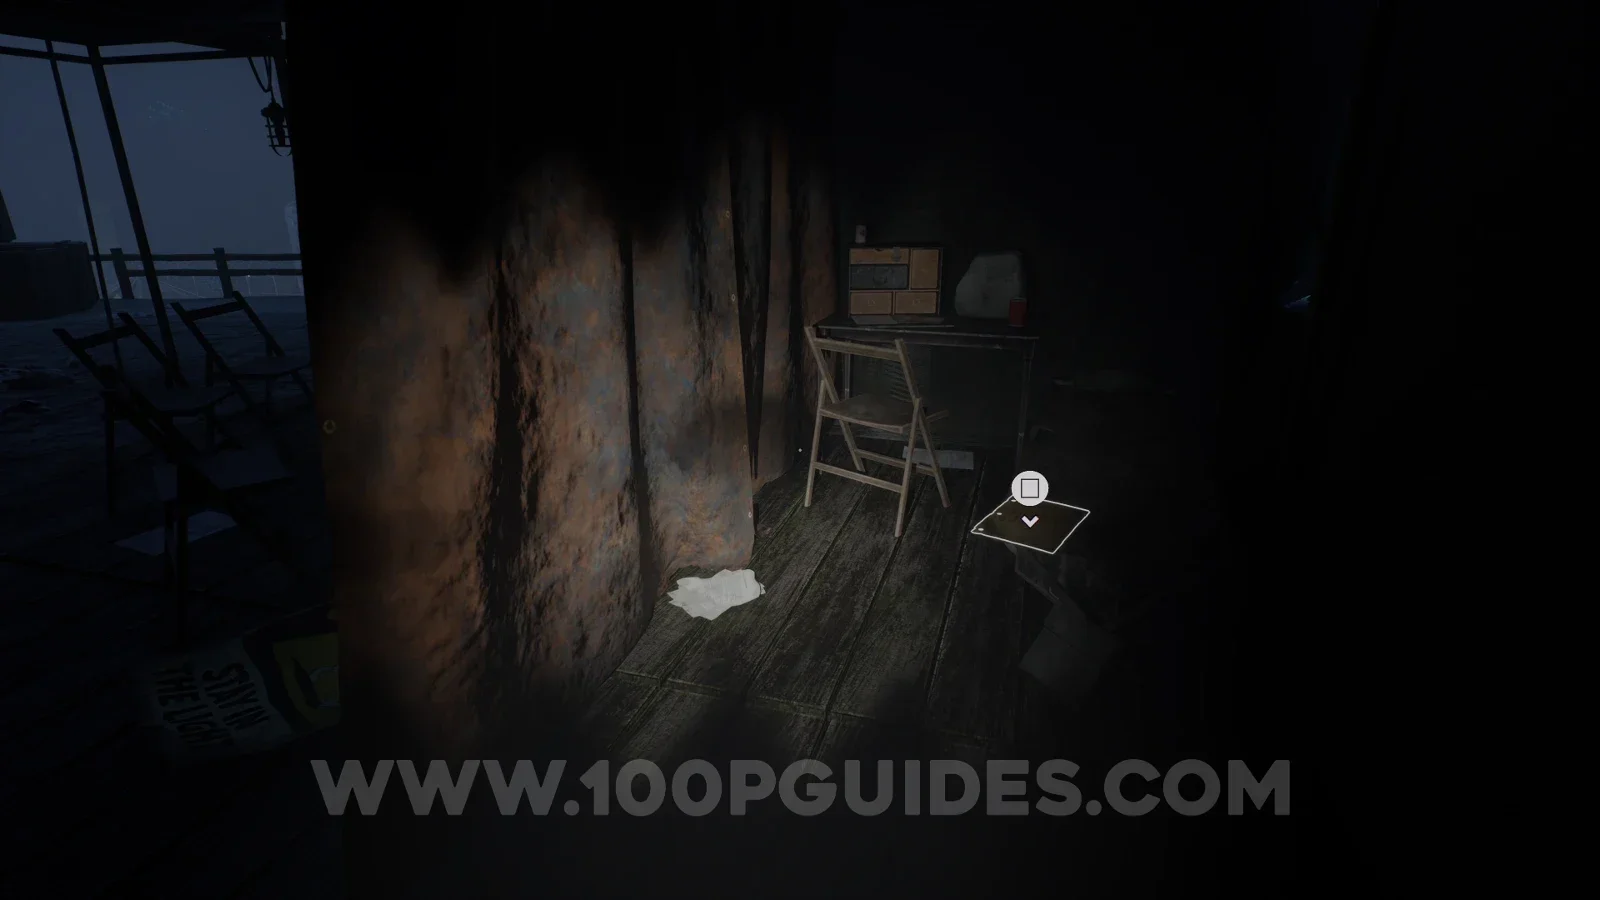
NoteIt's Commander RidgewaterImage reviewed |
Inside the tent at the end of the upper camp area, look beside the radio desk and folding chair. The highlighted page rests on the low surface to the right of the chair. Location image ↗ Open collection entry ↗ |
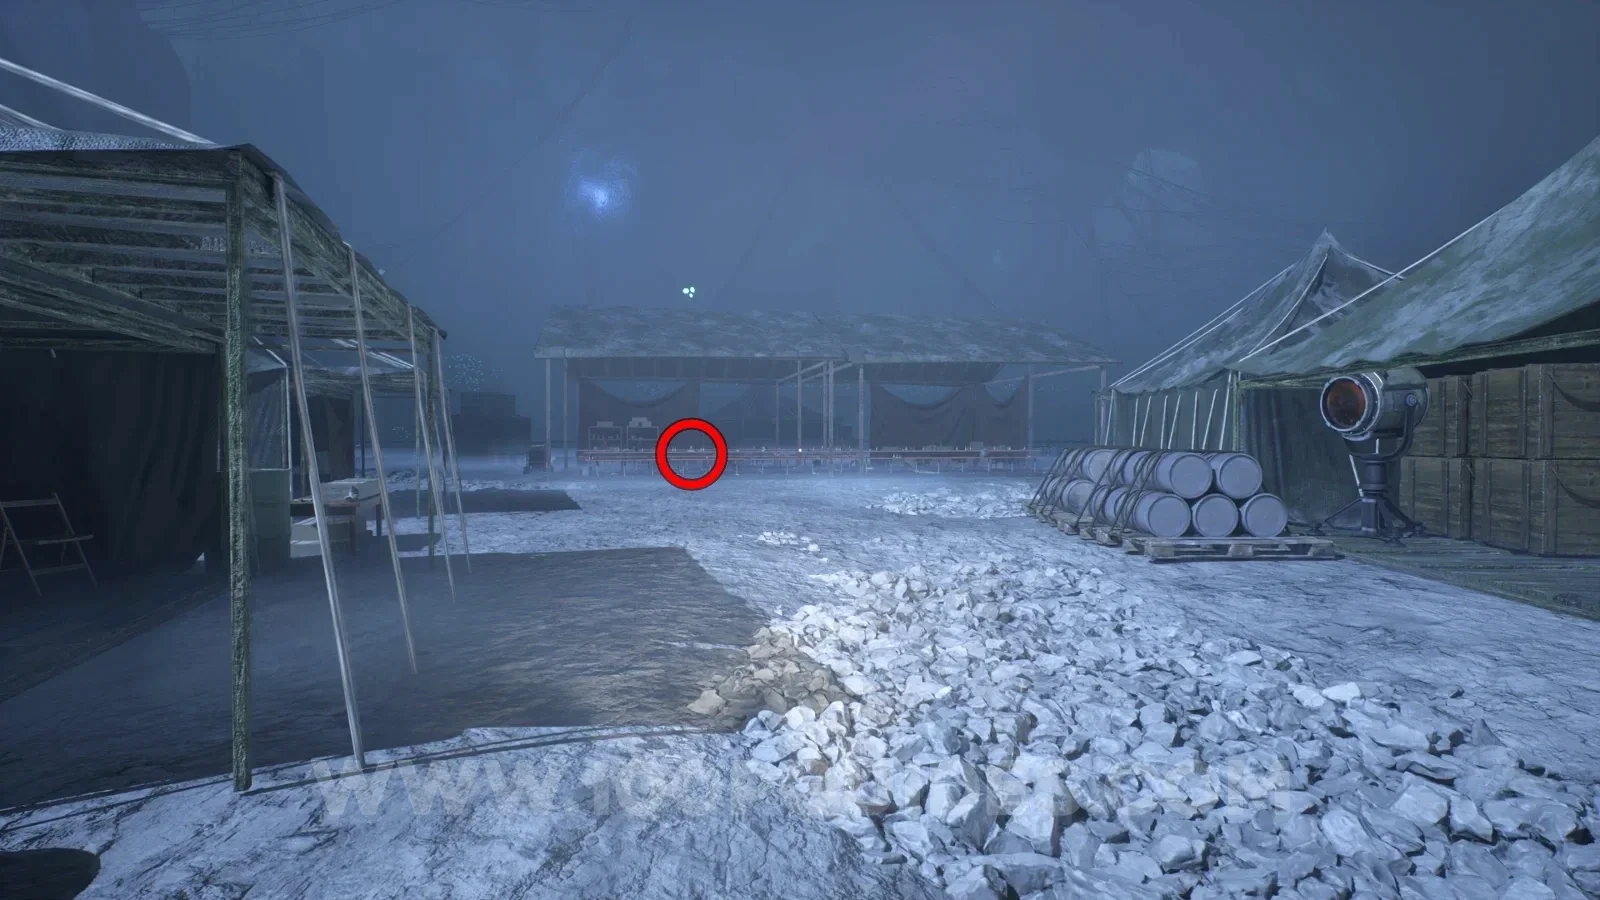
NotePersonnel clashCommunity report |
Reported route: Below the upper-camp ramp: tables under the large canopy. Final pickup not confirmed here. Reference image ↗ Report this location ↗ Open collection entry ↗ |
NoteMaterial analysisCommunity report |
Reported route: Tent right of the covered tables: enter from its opposite side. Final pickup not confirmed here. Reference image ↗ Report this location ↗ Open collection entry ↗ |
NoteThe special lightImage reviewed |
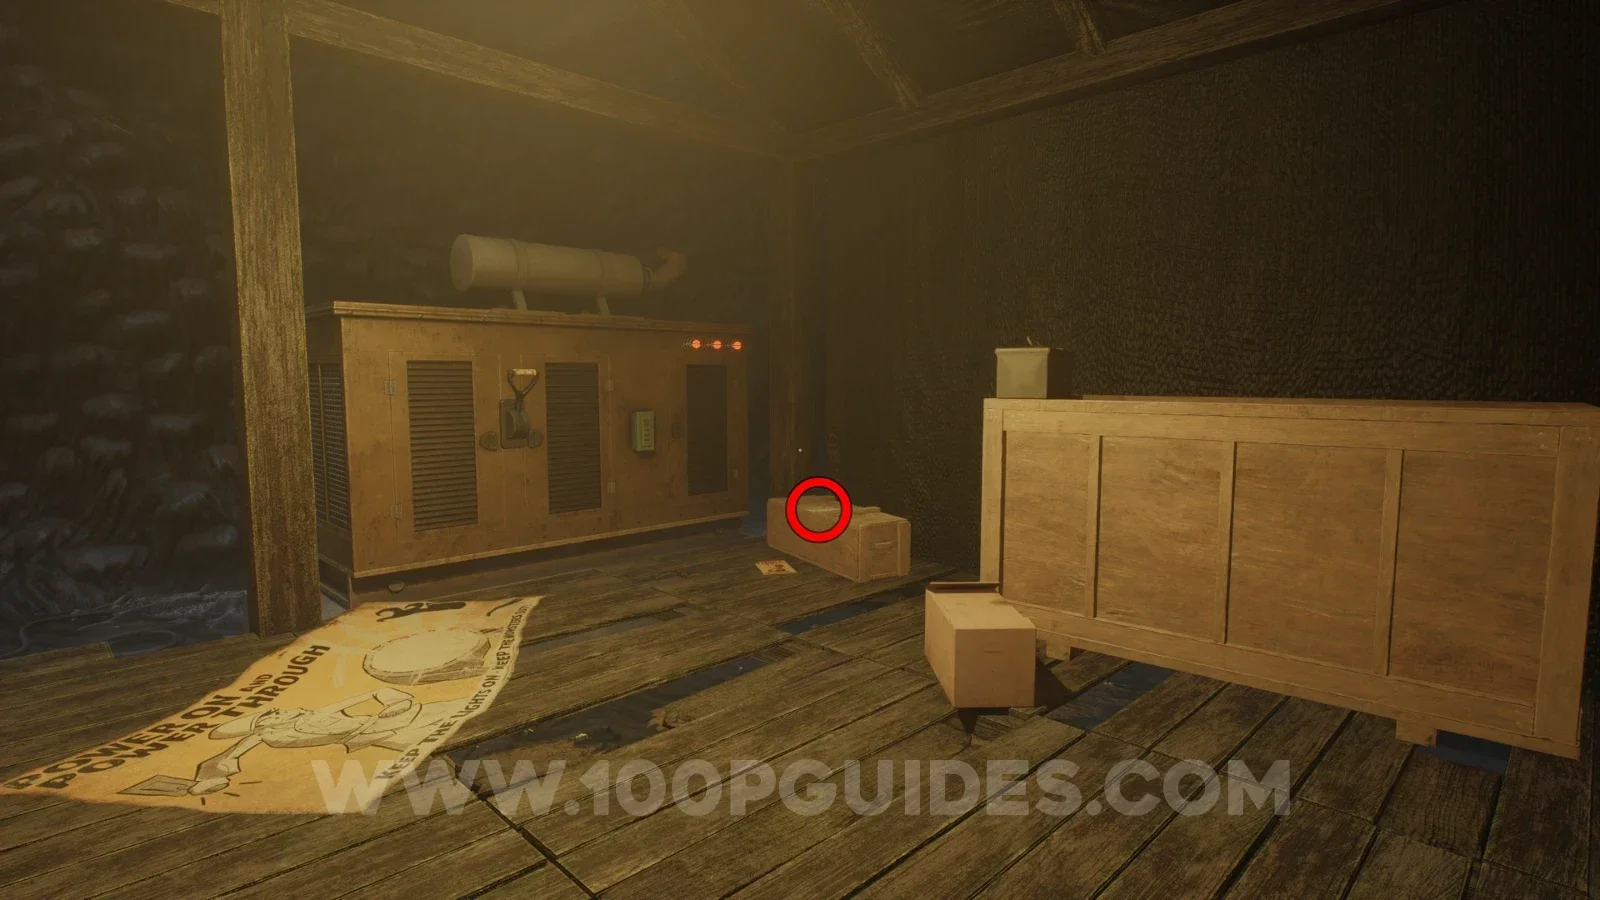
DJ’s camp tent: inspect the box beside the yellow generator, beneath the Keep the Lights On poster. Location image ↗ Open collection entry ↗ |
NoteUh ohImage reviewed |
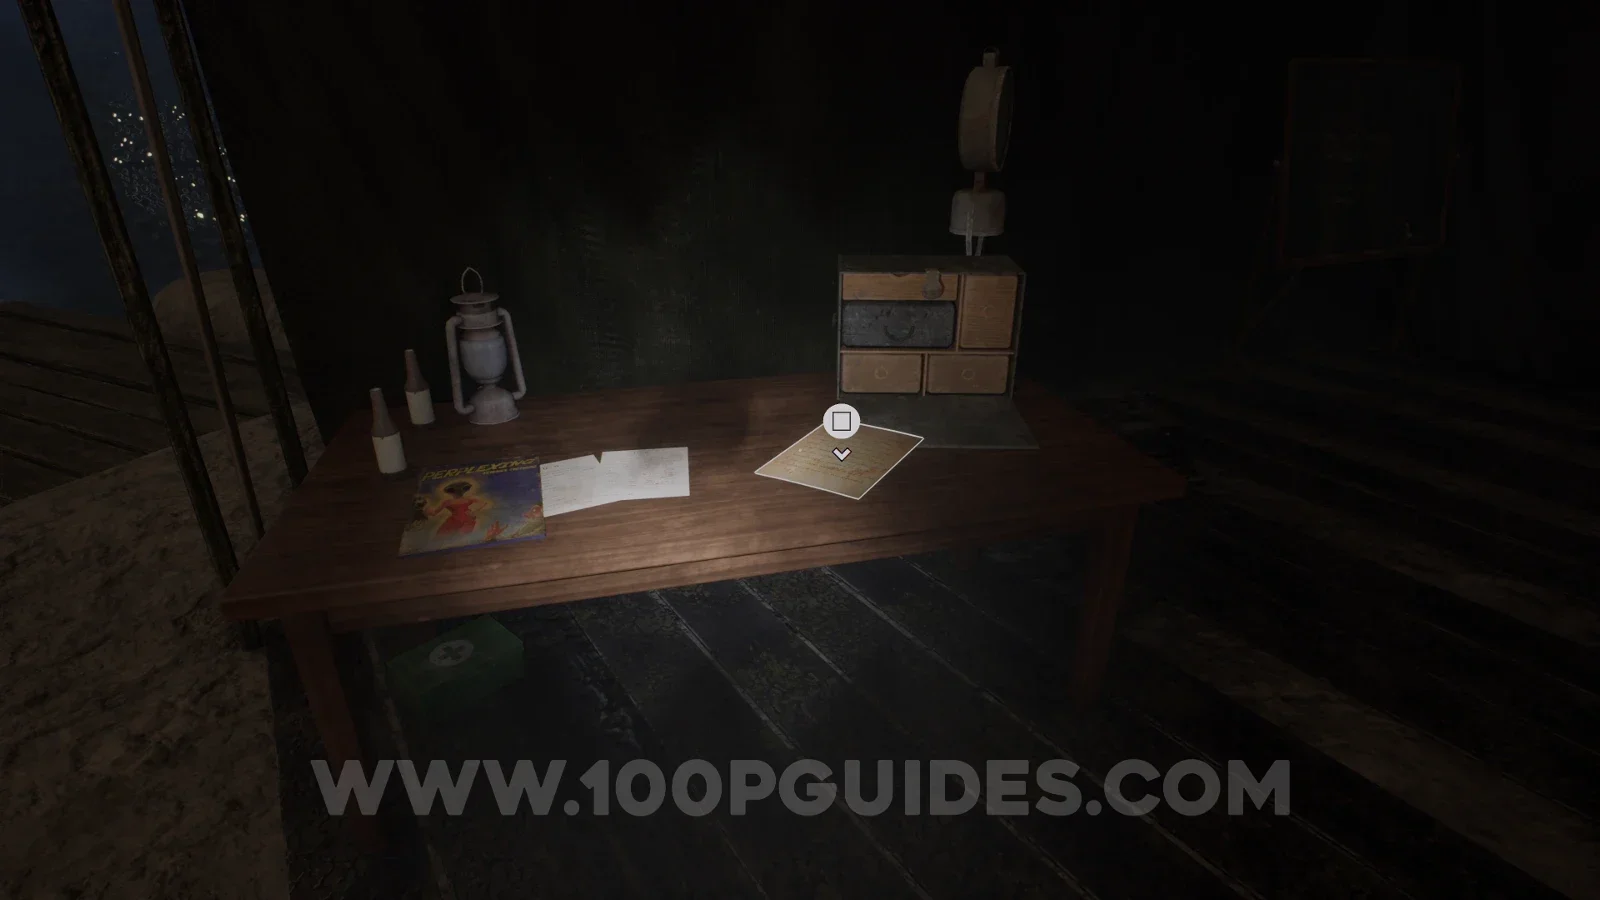
At the first power-switch stop around the camp perimeter, enter the tent to the left. Inspect the highlighted handwritten page in front of the wooden radio, beside the lantern and bottles. Location image ↗ Open collection entry ↗ |
AmberAmber 15 |
Behind Uh oh tent; wallrun, pole, right platform. View 15 ↗ Open collection entry ↗ |
Chapter 4: Cavern routes and lift return
Story objective: Take dynamite from A, open B, recover the key and return to camp. Open the steps.
Checkpoint: Insert and turn the key, pull the lever, then board the Crew Lift with DJ. Collectible detours below may span the approach and return route.
| Stop | Location and reference |
|---|---|
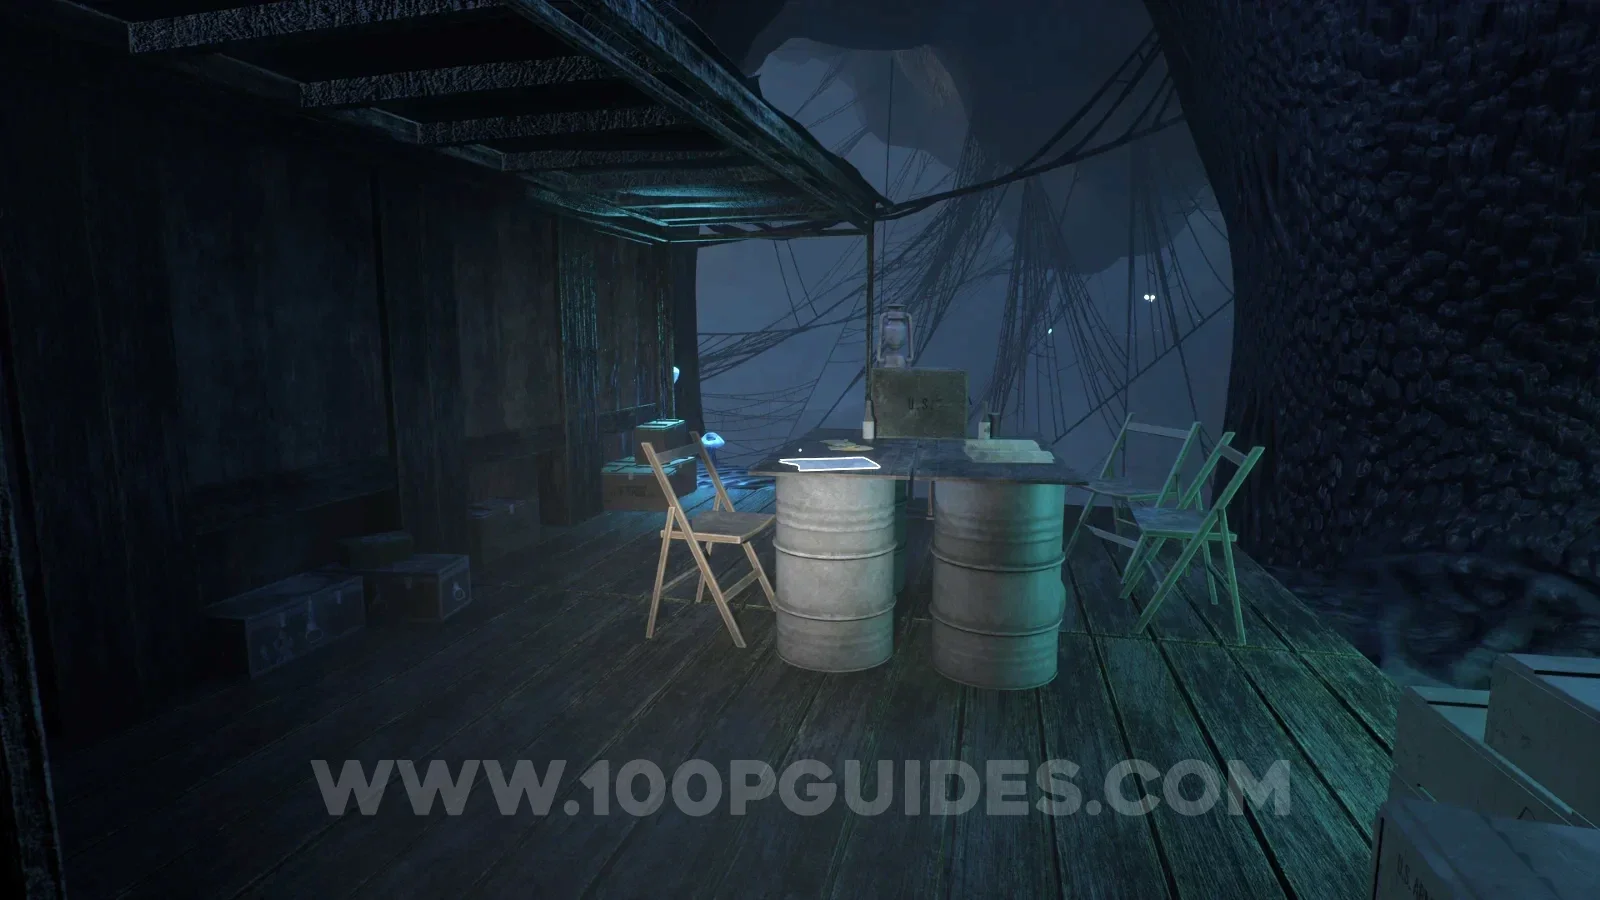
NoteA mutinyImage reviewed |
After the first wall climb in Cavern A, look left under the small canopy. The highlighted page lies on the tabletop supported by two barrels, beside the folding chairs. Location image ↗ Open collection entry ↗ |
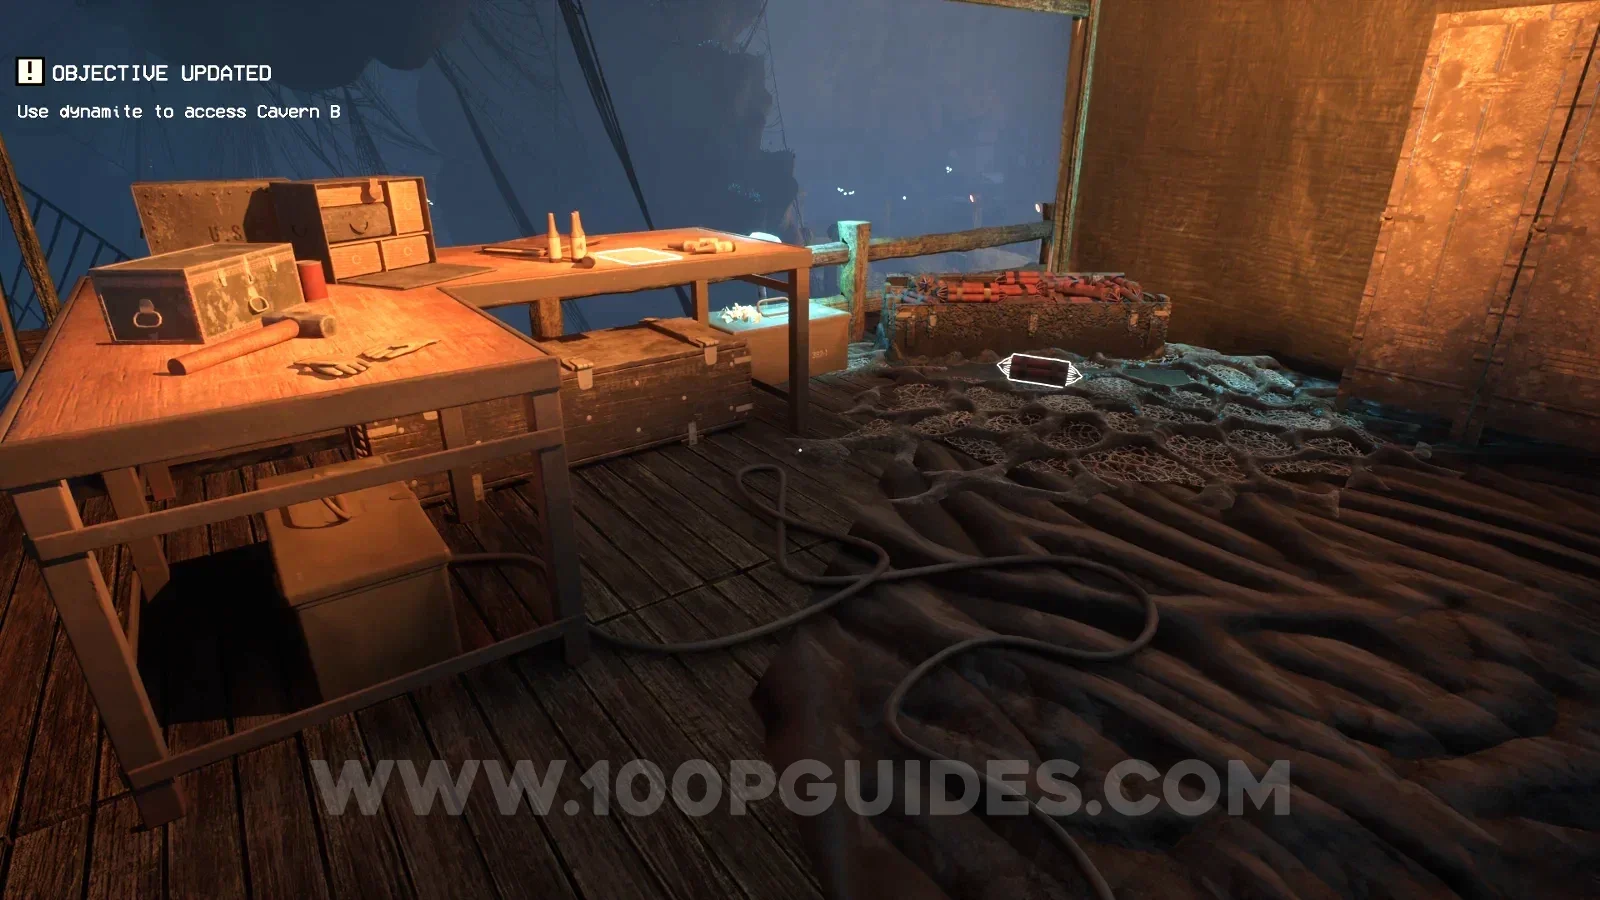
NoteTo-do listImage reviewed |
Cavern A dynamite platform: examine the rear worktable beside the explosives and rolled supplies. Location image ↗ Open collection entry ↗ |
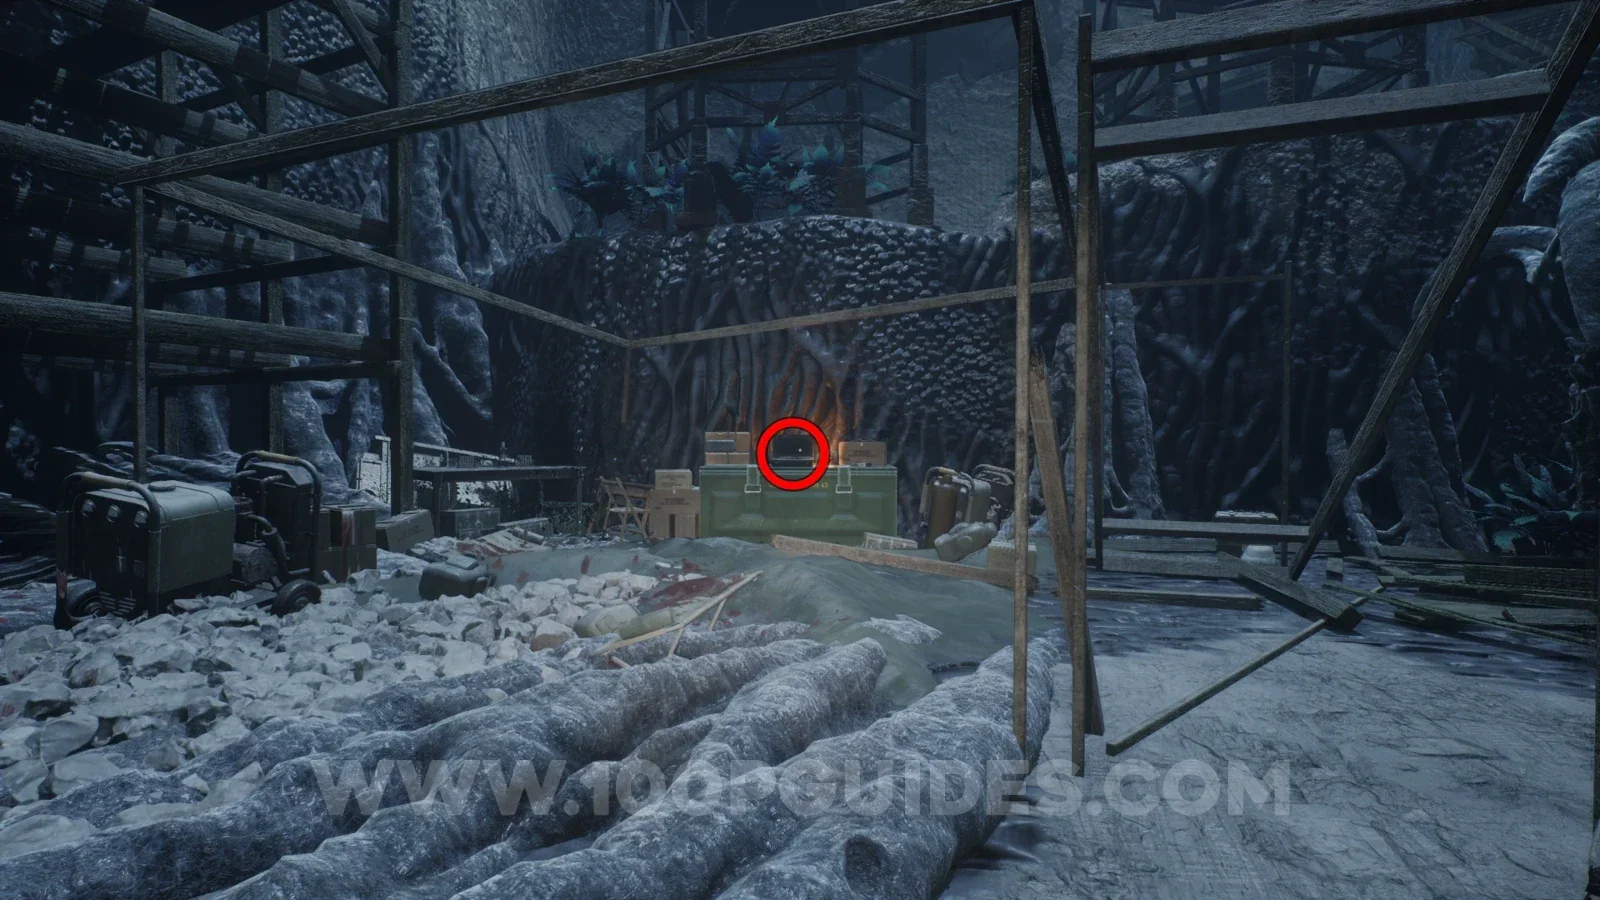
Audio tapeDr. Fellows: Troop Movement ObservationsImage reviewed |
Cavern B lower route: search the green equipment chest beneath the wooden scaffold, between the generators and curved cavern wall. Location image ↗ Open collection entry ↗ |
NoteMission ordersImage reviewed |
Early in the Cavern B climb, check the third wooden landing. The paper is on the cable-spool table beside the stacked yellow-filled cargo crates. Location image ↗ View pickup screenshot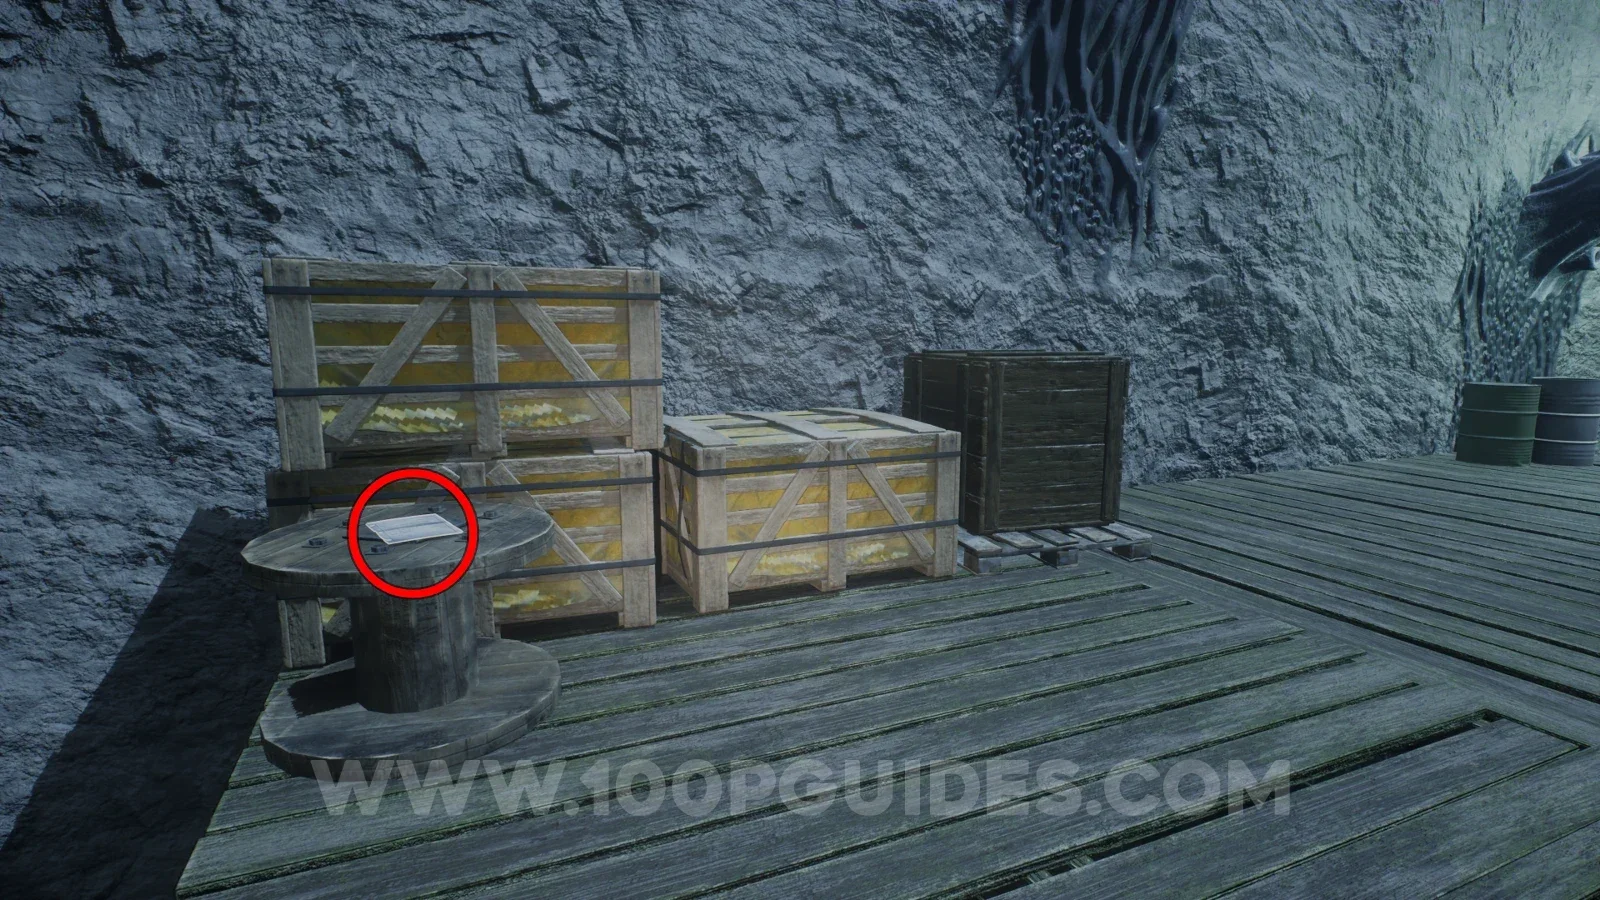 |
Audio tapeTony Marino: Burned BodyImage reviewed |
Cavern B spires: remain low and look toward the small supply pile beside the central raised goo formation. Location image ↗ Open collection entry ↗ |
NoteWe need the lights!Image reviewed |
On the spire-climbing route beyond the first Cavern B platforms, inspect the equipment chest inside the canopy. The page lies near the lantern and rounded machinery, opposite the red-lit gate. Location image ↗ Open collection entry ↗ |
AmberAmber 16 |
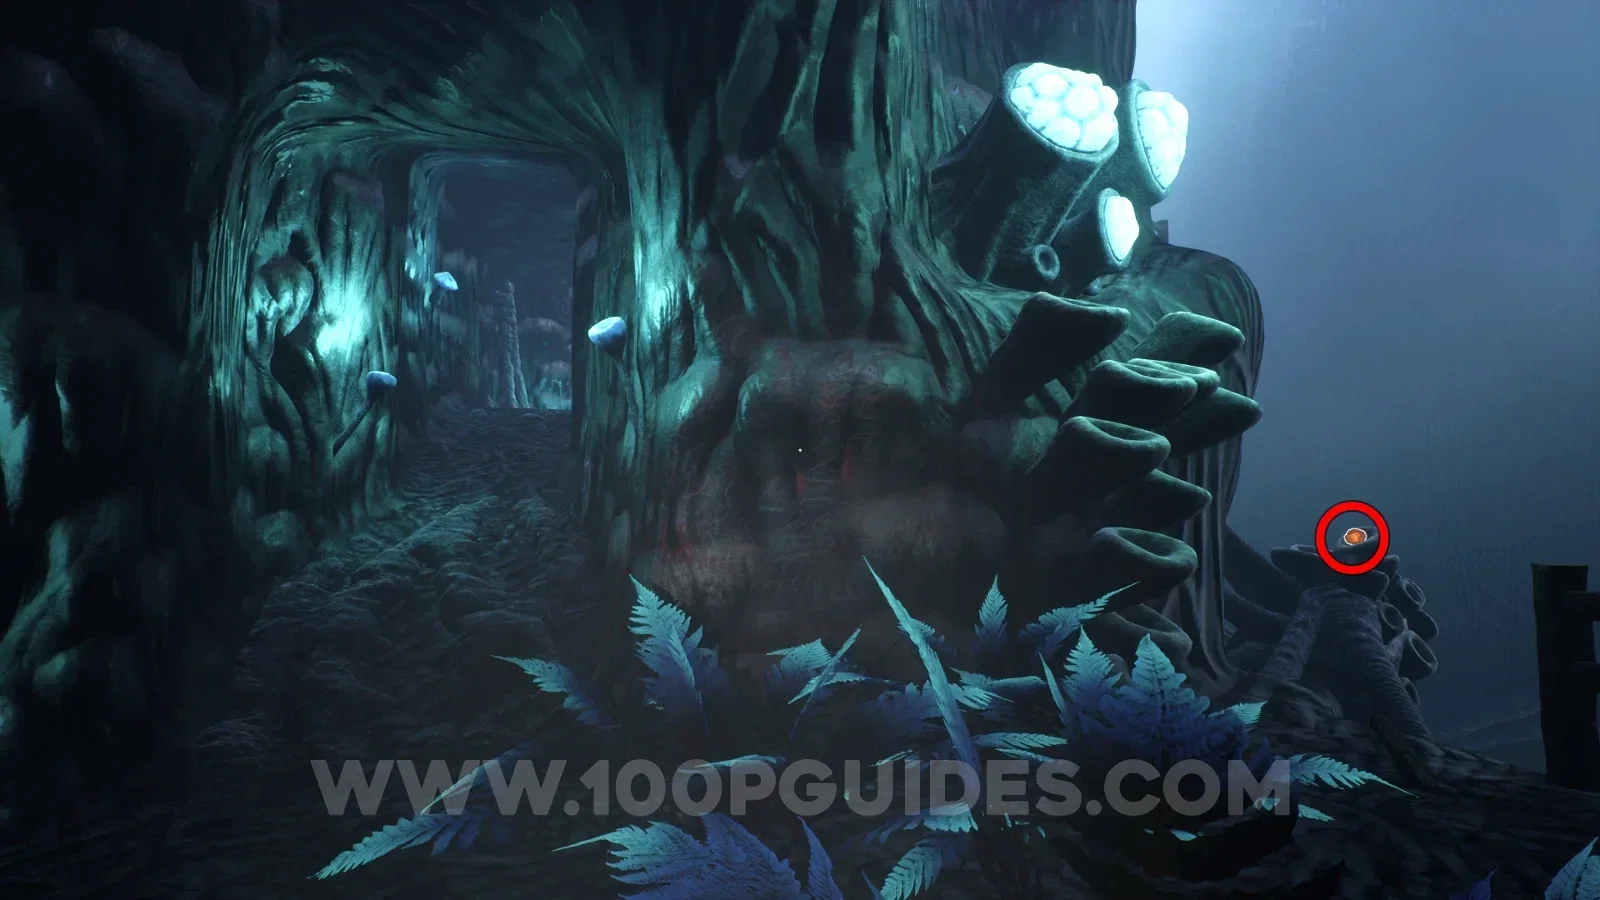
Cavern B: right before narrow glowing-plant passage. View 16 ↗ Open collection entry ↗ |
NoteFellows' last wordsImage reviewed |
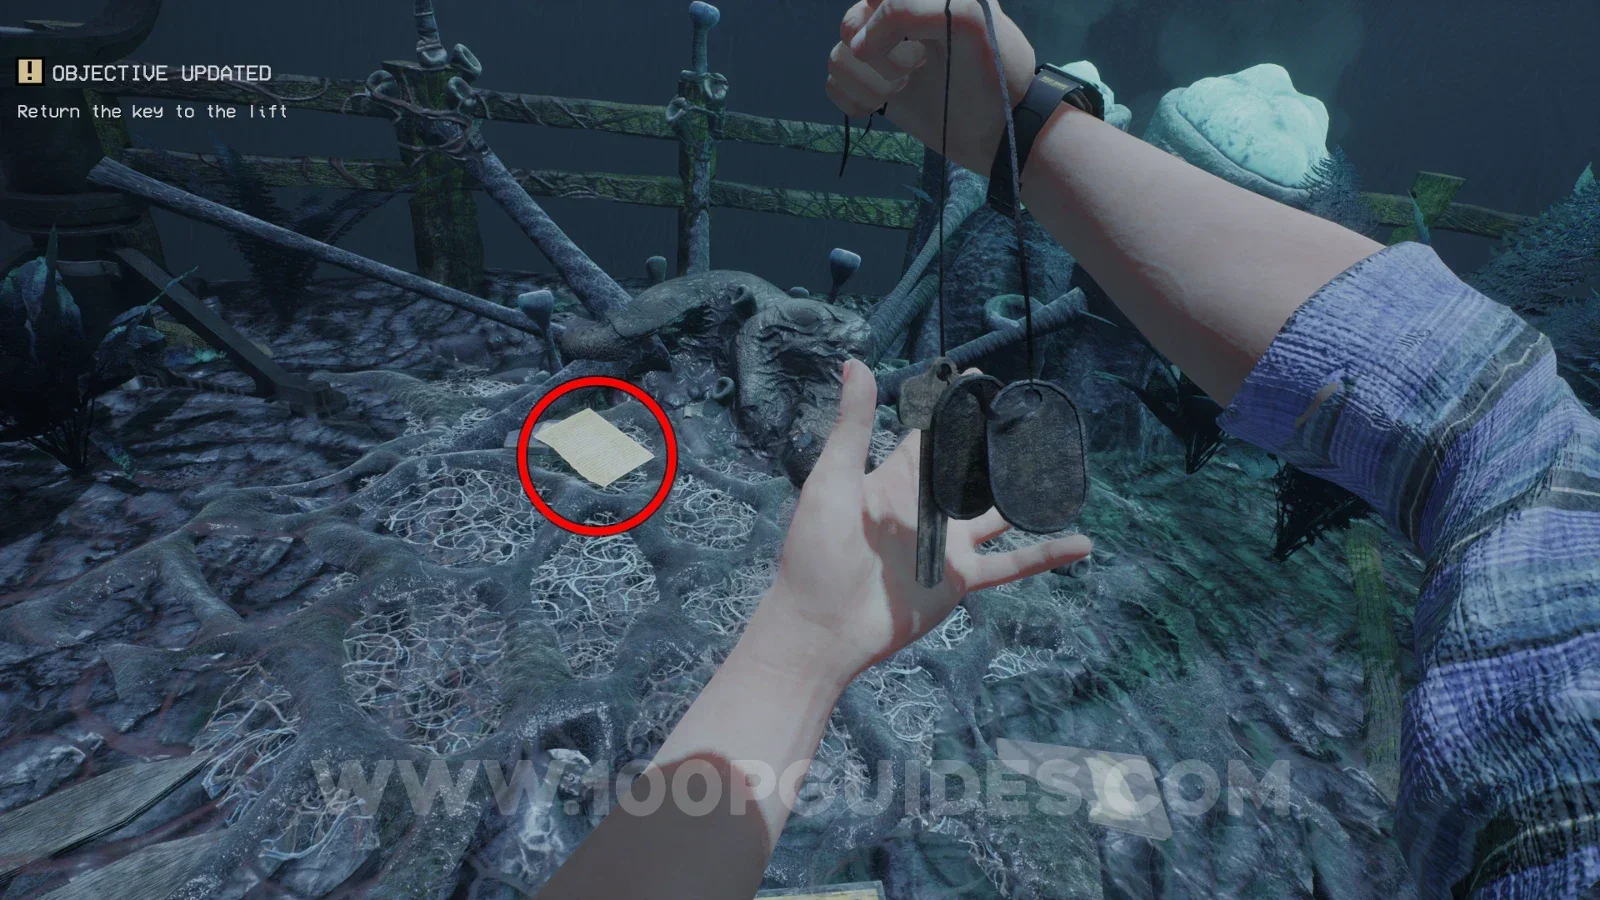
Cavern B key destination: look on the ground beside the body at the lift-key pickup. Location image ↗ Open collection entry ↗ |
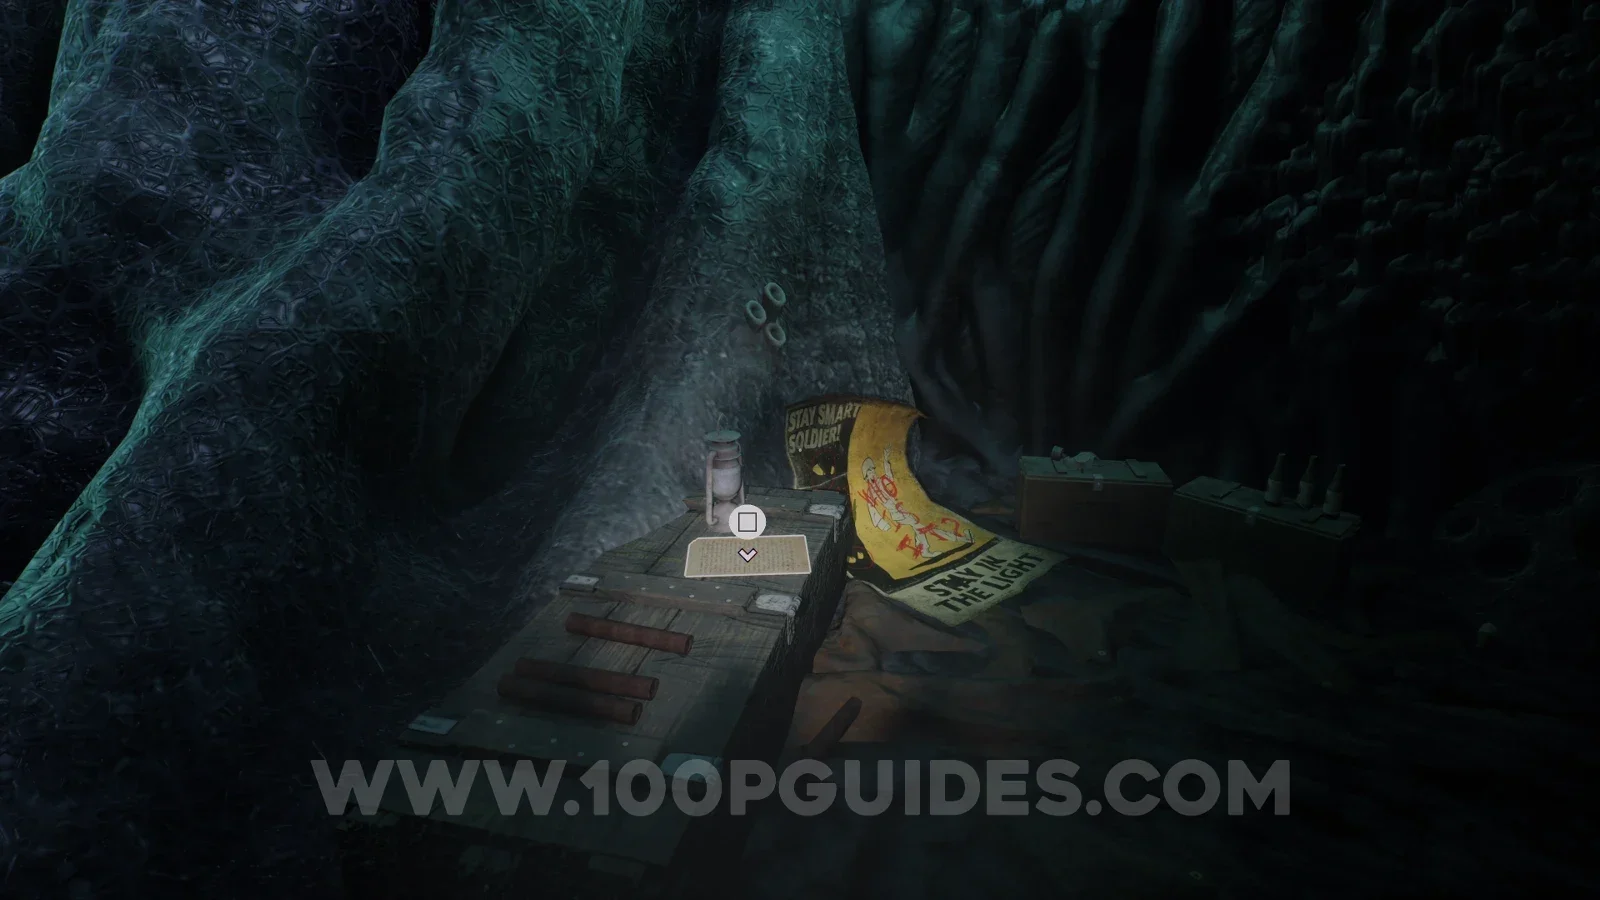
NoteMurderer in the camps?Image reviewed |
After the lift-key chase, pass through the goo strands on the left. Inspect the handwritten page on the low wooden box beside the lantern and fallen Stay Smart Soldier poster. Location image ↗ Open collection entry ↗ |
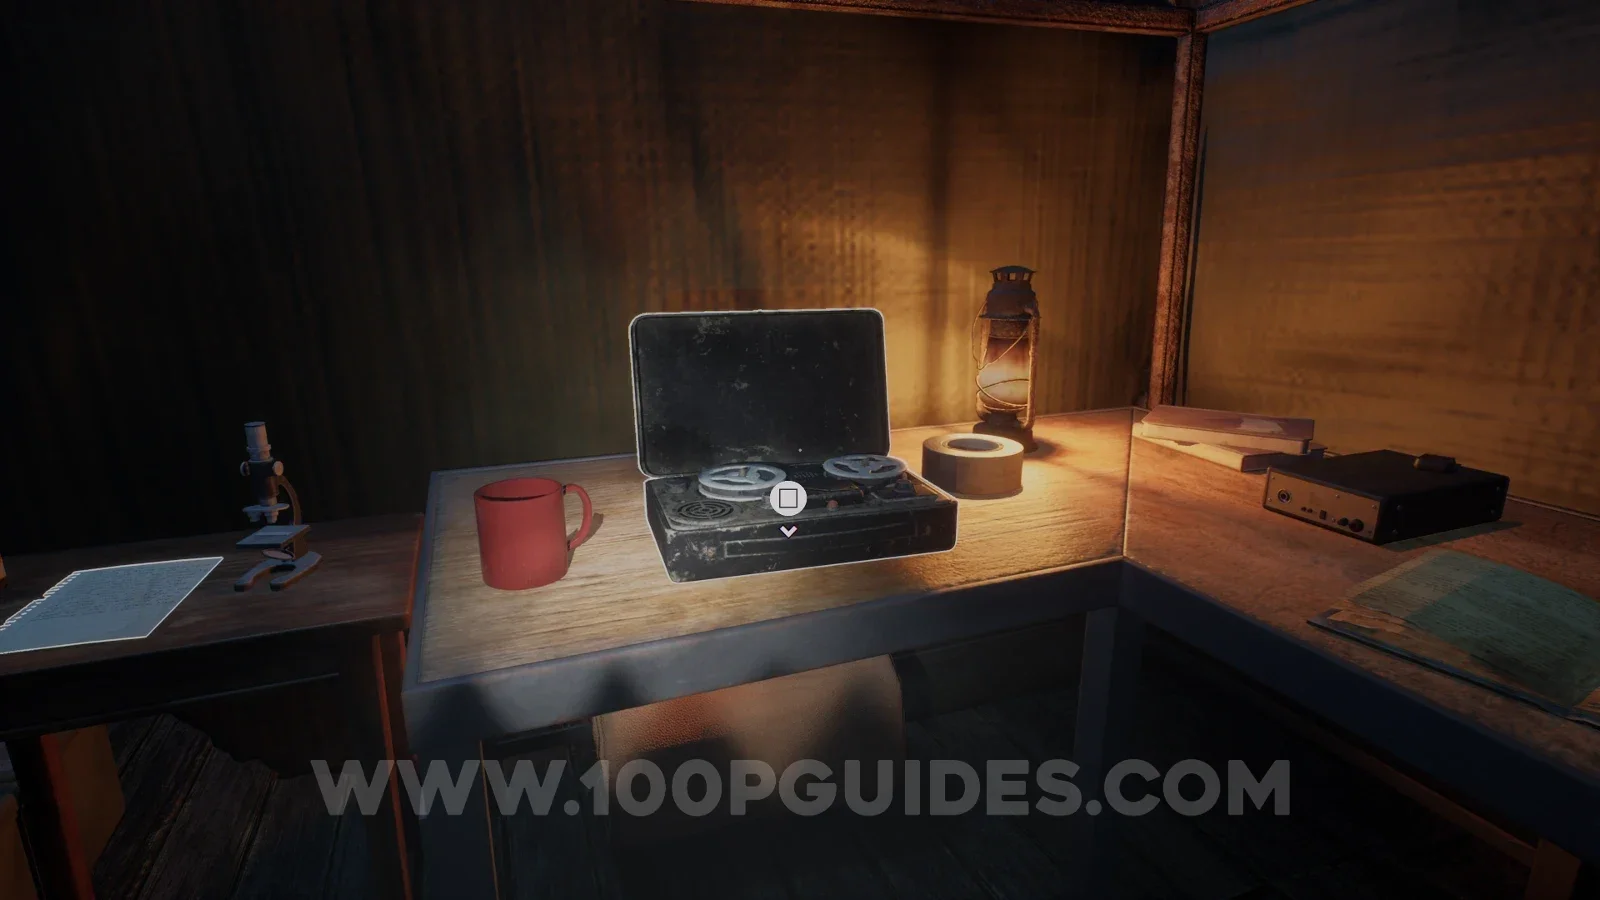
Audio tapeDr. Crane: A RequestImage reviewed |
Tent after the cliff encounter: inspect the desk with the red mug, lantern and microscope. The recording is next to the mug. Location image ↗ Open collection entry ↗ |
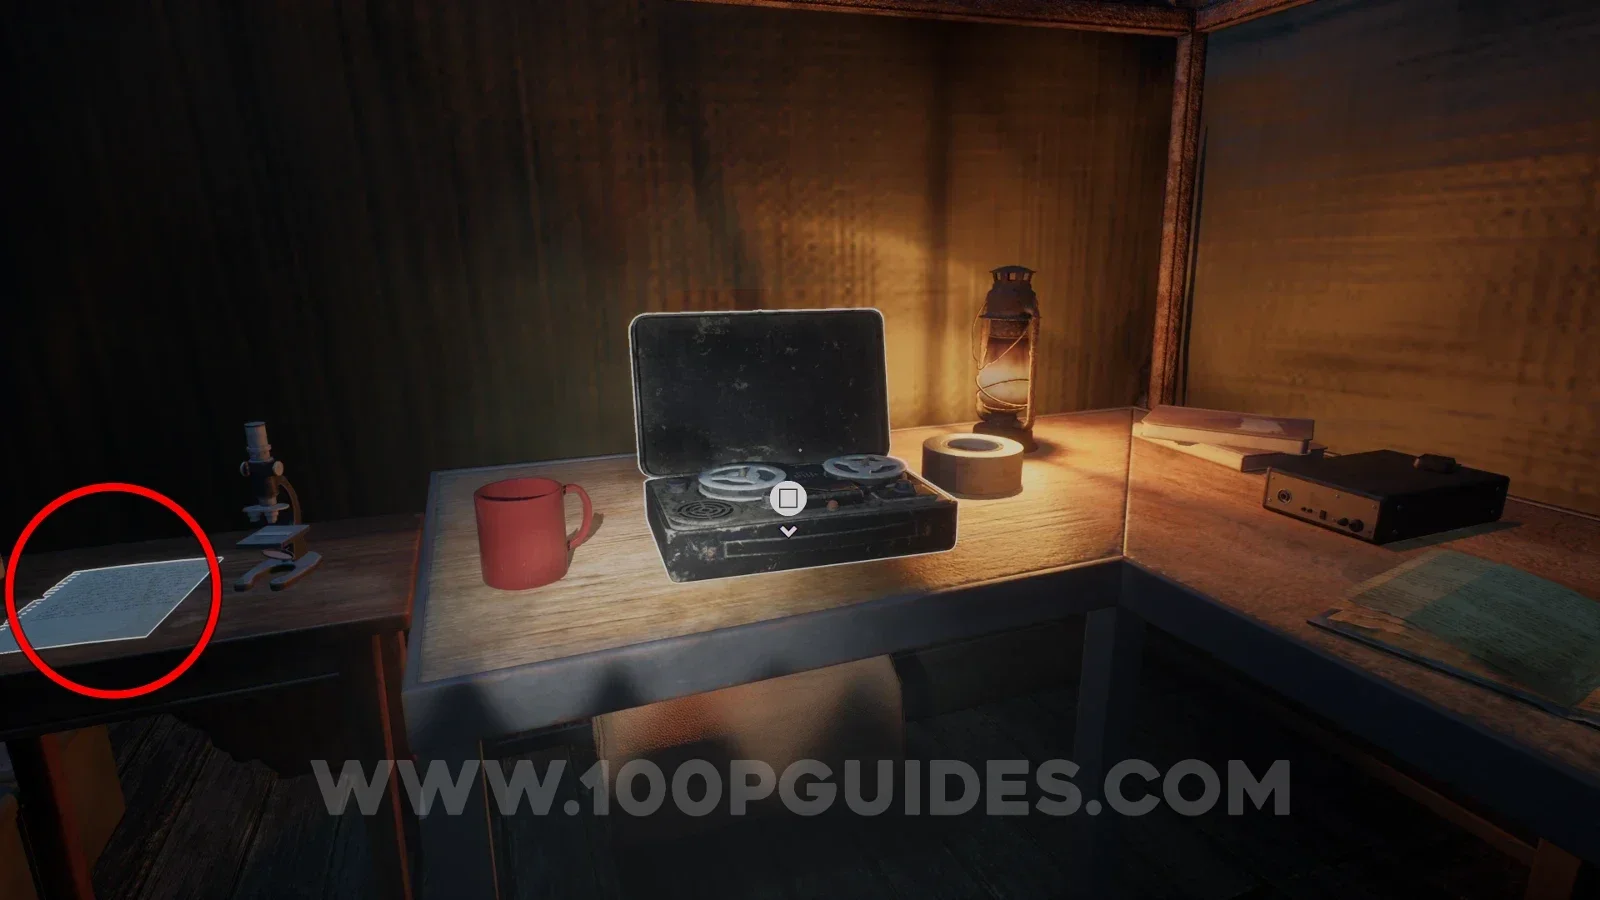
NoteGround ZeroImage reviewed |
Cliff-side tent: check the small notebook beside the microscope, immediately left of Dr. Crane’s recording. Location image ↗ Open collection entry ↗ |
Continue your route
After these listed detours, continue the Chapter 4 story and escape steps. Finishing this checklist does not mean the chapter or its achievements are complete.
Chapter 1 collection run · Chapter 2 collection run · Chapter 3 collection run