Before you start
This chapter lists 4 amber, 23 notes and 5 tapes (32 stops). Entries follow the published collection reference’s order, grouped into broad story stages. These groups are navigation aids, not a promise that every stop is immediately accessible or that no backtracking is needed. Follow your active objective and use the Chapter 2 walkthrough between detours.
Checks are shared with the amber, note and tape guides on this browser. Image reviewed means the linked source image was compared with the route; Community report means the final pickup remains unconfirmed here. Item names are reported labels. Seven notes remain unmapped across the game; this is not a complete 97-note achievement route. Toy deliveries remain in the separate pickup and pedestal list.
Chapter 2: Generator hub and first onward route
Story objective: Start both generators and operate the tower gate control. Open the steps.
Checkpoint: The onward gate is open; follow the cavern route. Collectible detours below may span the approach and return route.
| Stop | Location and reference |
|---|---|
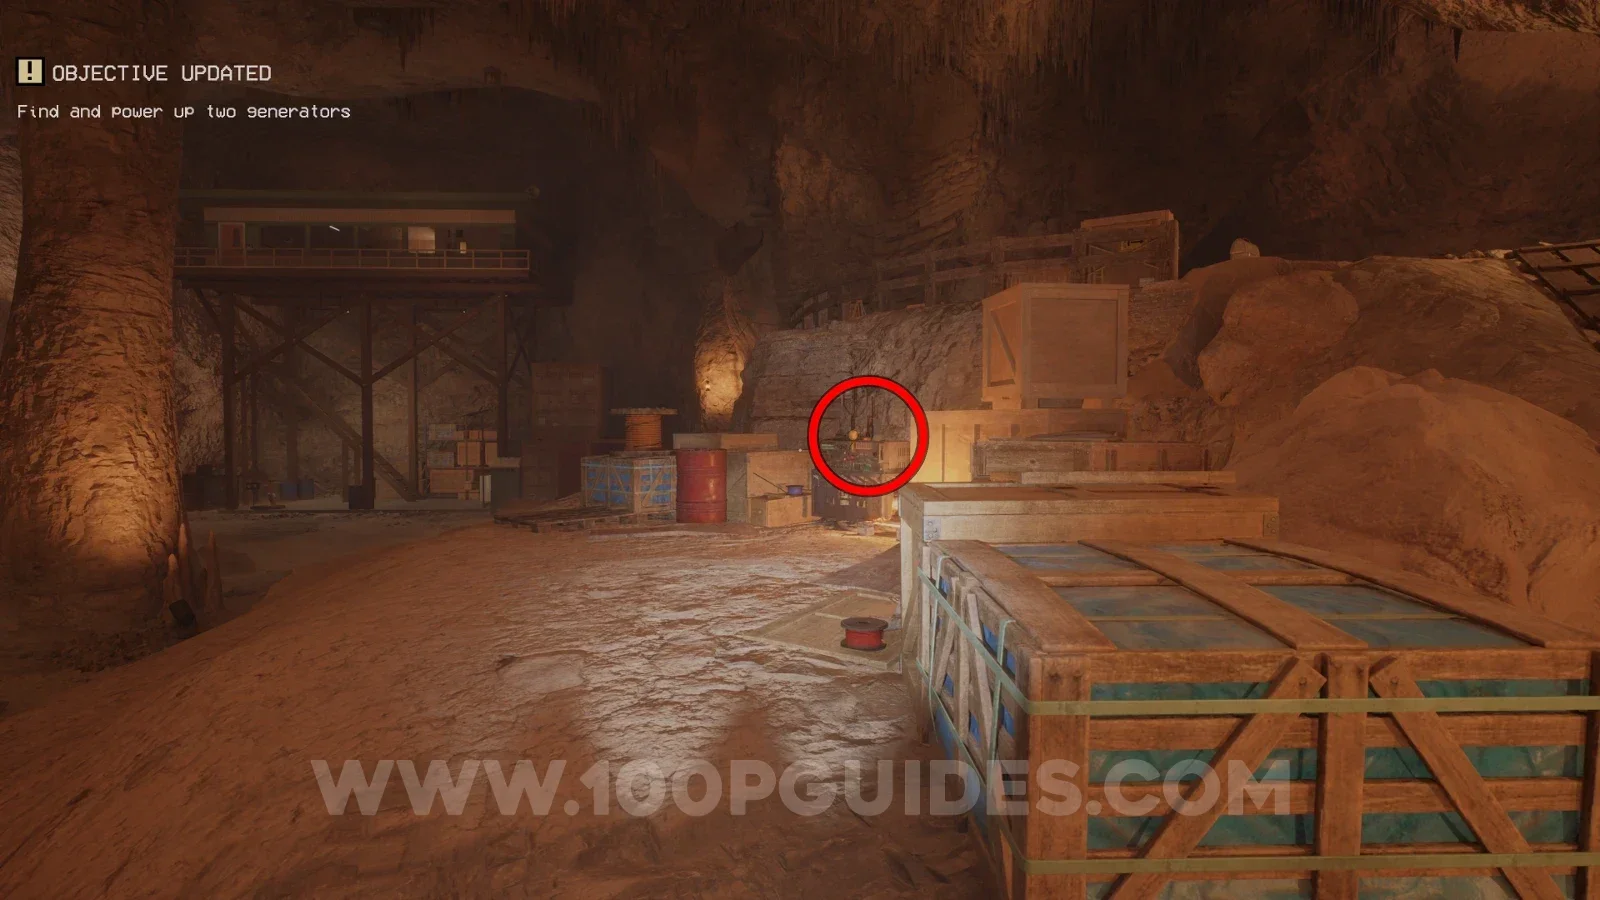
NoteComms System Relay AuditCommunity report |
Reported route: Opening slope: turn right near the blue box toward the communications machine. Final pickup not confirmed here. Reference image ↗ Report this location ↗ Open collection entry ↗ |
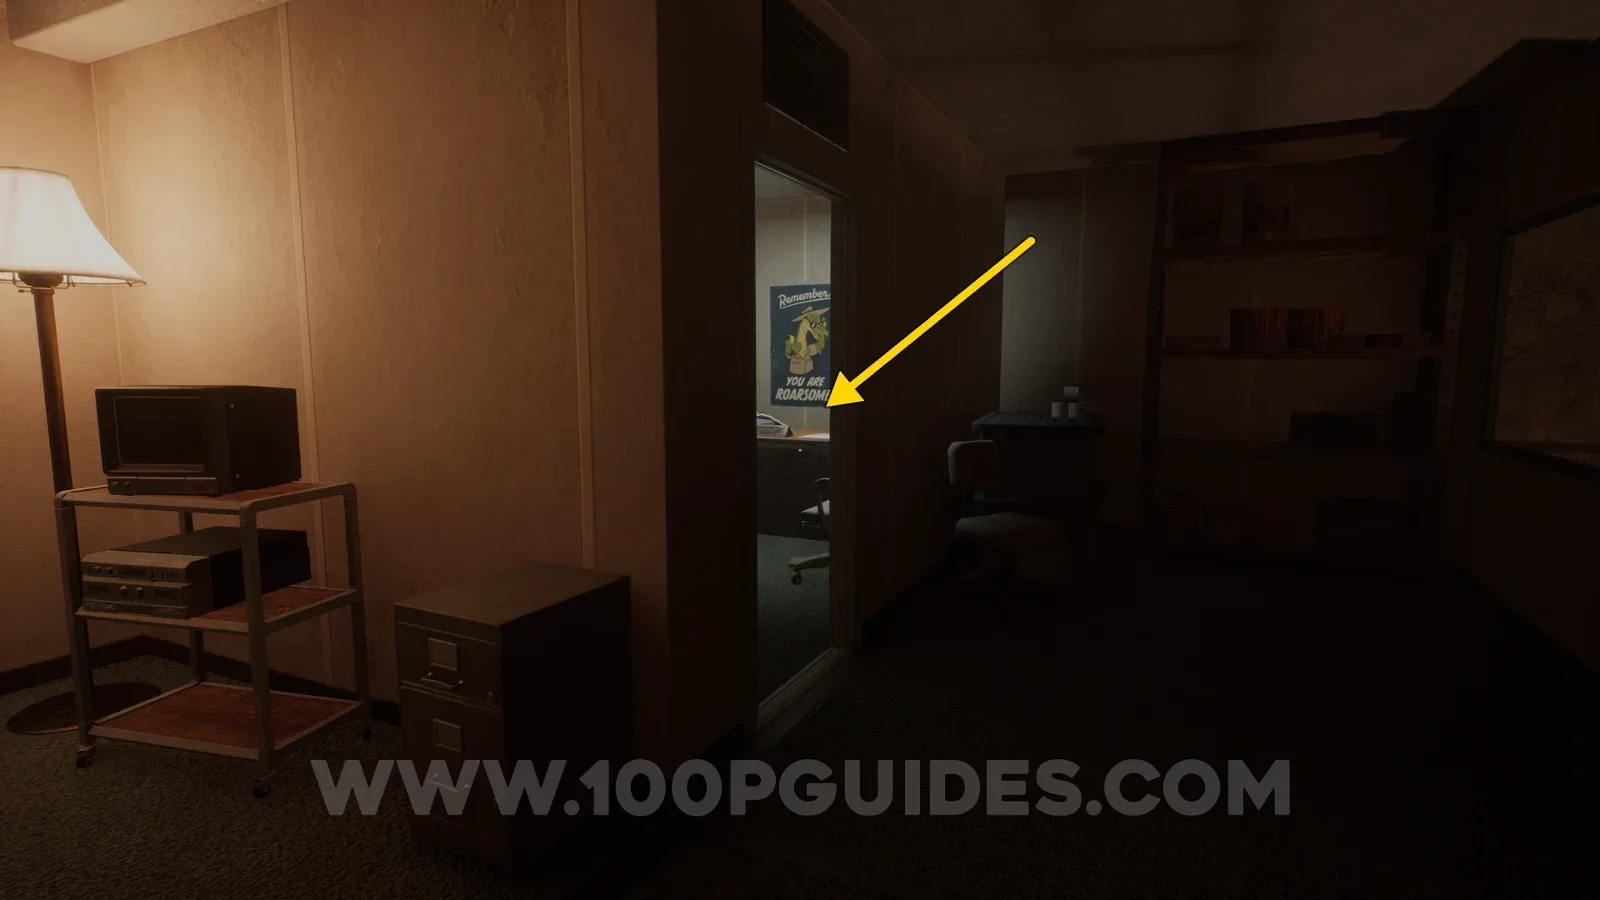
NoteDalton Journal Entry: Feb 3 1986Community report |
Reported route: First open digsite: rear desk in the raised right-hand office. Final pickup not confirmed here. Reference image ↗ Report this location ↗ Open collection entry ↗ |
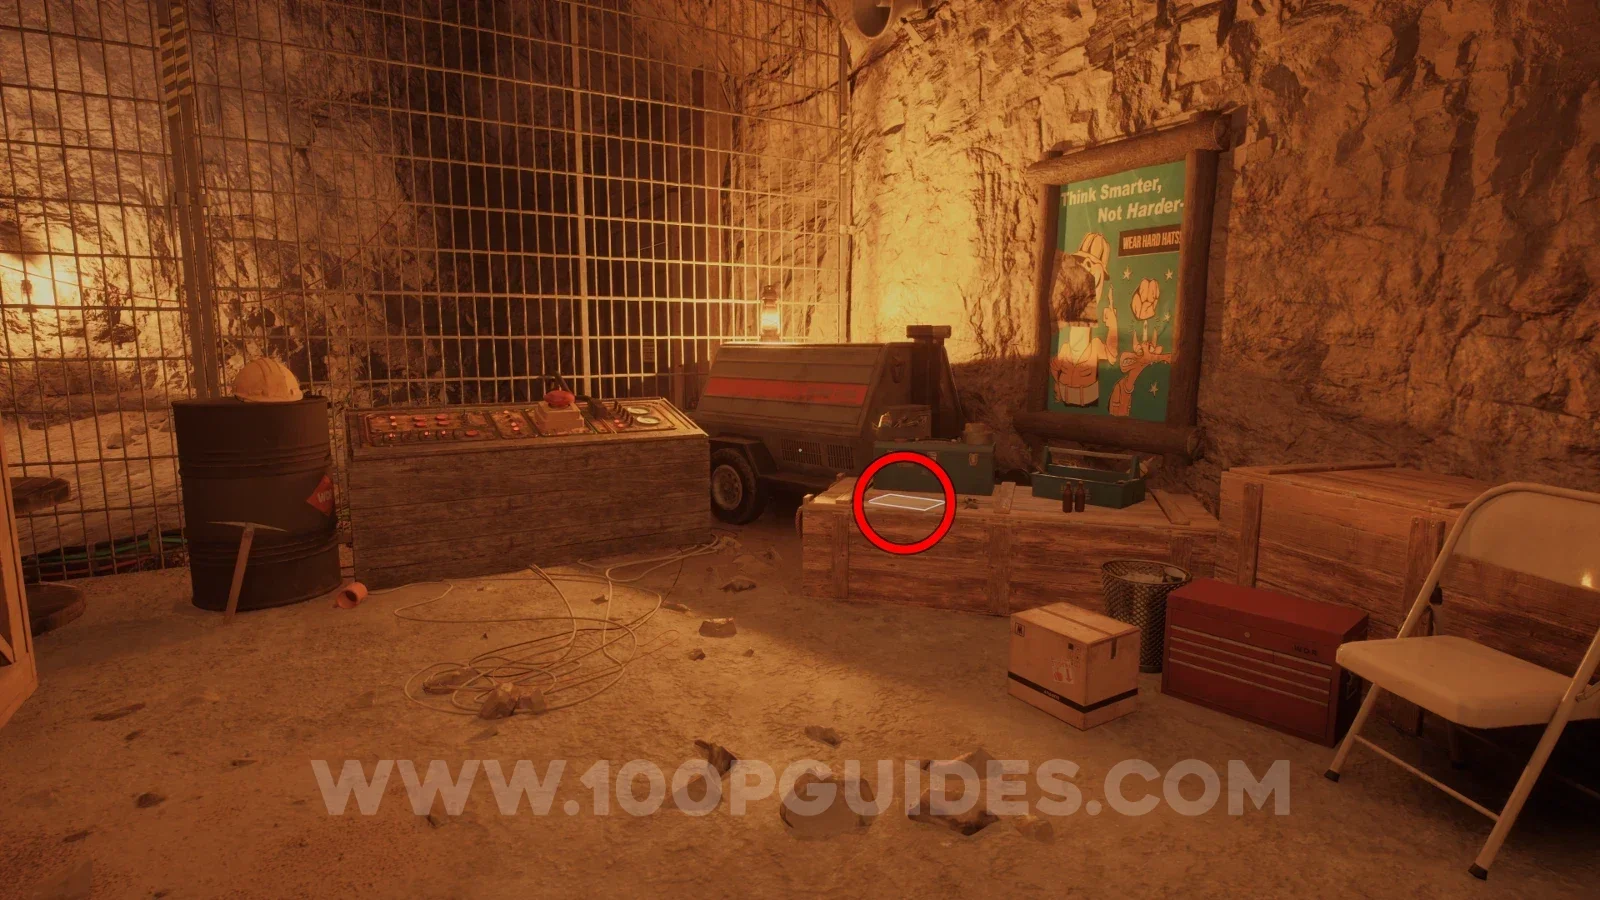
NotePower Saver DoorsImage reviewed |
Initial digsite generator route: check the low crate beside the generator, tool case and red-button control. Location image ↗ Open collection entry ↗ |
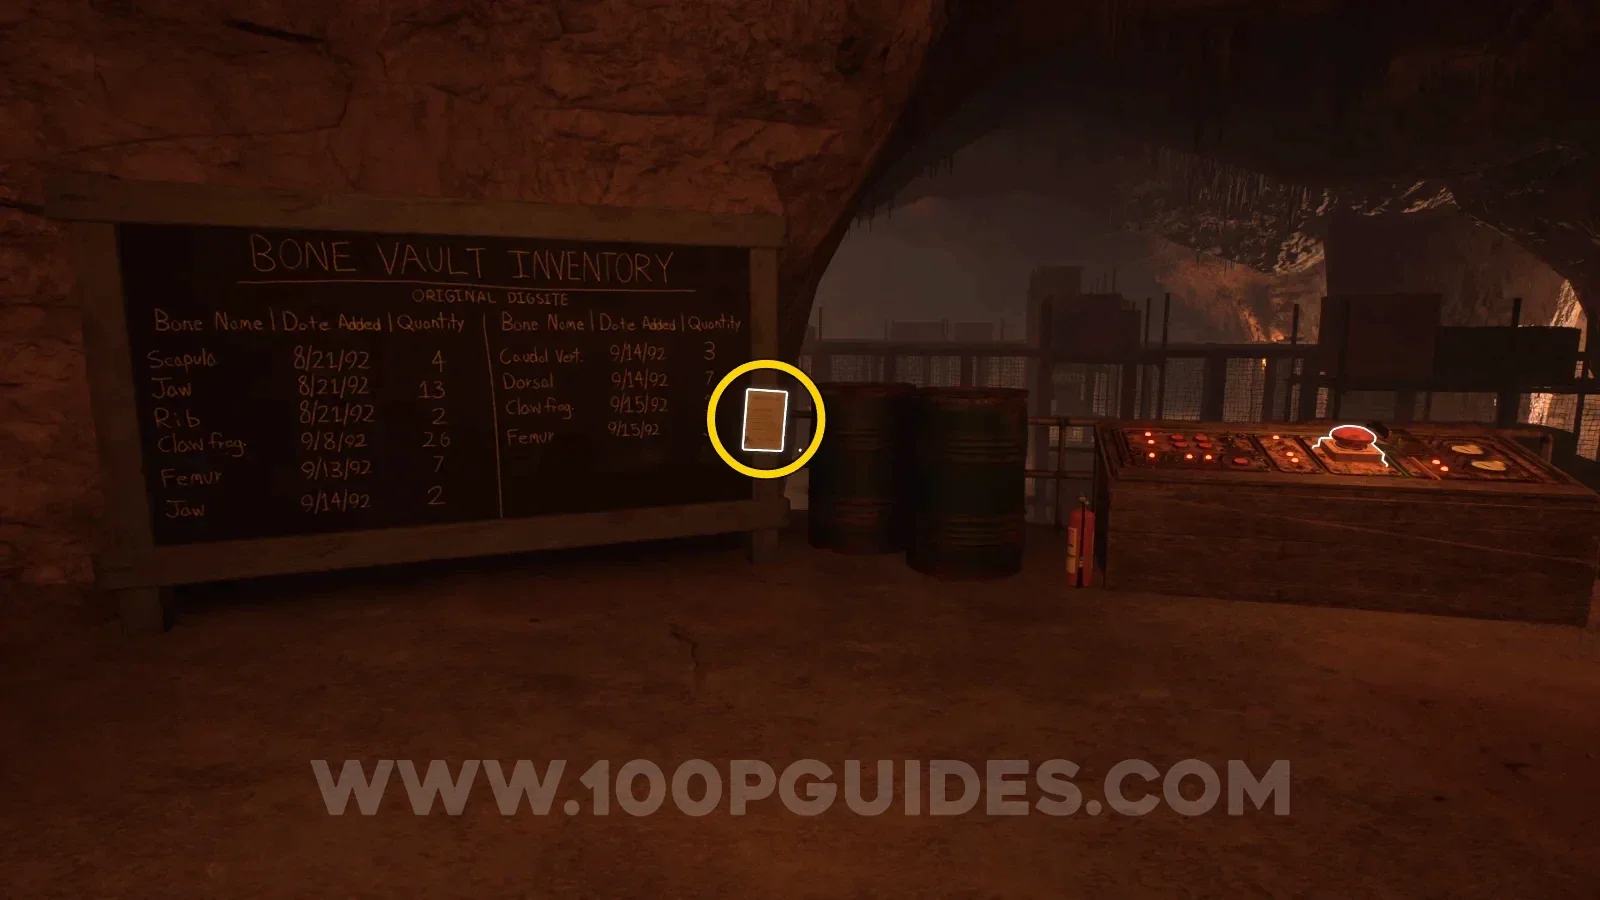
NoteBone Vault RecordsImage reviewed |
Bone Vault Inventory board: check the paper attached to its right edge, beside the red-button control. Location image ↗ Open collection entry ↗ |
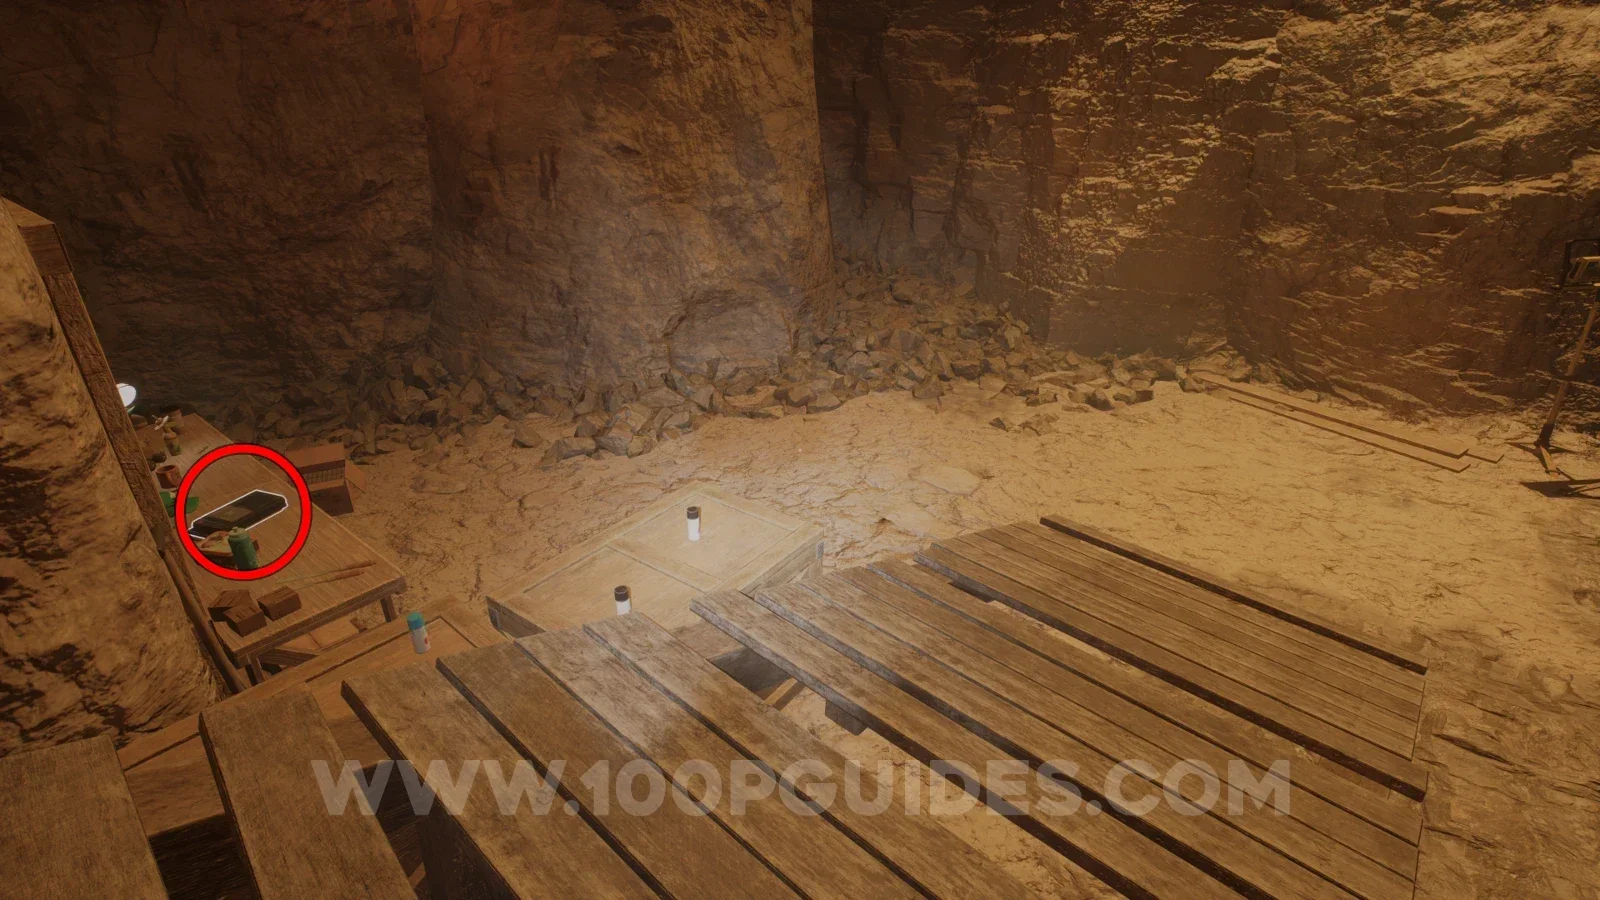
Audio tapeDalton Coolidge: The "Propaganda"Image reviewed |
Initial digsite side cavern: at the wooden ramp’s lower end, check the workbench against the rock wall. Location image ↗ Open collection entry ↗ |
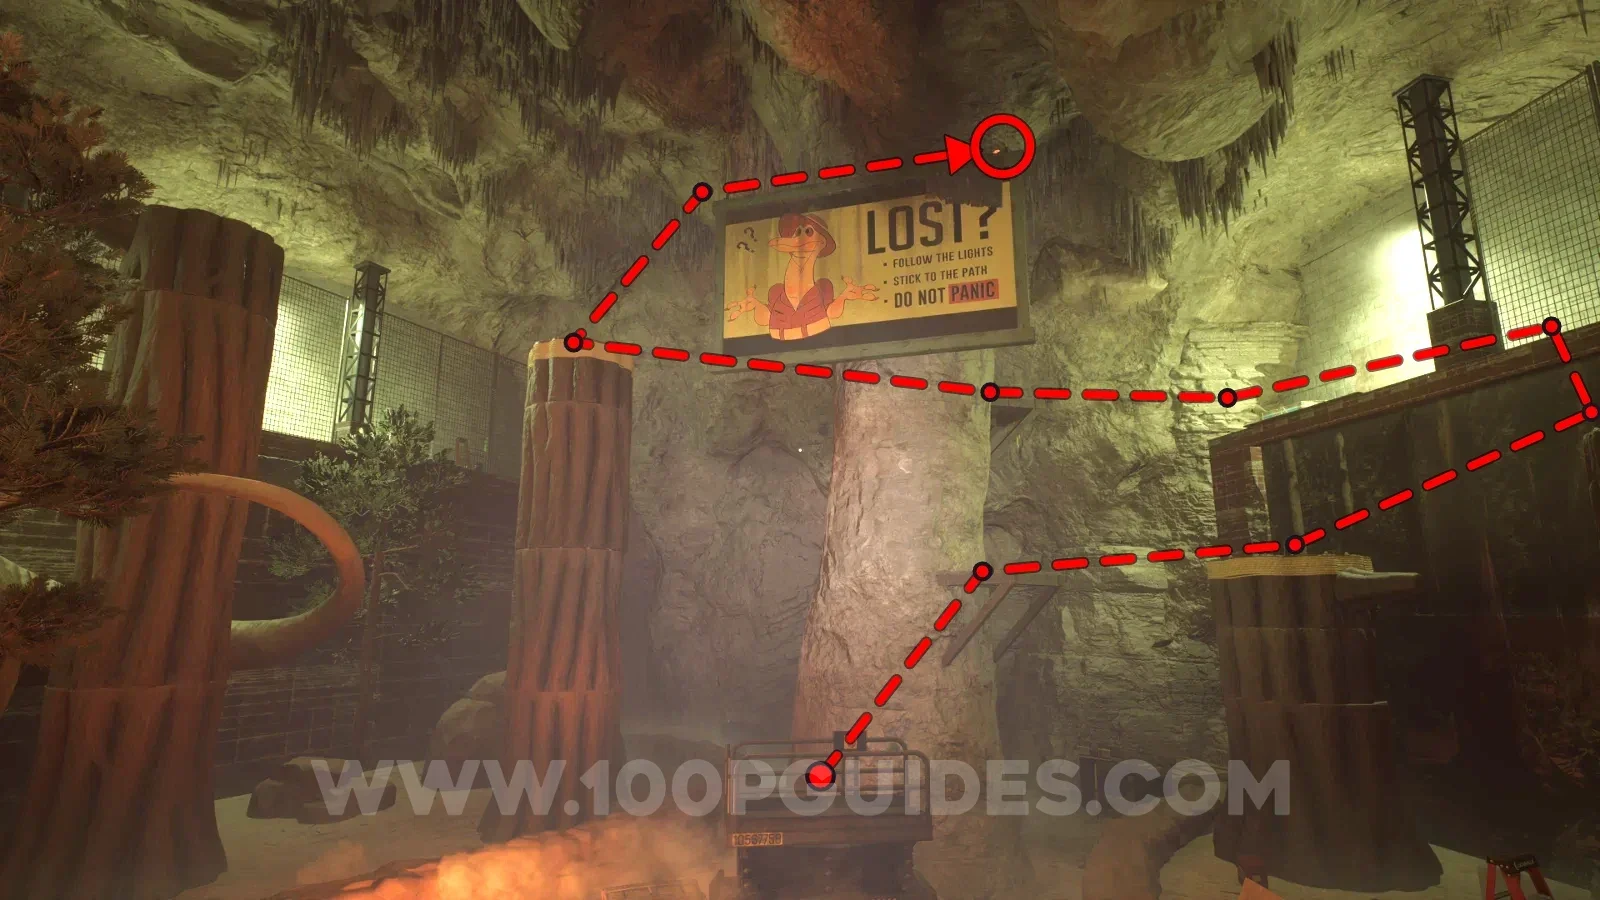
AmberAmber 05 |
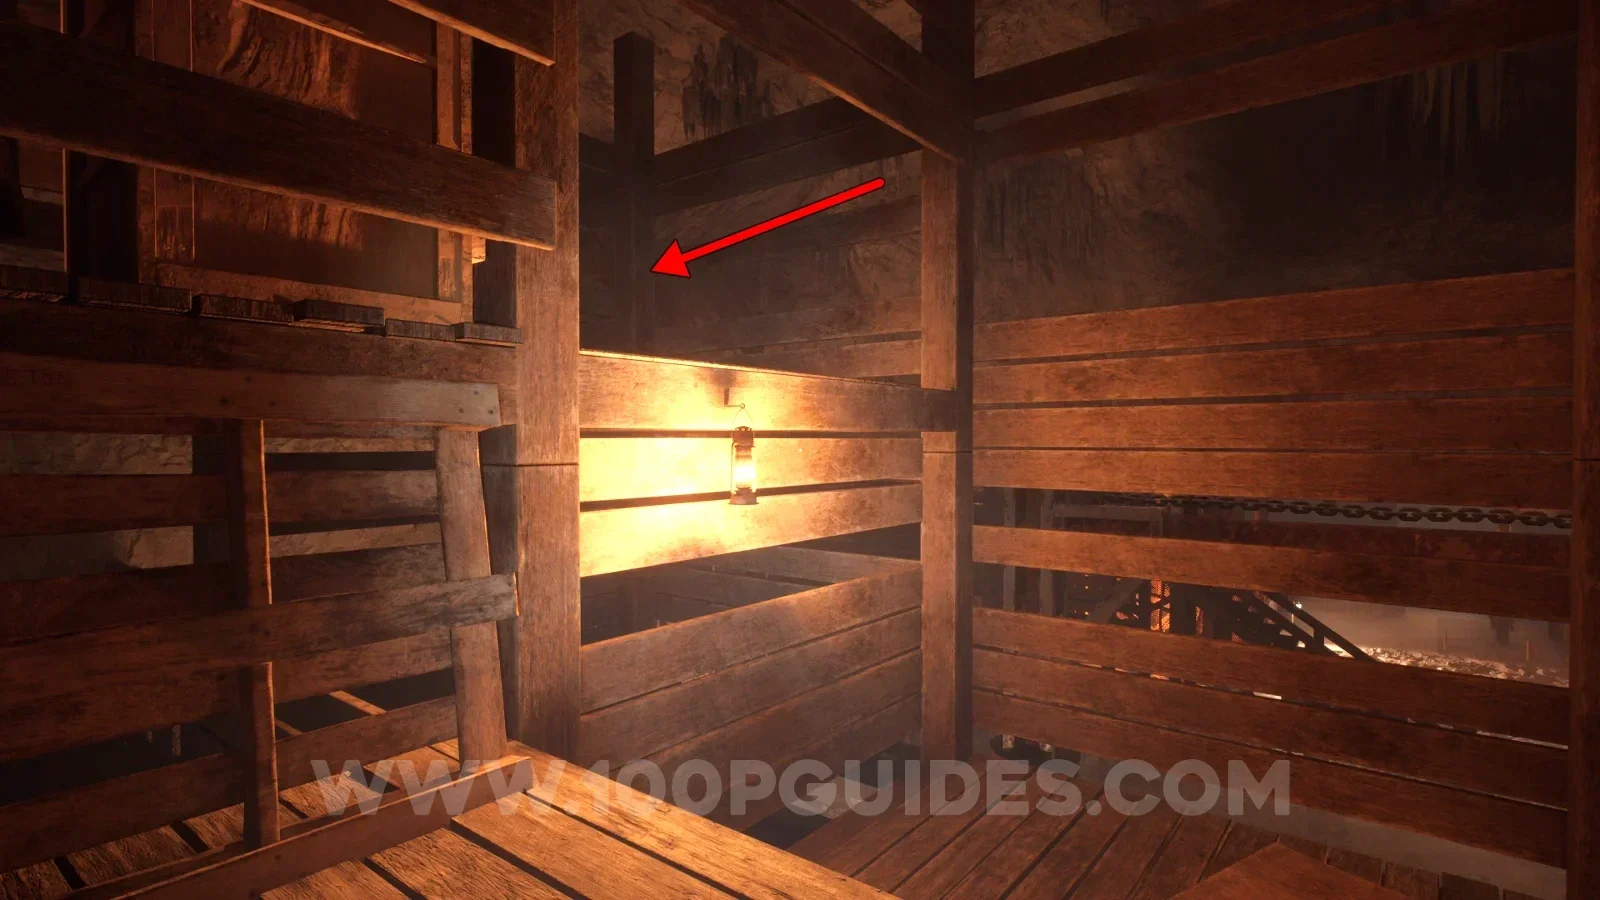
Above red-button sign; approach via pillar and trunk. View 05 ↗ Open collection entry ↗ |
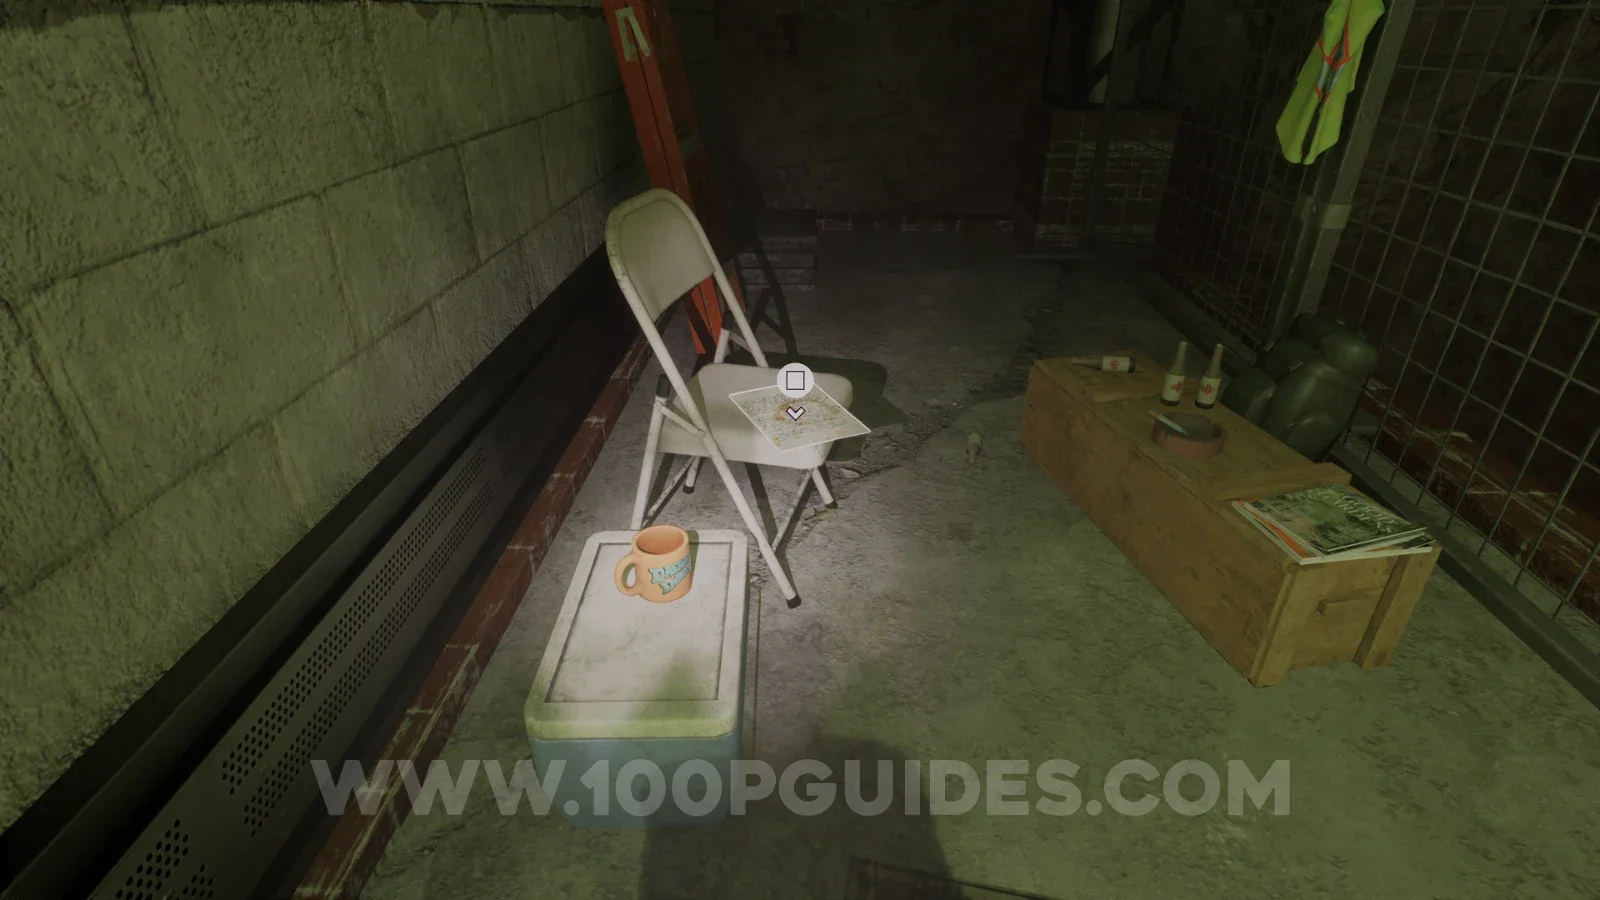
NoteBreak RoomImage reviewed |
In the fenced passage, check the white folding chair beside the cooler and cup; bottles sit on the crate below. Location image ↗ Open collection entry ↗ |
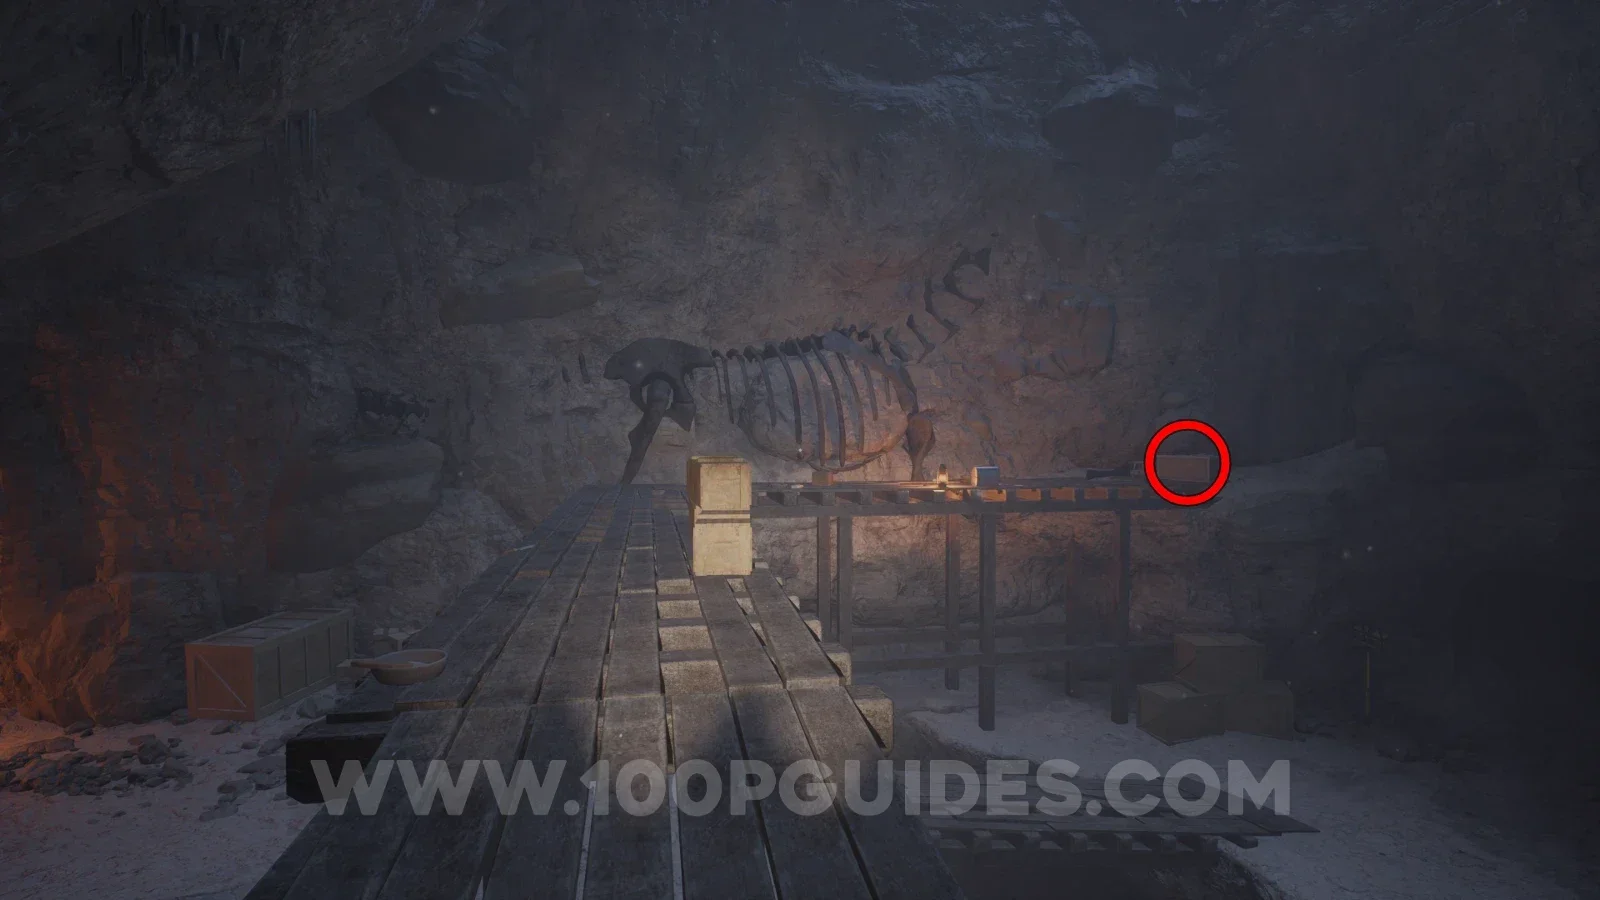
NoteStella's Journal Entry: Special DigsiteCommunity report |
Reported route: Beyond the generator gate: crate beneath the large exposed bones. Final pickup not confirmed here. Reference image ↗ Report this location ↗ Open collection entry ↗ |
Chapter 2: Crane route and flooded passages
Story objective: Salvage the keypad parts, then finish the cavern switches and emergency shutoffs. Open the steps.
Checkpoint: The water route is safe to cross after the shutoff objective. Collectible detours below may span the approach and return route.
| Stop | Location and reference |
|---|---|
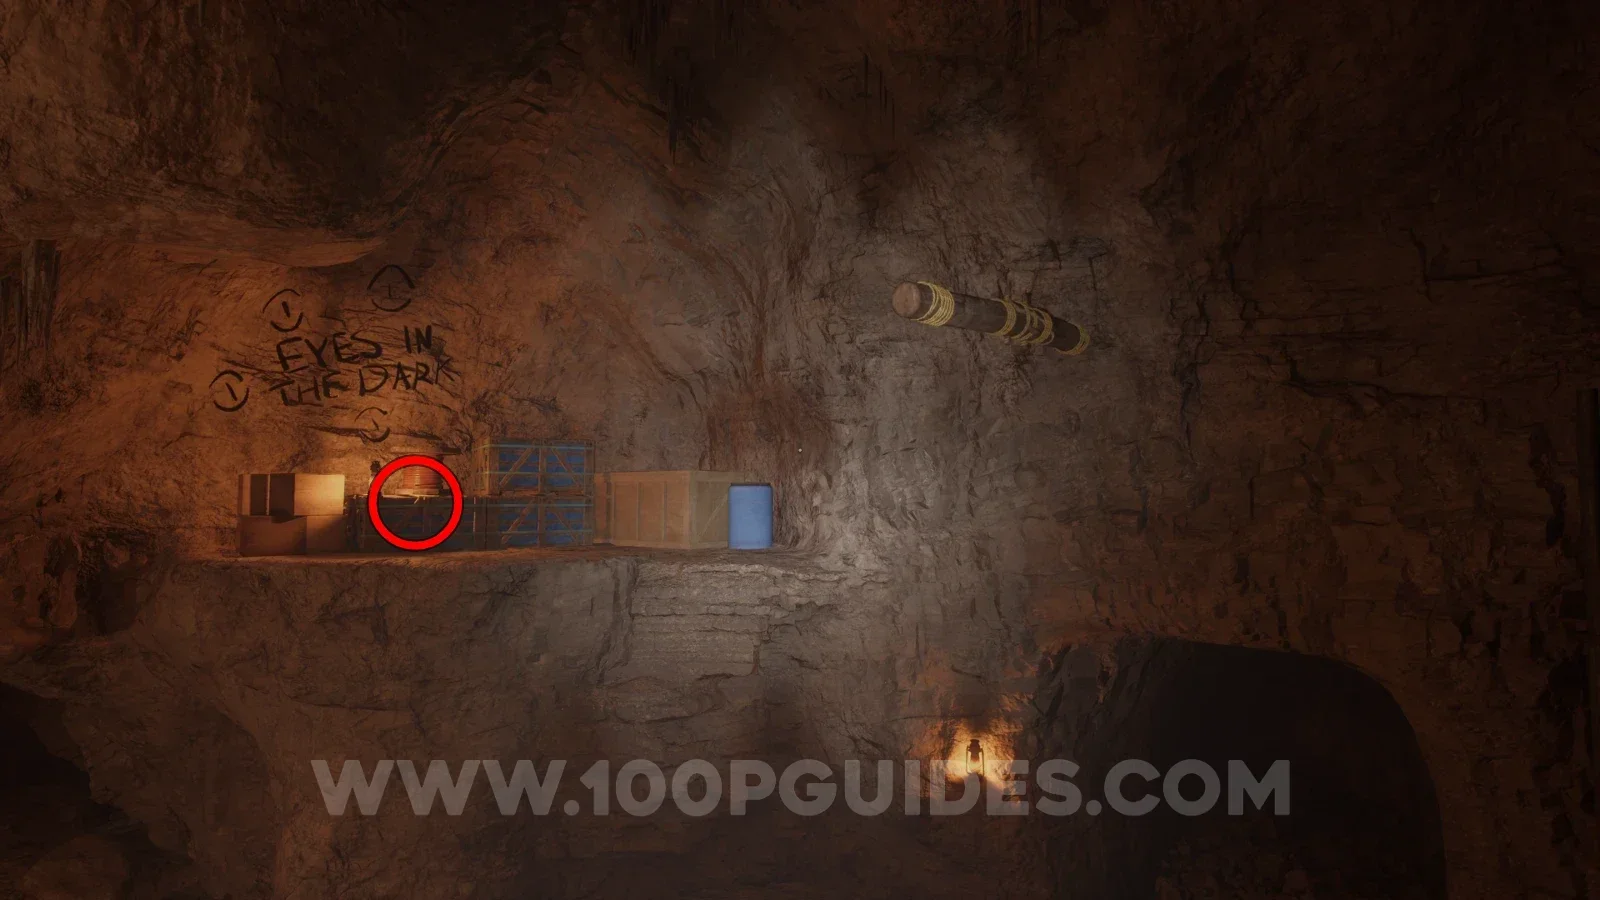
NoteEyes in the darkImage reviewed |
Below the EYES IN THE DARK graffiti, look on the raised ledge with stacked blue boxes and a work light, near the yellow swing bar. Location image ↗ Open collection entry ↗ |
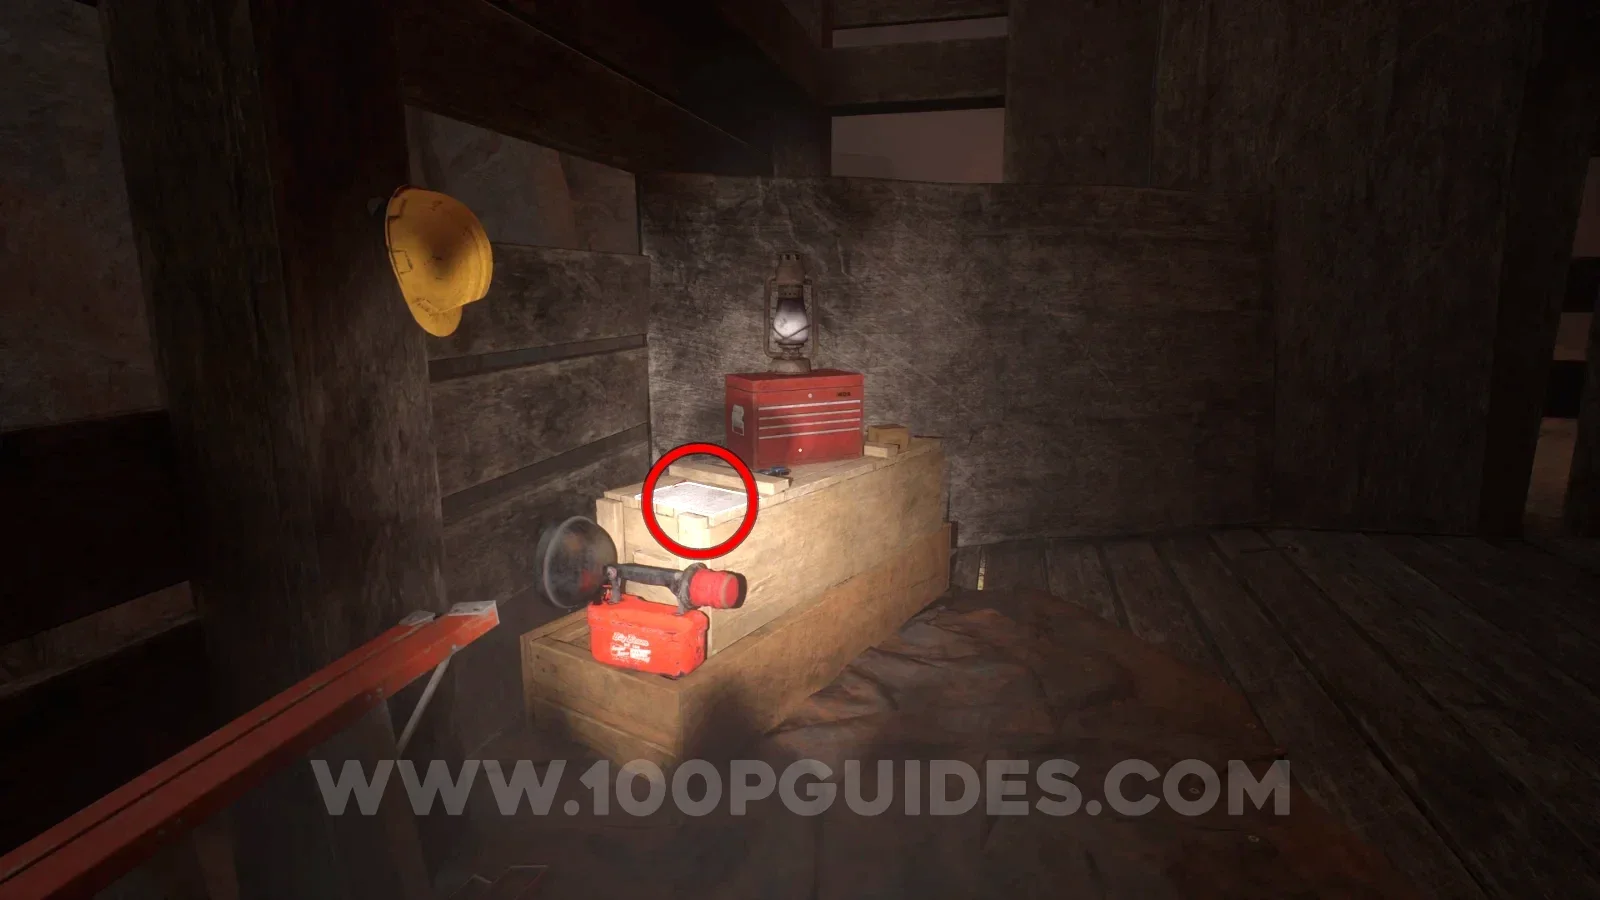
NoteAdrenaline Junkie: HiredImage reviewed |
Inside the timber support structure, check the box beside the red toolbox and lamp. A yellow hard hat hangs on the adjacent post. Location image ↗ Open collection entry ↗ |
NoteMovable PlatformsCommunity report |
Reported route: After the Bronto chase and squeeze gap: check the wall-mounted tools. Final pickup not confirmed here. Reference image ↗ Report this location ↗ Open collection entry ↗ |
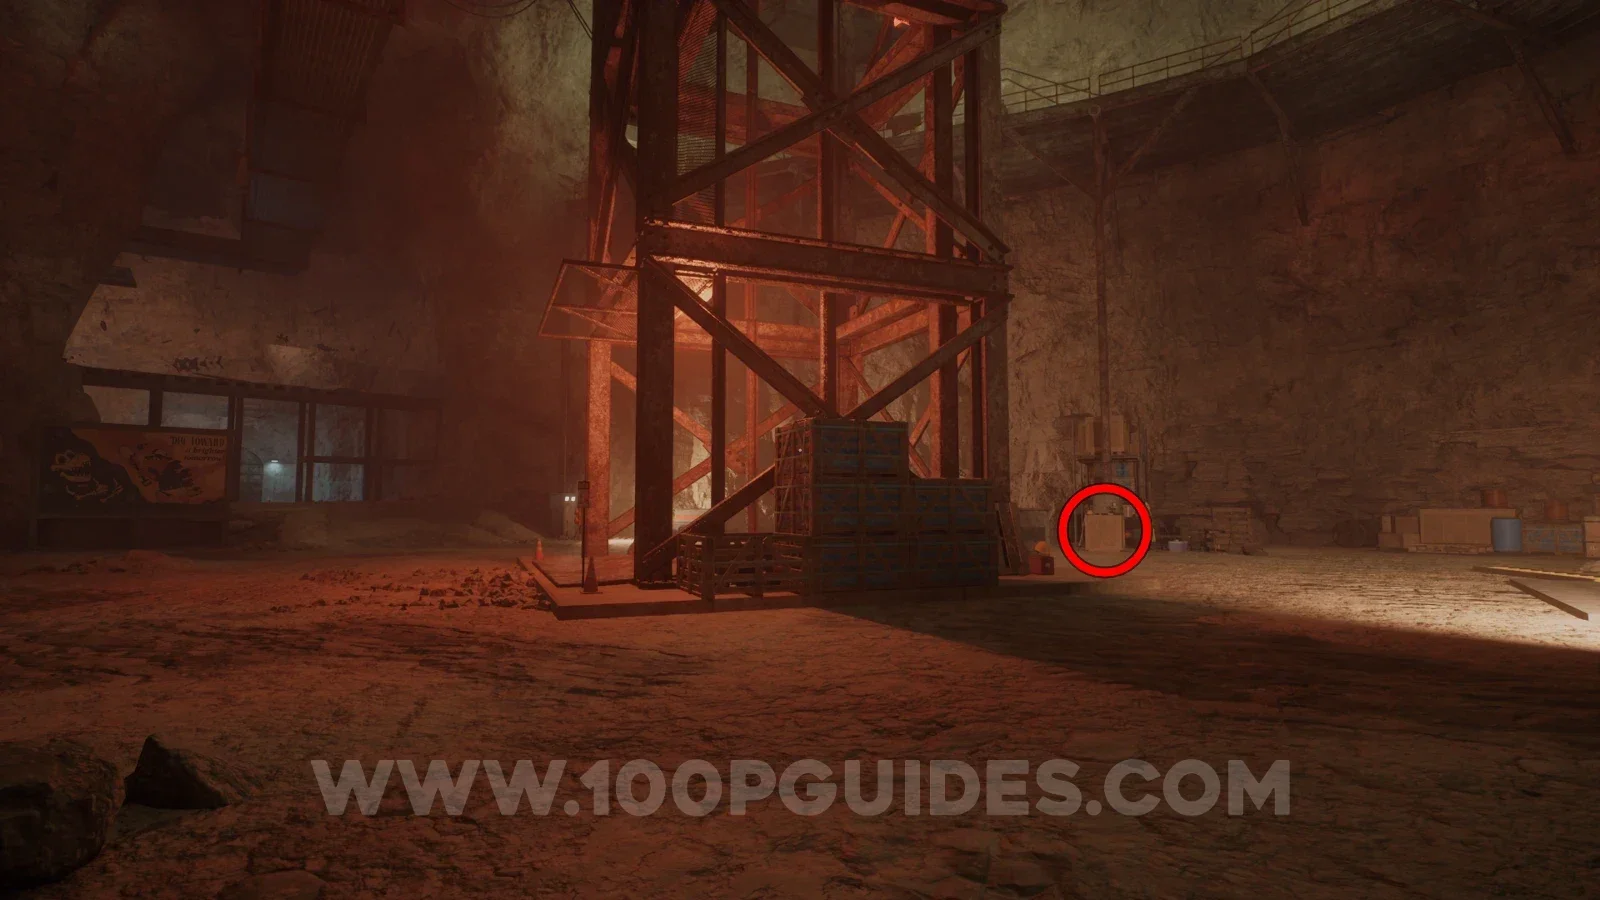
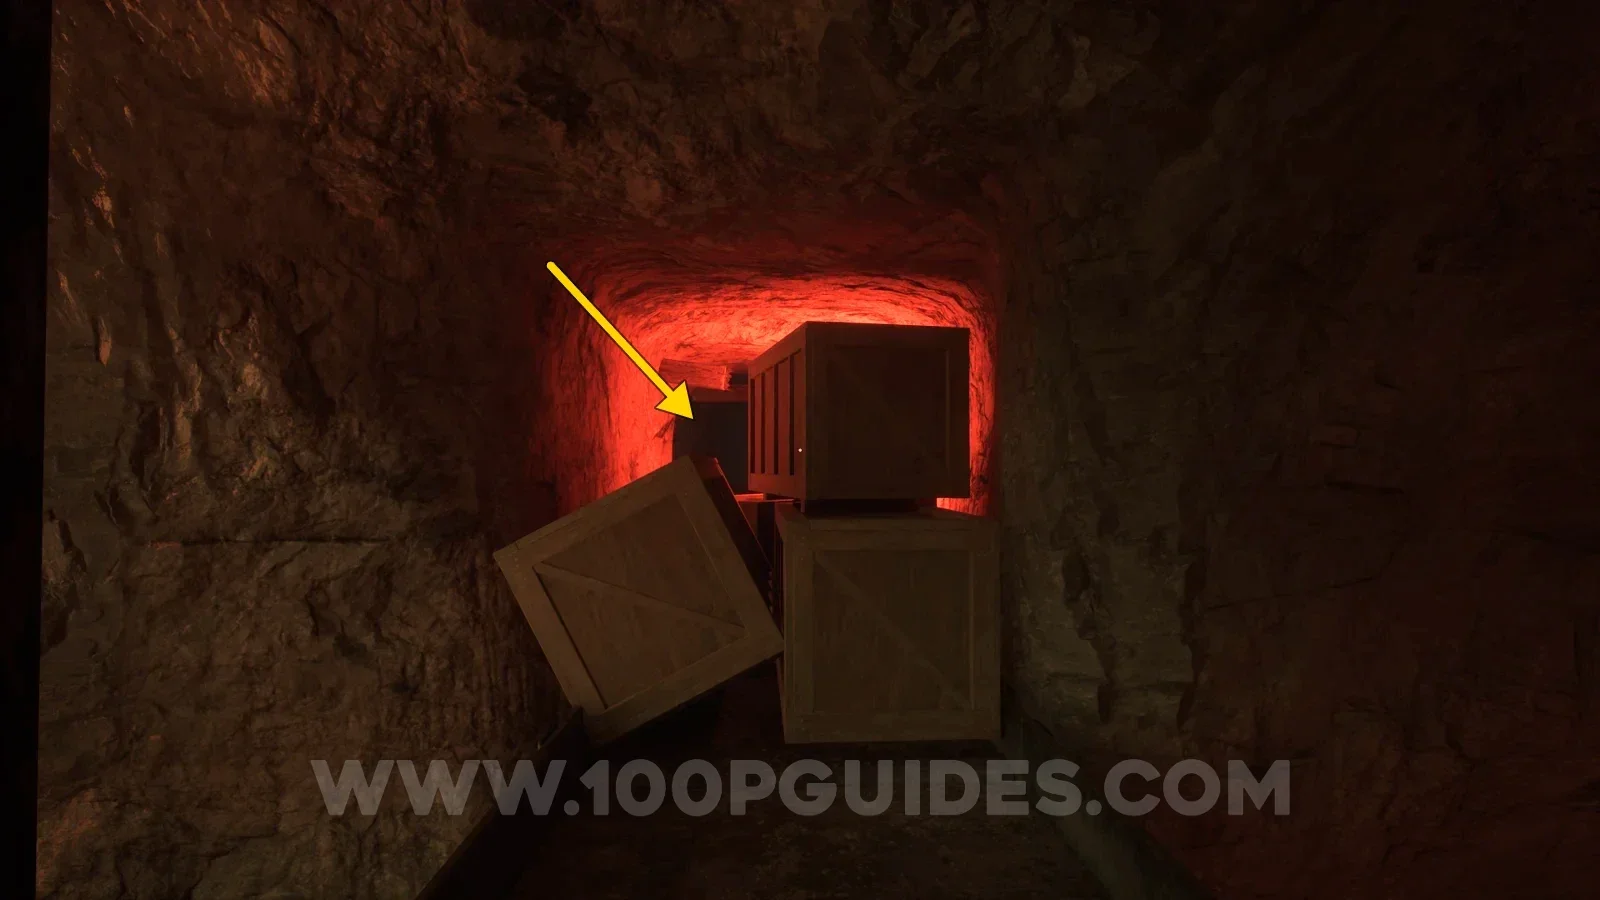
Audio tapeDES Site Managers: Inner Circle DiscussionImage reviewed |
Empty lift-shaft chamber: look beside the stacked crates at the base of the tall steel shaft frame. Location image ↗ Open collection entry ↗ |
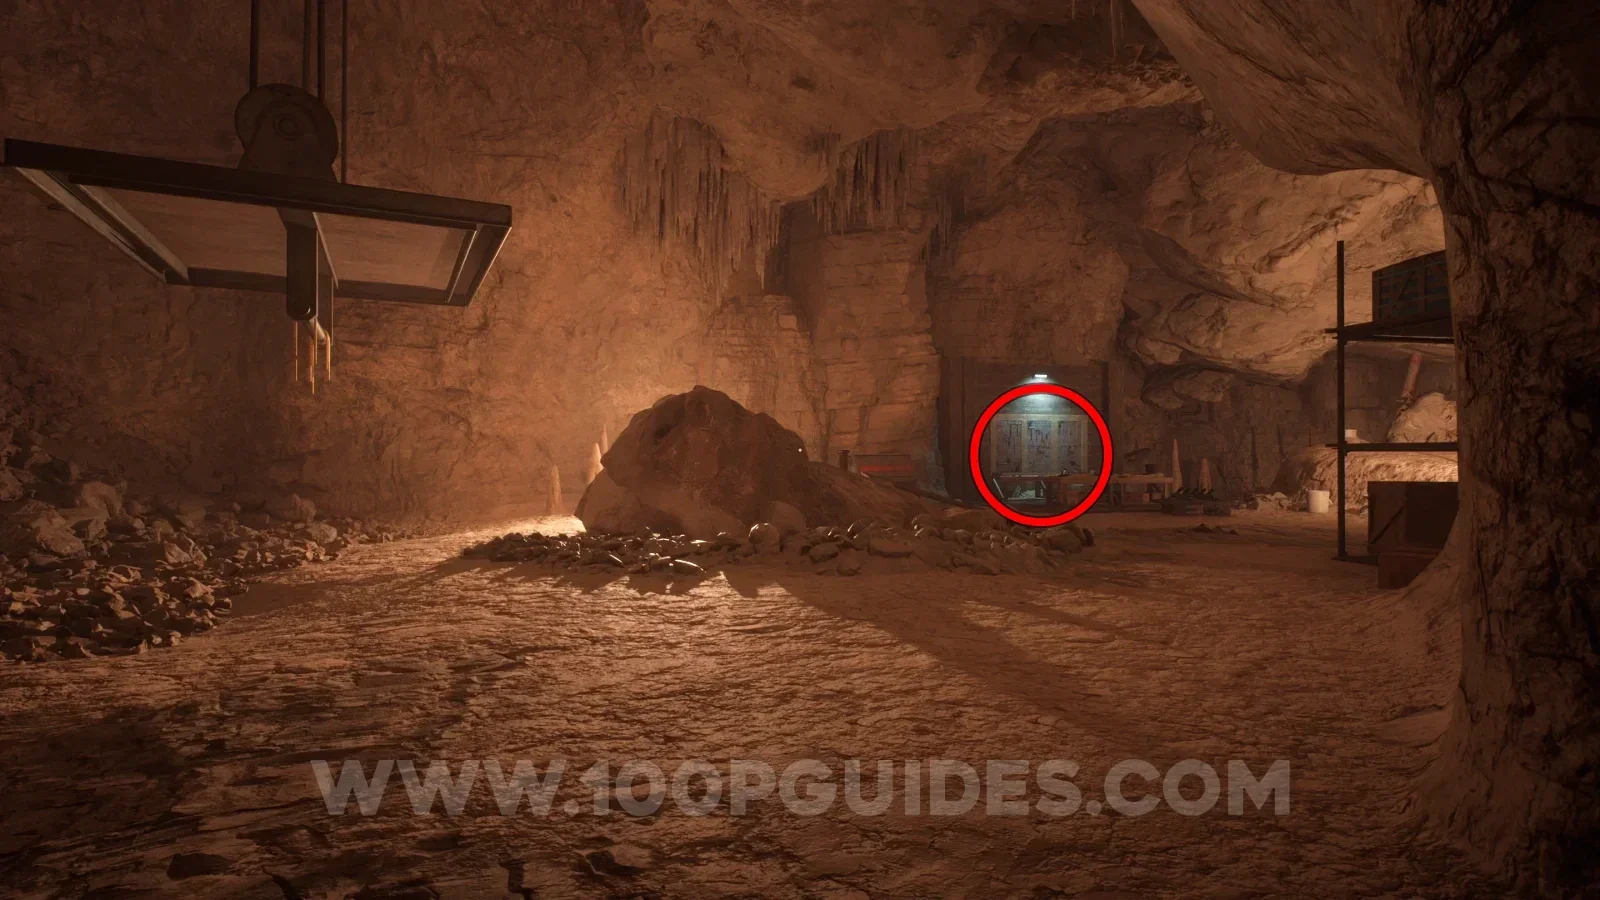
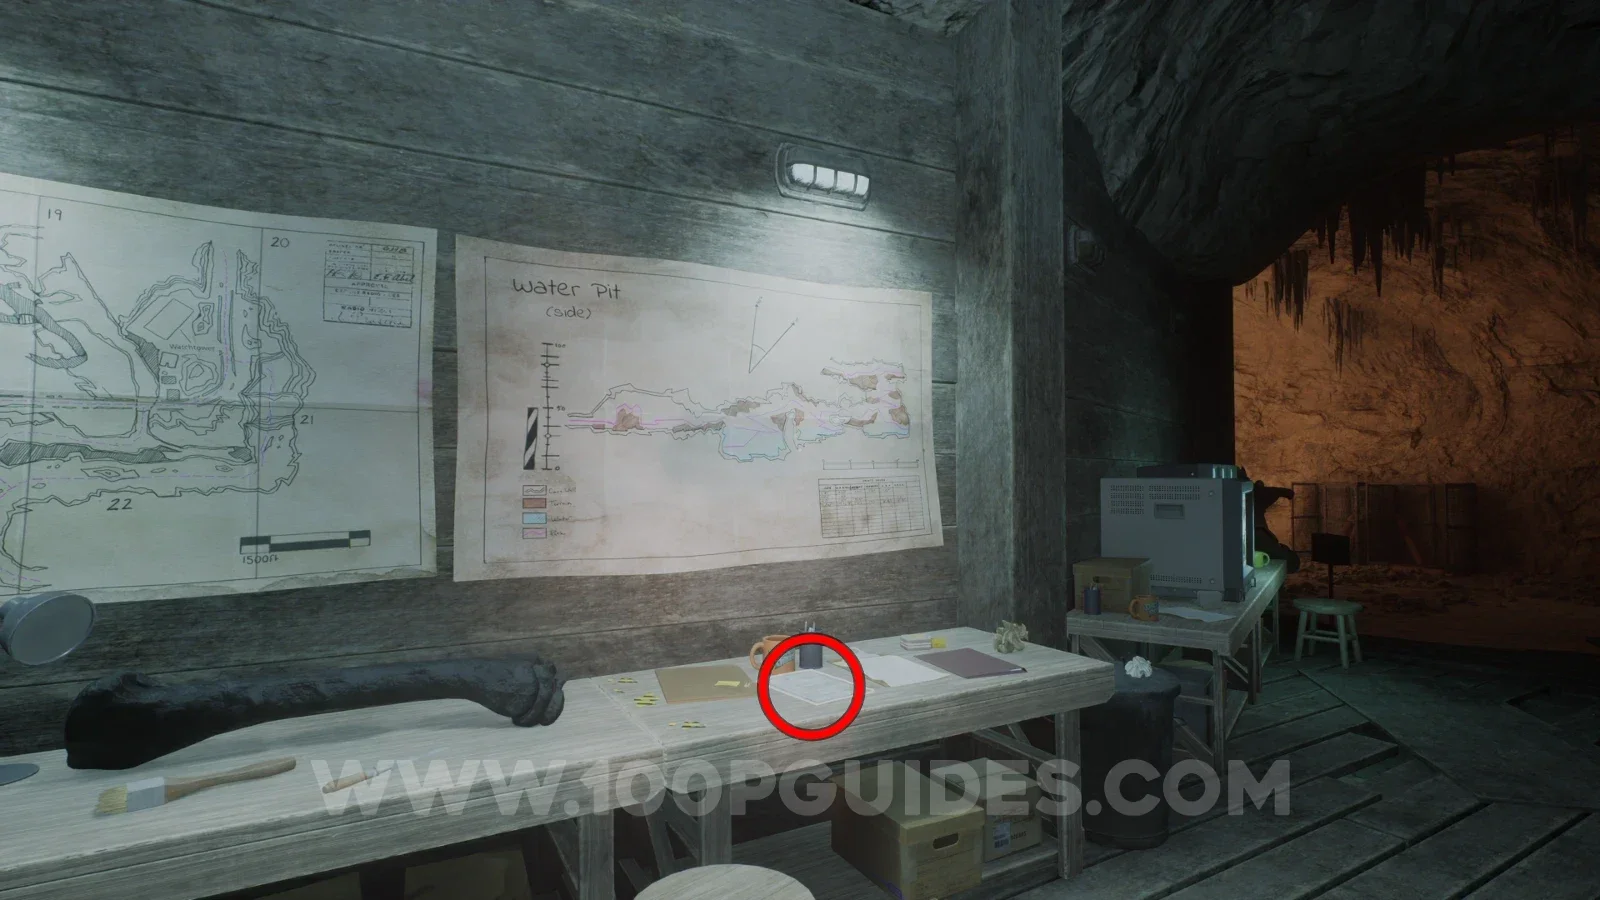
NoteDigsite ReportImage reviewed |
Equipment cave: examine the wooden desk below the two large terrain drawings; the paper is between the cup and folders. Location image ↗ Open collection entry ↗ |
AmberAmber 06 |
Box-obstructed side cave off the hanging-metal walkway. View 06 ↗ Open collection entry ↗ |
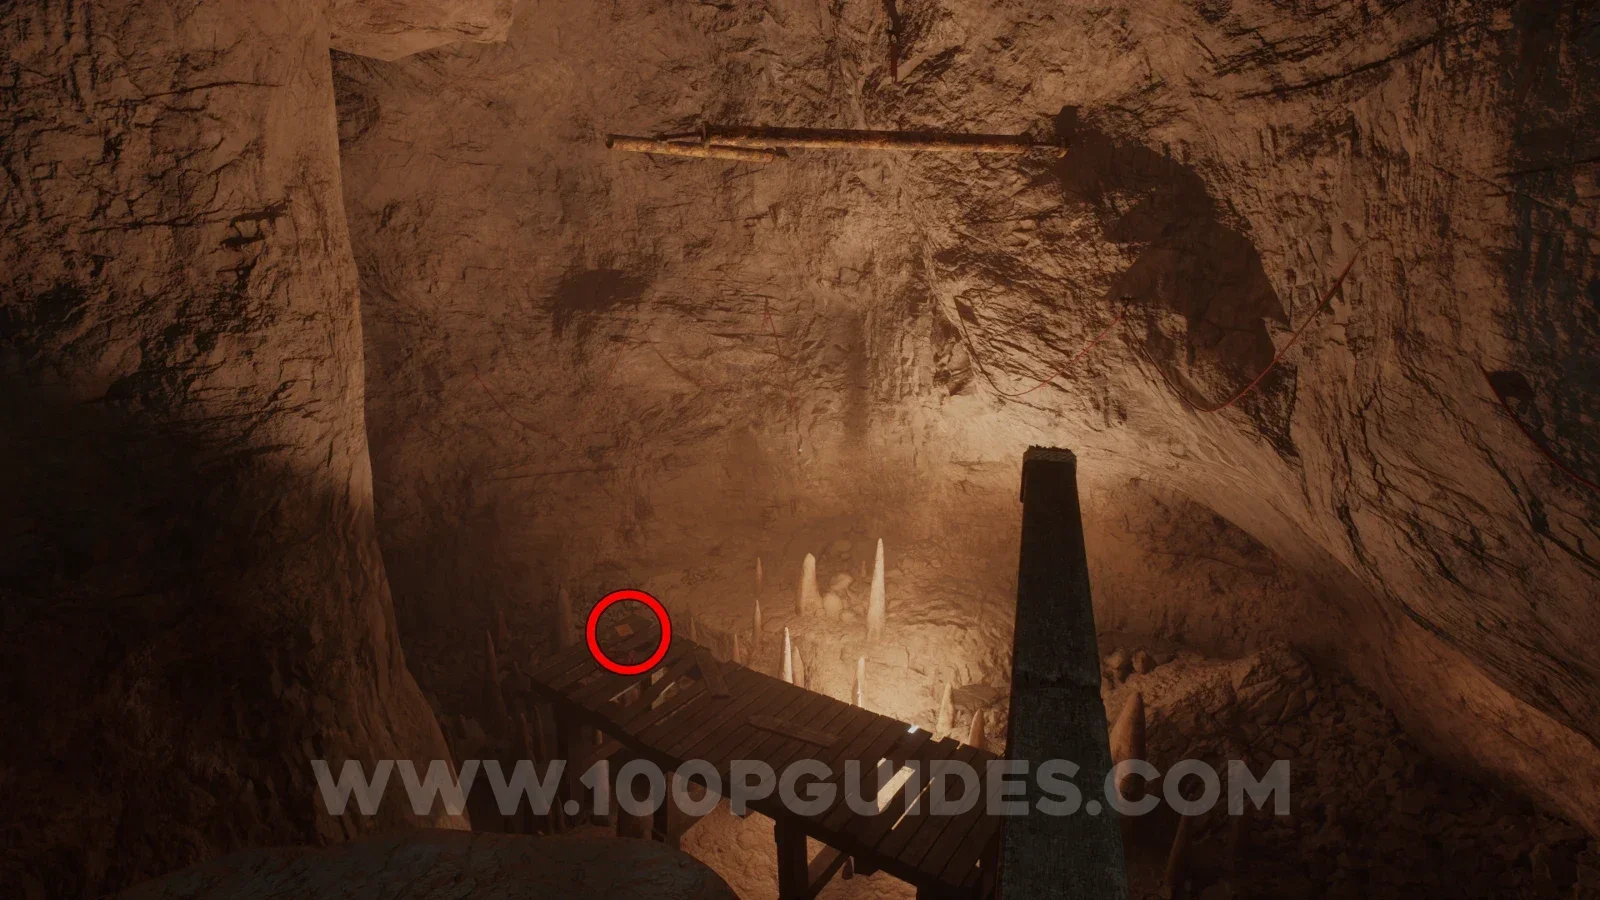
NoteGoo?Image reviewed |
Look down from the swing-bar crossing toward the lower wooden walkway beside the pointed rock column. The highlighted paper lies at its end. Location image ↗ Open collection entry ↗ |
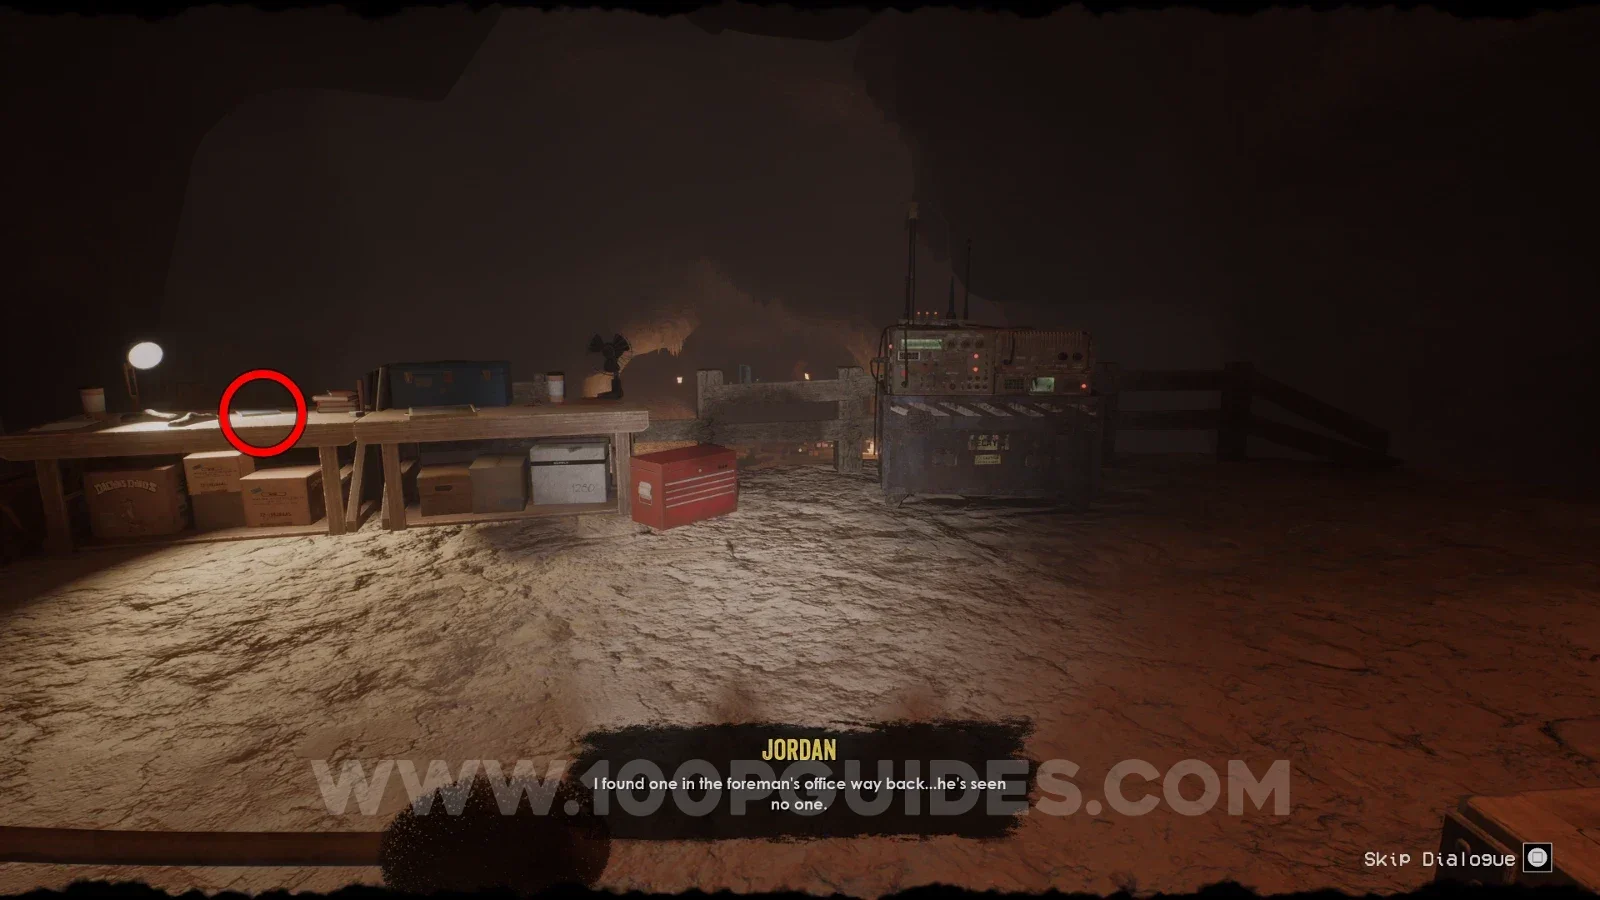
NoteOutpost ReportImage reviewed |
Communications outpost: inspect the lit workbench immediately beside the radio equipment, near the red toolbox. Location image ↗ Open collection entry ↗ |
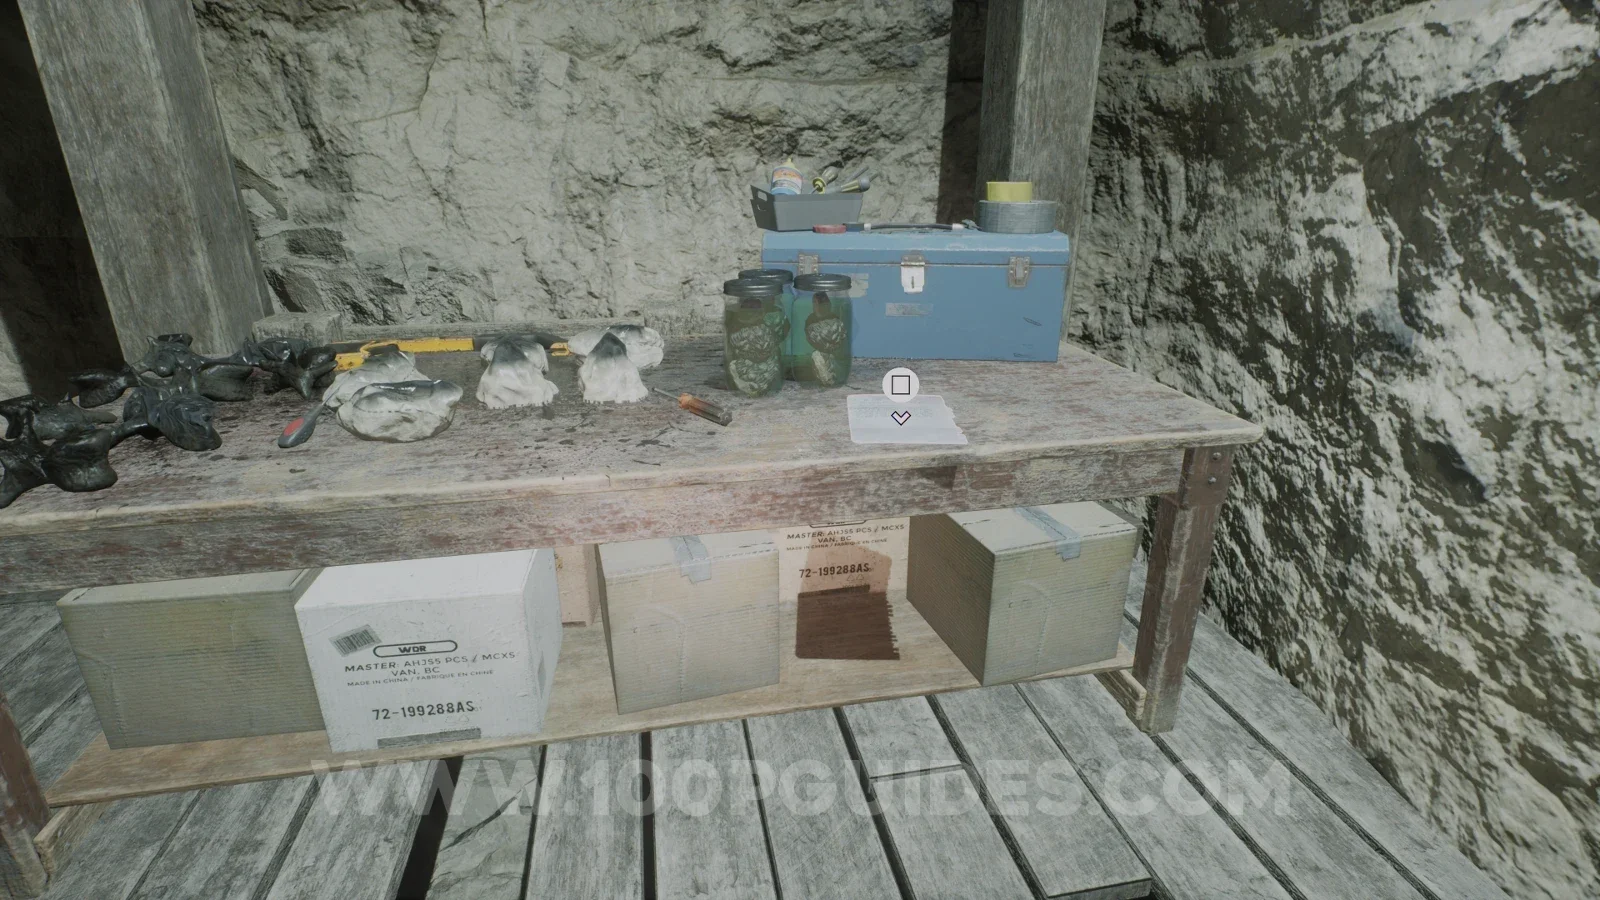
NoteStella's Journal Entry: Jan 10 1989Image reviewed |
Lit workstation near the Paleo Pal: check the table with specimen jars, fossil casts and the blue toolbox. Location image ↗ Open collection entry ↗ |
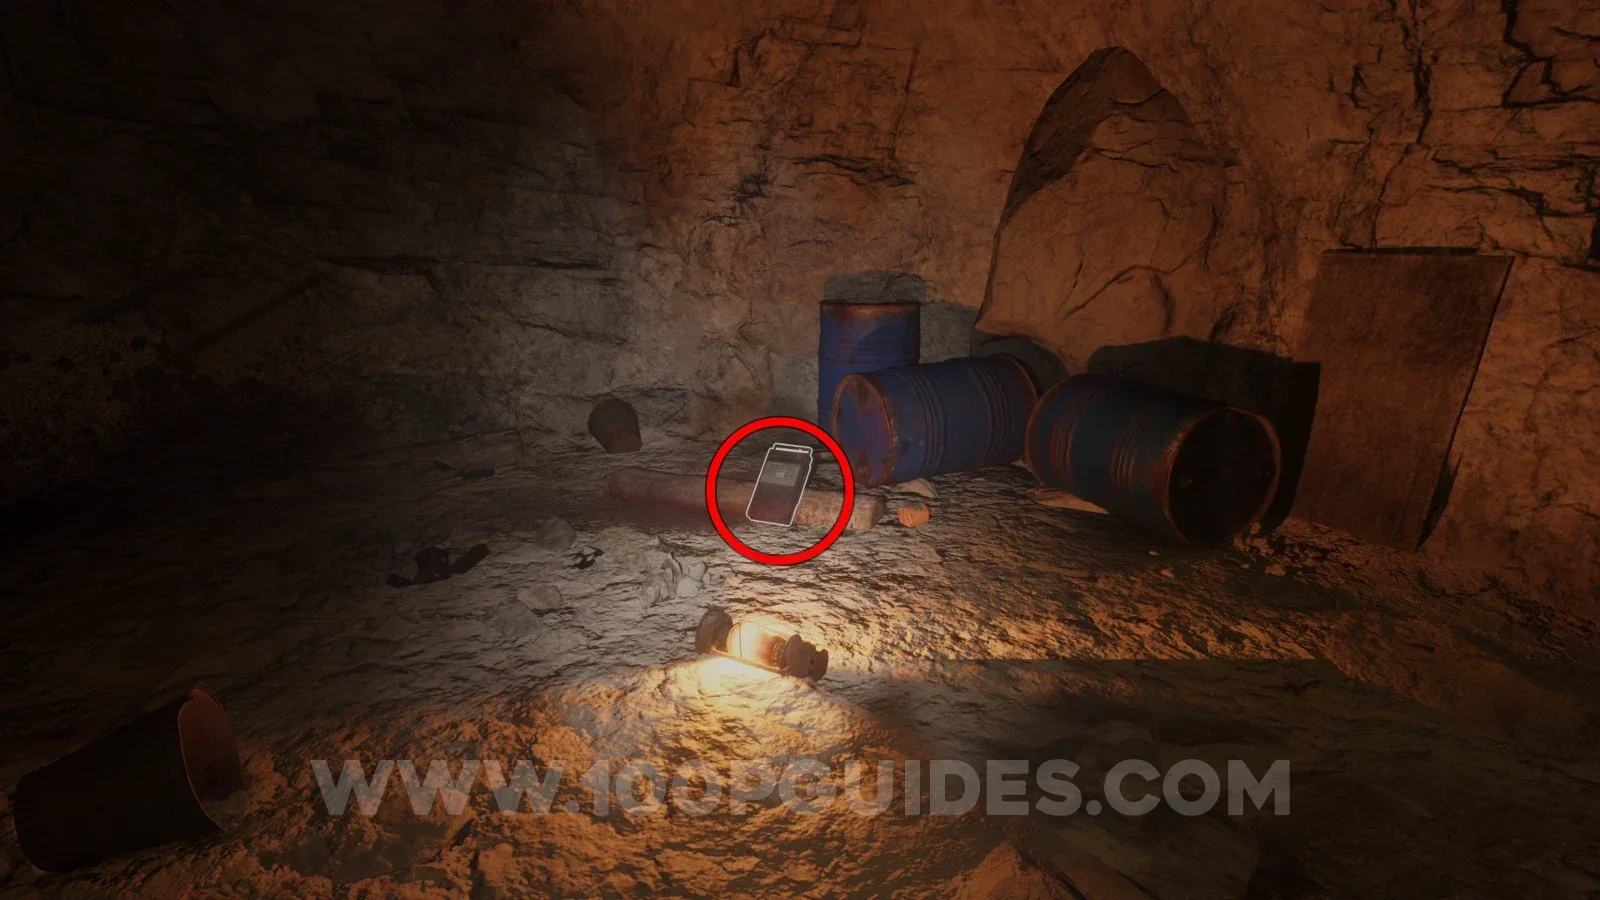
Audio tapeCrewmen: Campfire FunImage reviewed |
Campfire side room: examine the ground beside the blue barrels and fallen light. The source reaches it through the opened door by the Paleo Pal. Location image ↗ Open collection entry ↗ |
NoteNote Left BehindCommunity report |
Reported route: Beam-and-pillar chamber: left cave at the bottom of the wooden ramp. Final pickup not confirmed here. Reference image ↗ Report this location ↗ Open collection entry ↗ |
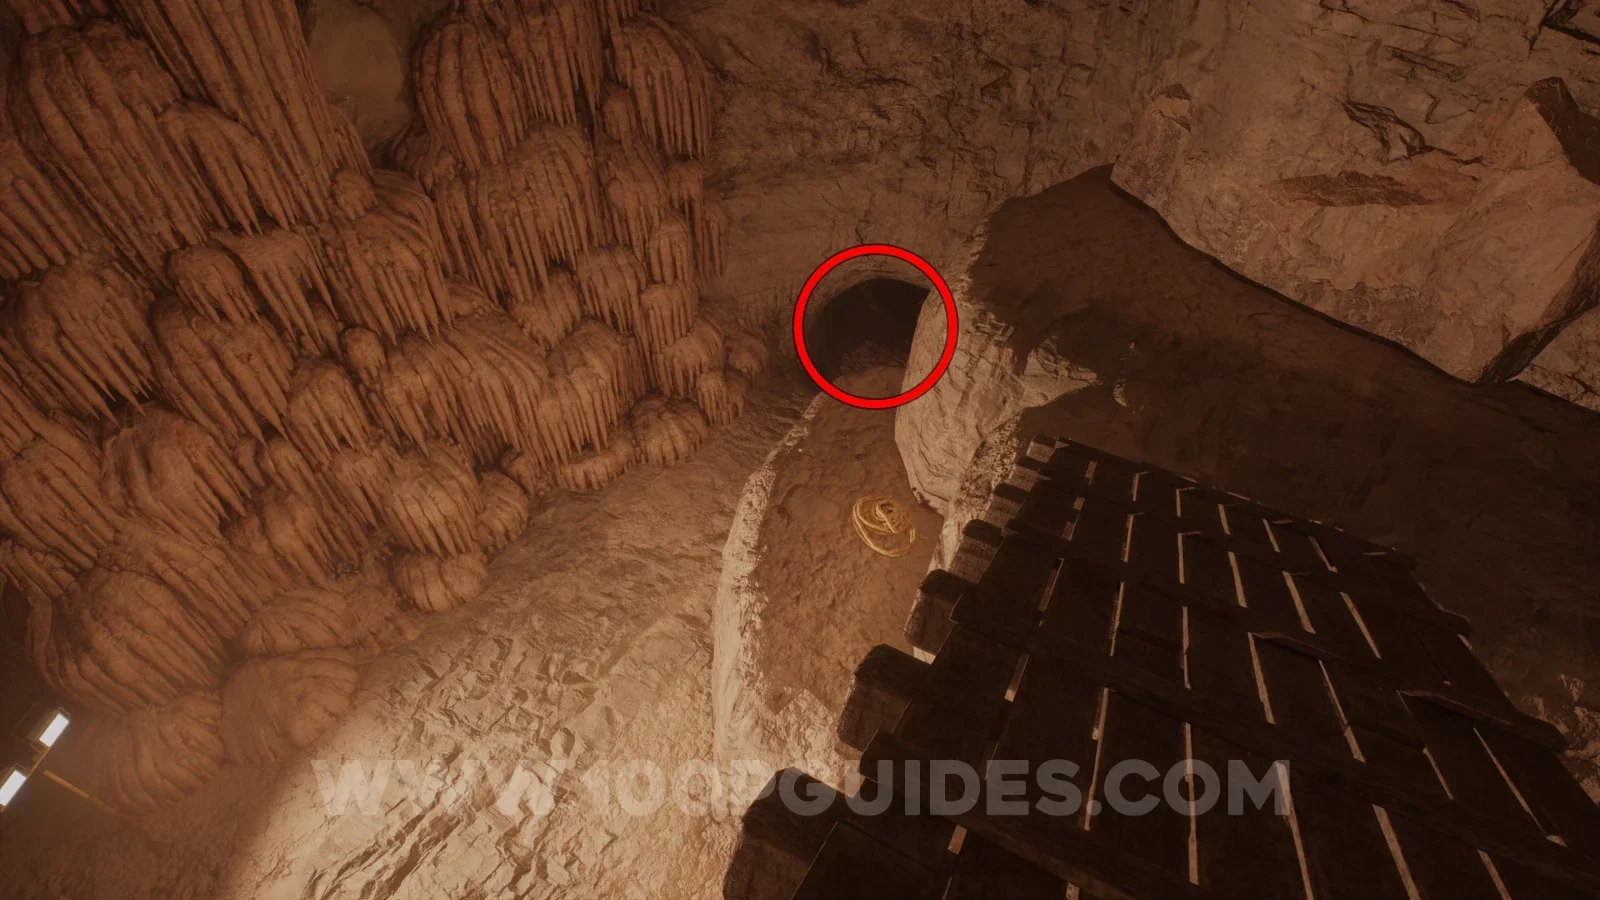
NoteFlooding?Community report |
Reported route: Beyond the hanging-beam climb: pass the boxes into the side cave. Final pickup not confirmed here. Reference image ↗ Report this location ↗ Open collection entry ↗ |
Chapter 2: Shaft and gondola approaches
Story objective: Take the shaft workshop fuse, restore the elevator and recover the gondola key. Open the steps.
Checkpoint: The padlocked gate can be opened after retrieving the key again. Collectible detours below may span the approach and return route.
| Stop | Location and reference |
|---|---|
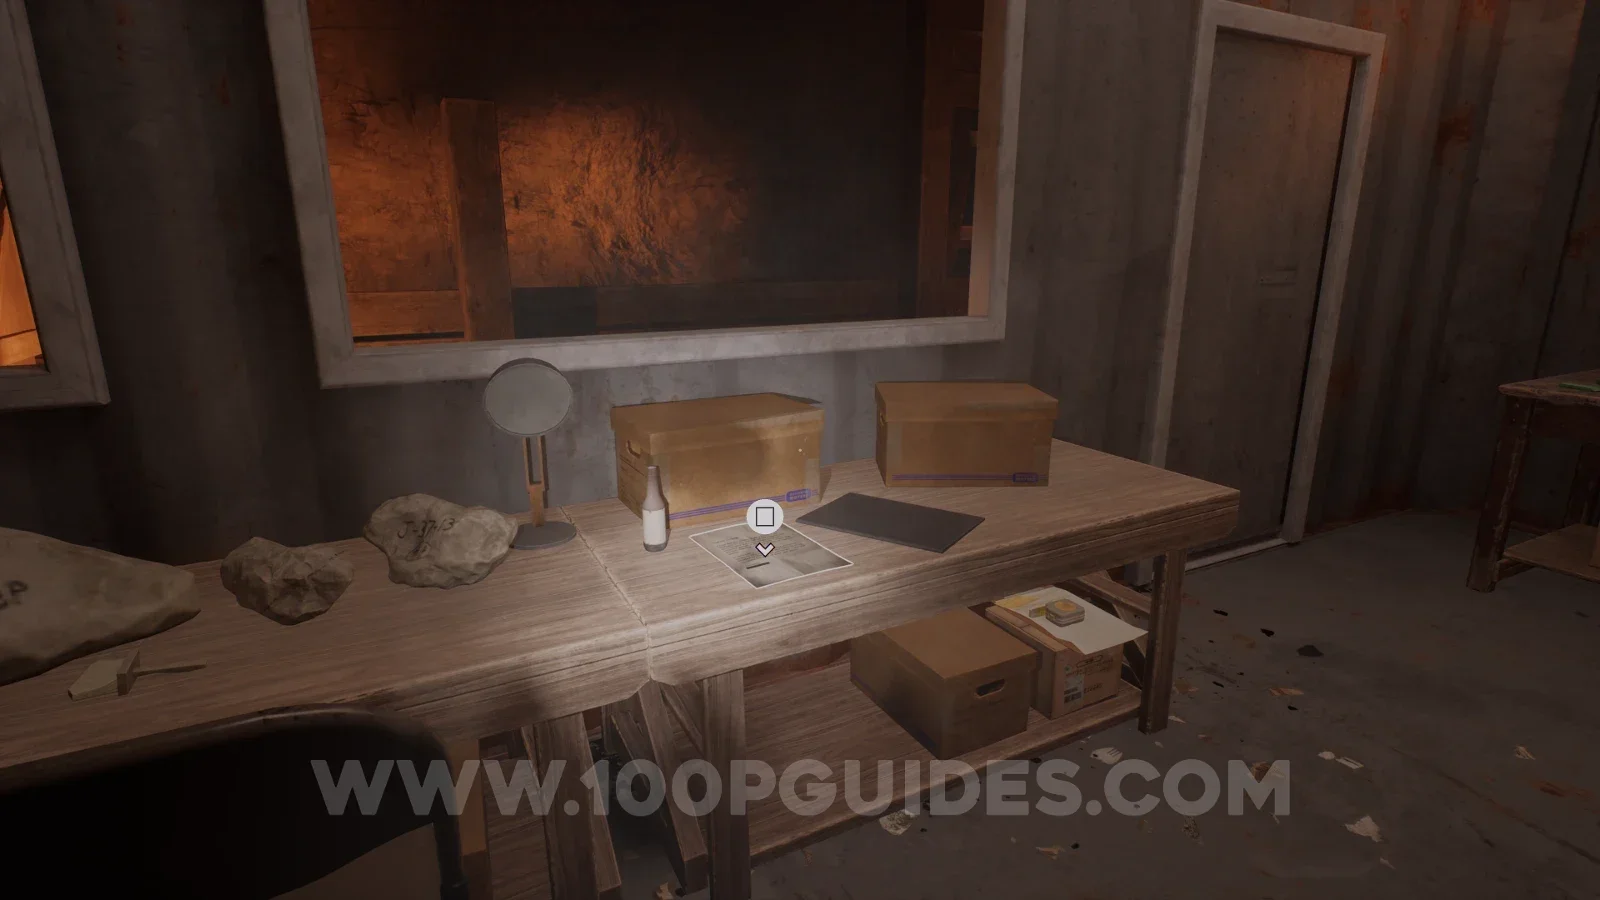
NoteNote from The Broker to DaltonImage reviewed |
Inside the wooden room, check the letter on the desk below the window, in front of the rock samples, lamp and two boxes. Location image ↗ Open collection entry ↗ |
NoteDalton Jr. Journal Entry: Mama's GoneCommunity report |
Reported route: Hanging-box swing area: look down toward the pallet-covered bed. Final pickup not confirmed here. Reference image ↗ Report this location ↗ Open collection entry ↗ |
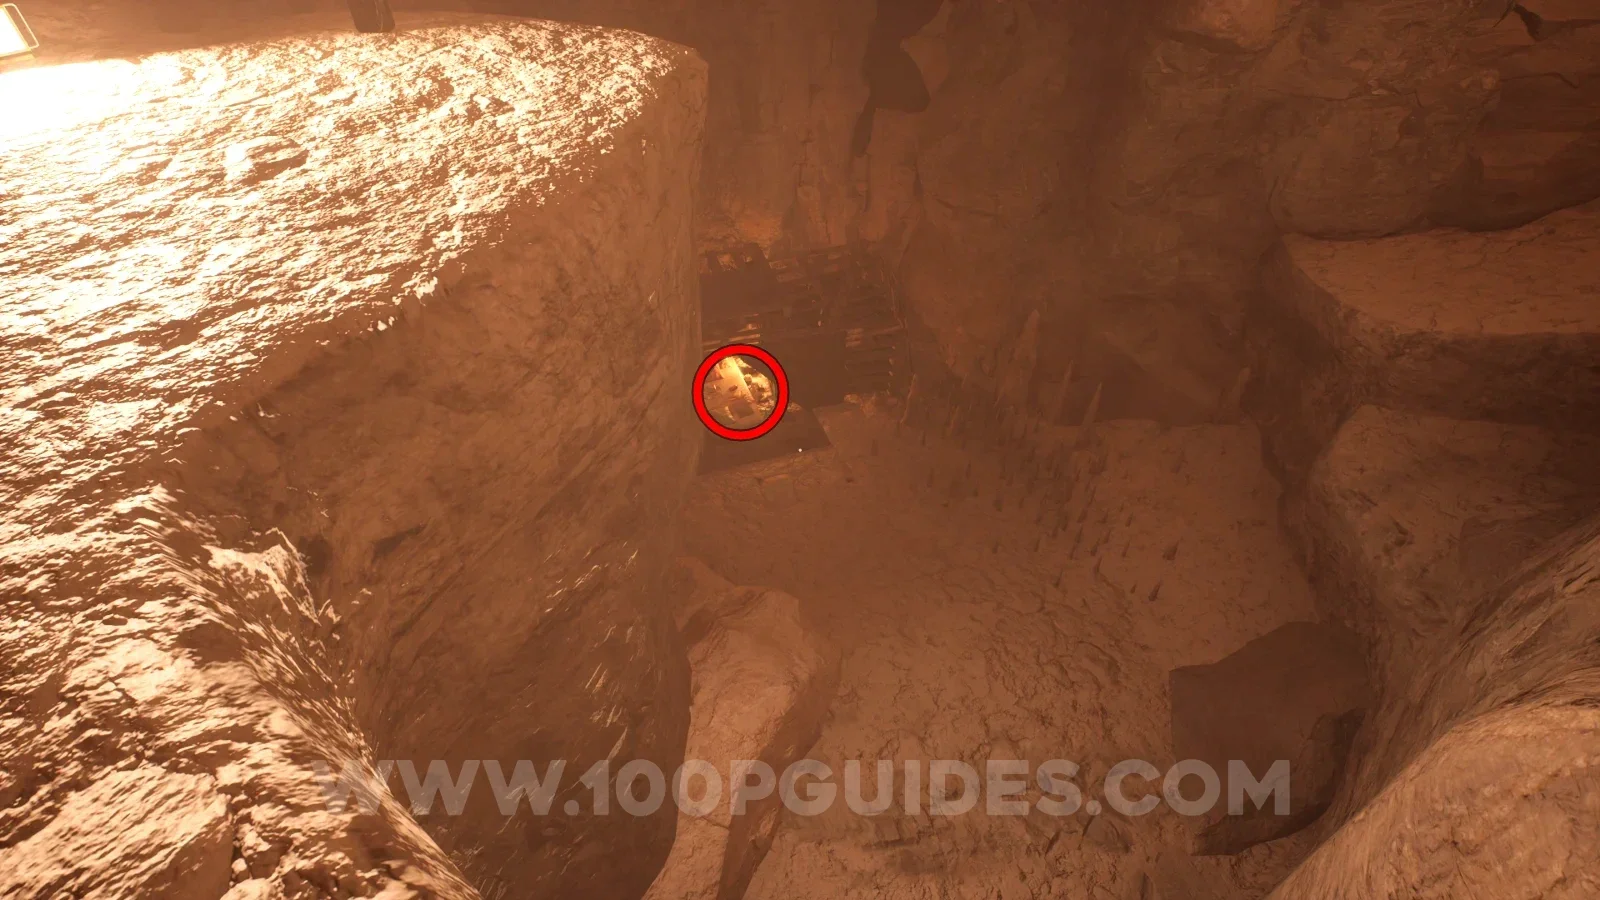
AmberAmber 07 |
Lift-shaft side cave, beyond angled barrel platform. View 07 ↗ Open collection entry ↗ |
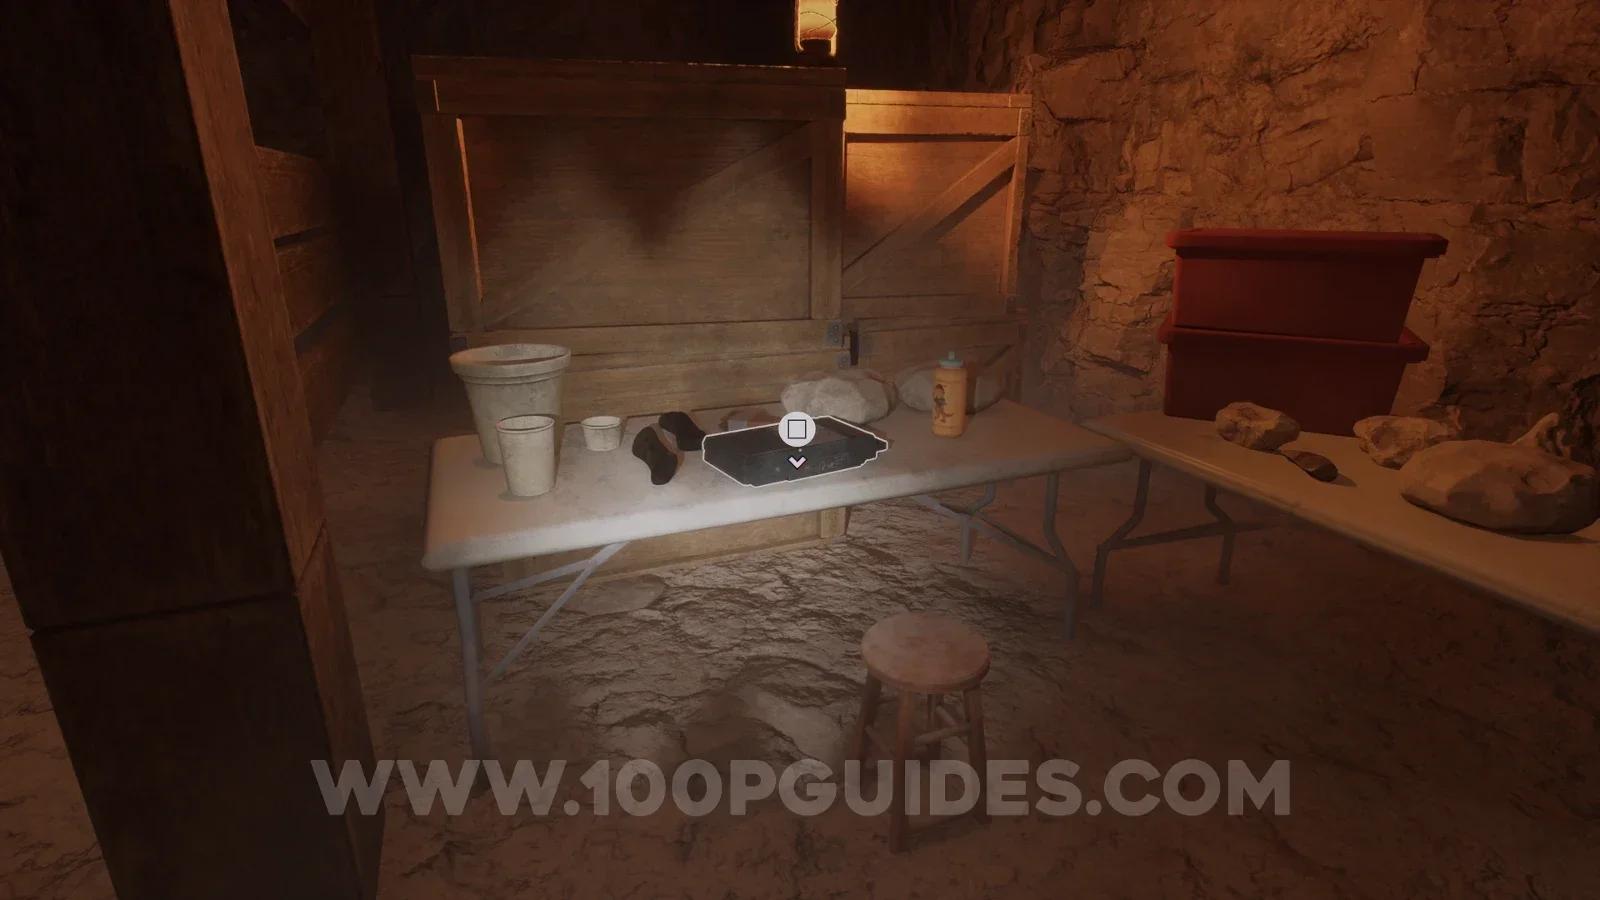
Audio tapeDalton Coolidge: Selling the FossilsImage reviewed |
Bottom of the lift shaft: enter the wooden work area. Check the folding table with cups and gloves beside the rock samples. Location image ↗ Open collection entry ↗ |
NoteGondola HaterCommunity report |
Reported route: Lift-shaft wooden building: short ladder, left crate, then left opening. Final pickup not confirmed here. Reference image ↗ Report this location ↗ Open collection entry ↗ |
NoteDalton Jr. Journal Entry: DJ's thoughtsImage reviewed |
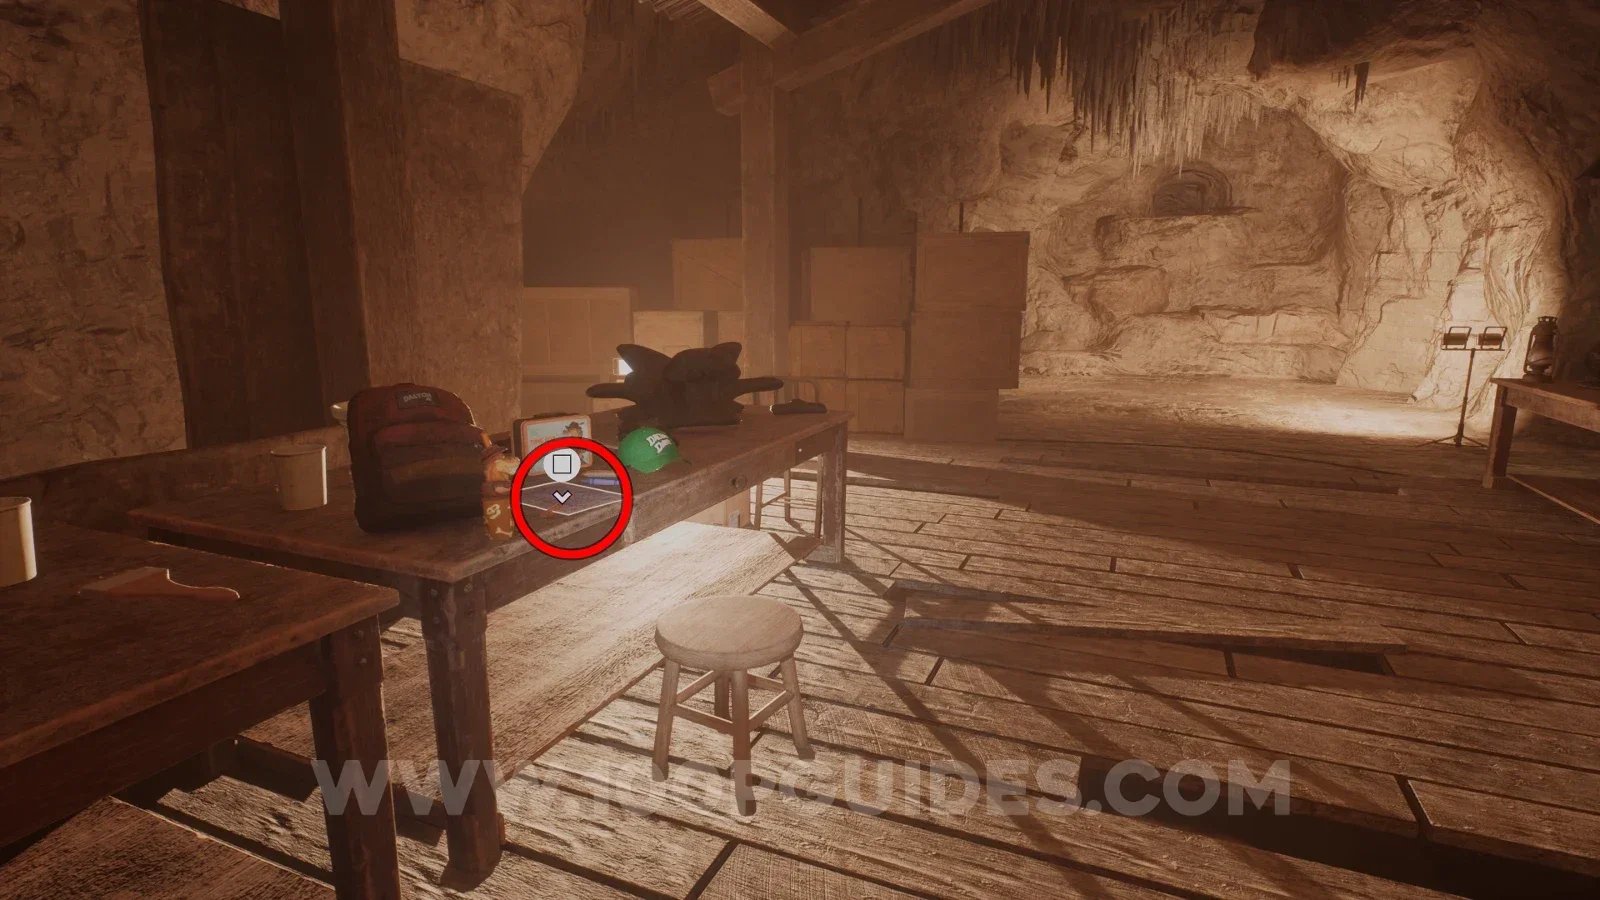
Check the worktable holding the dinosaur headpiece, green hat and red backpack. The highlighted journal lies on the tabletop. Location image ↗ Open collection entry ↗ |
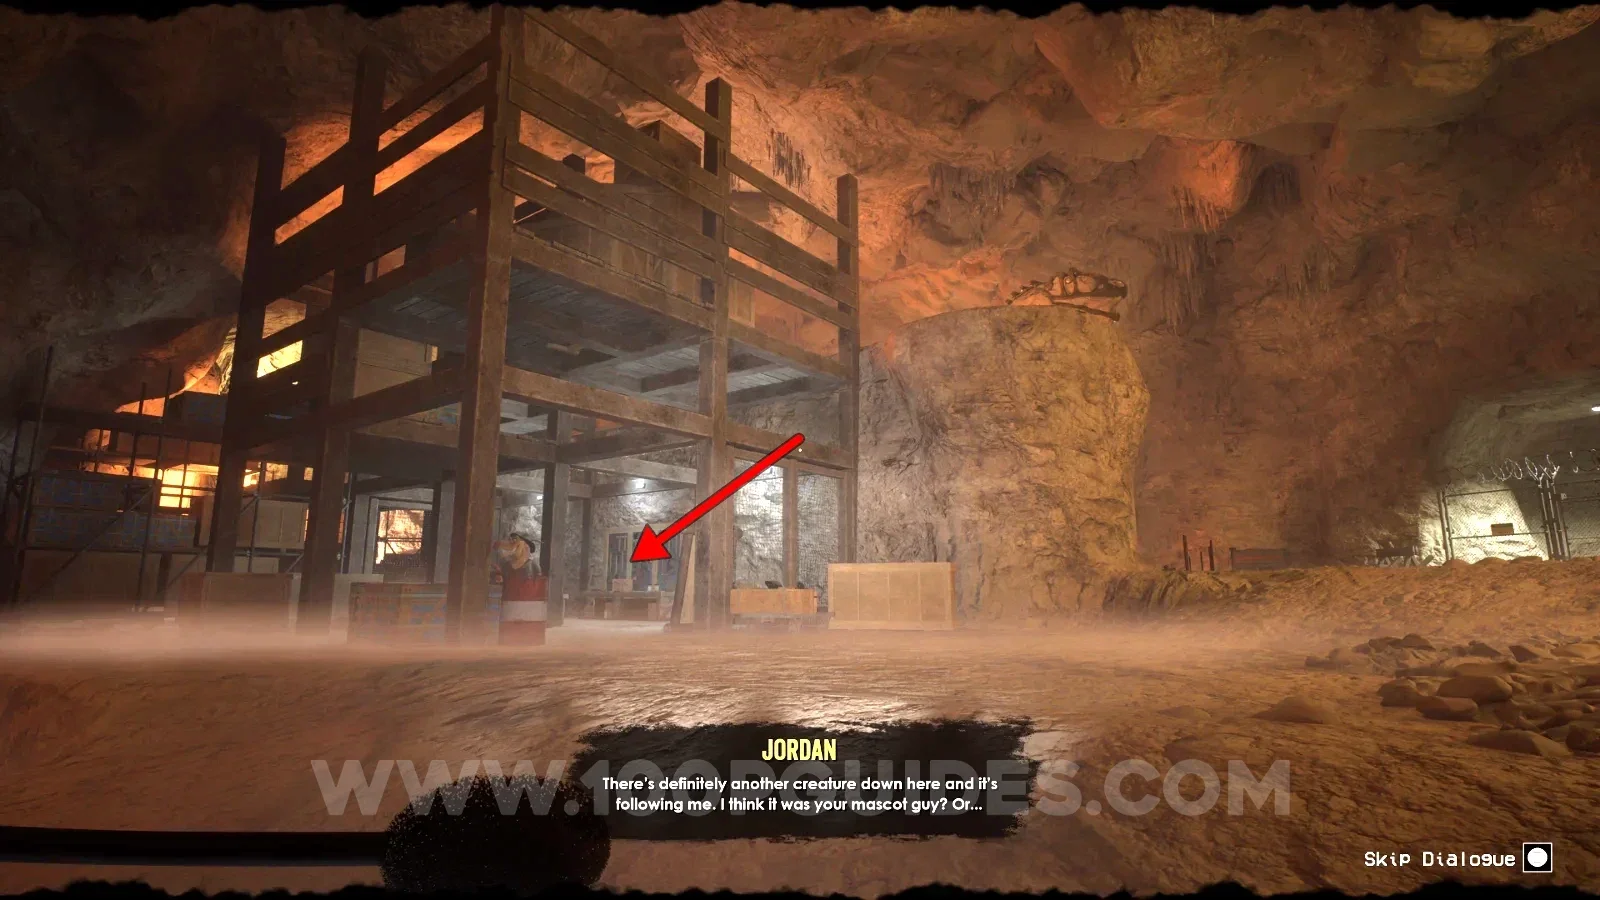
NoteWilly's messageImage reviewed |
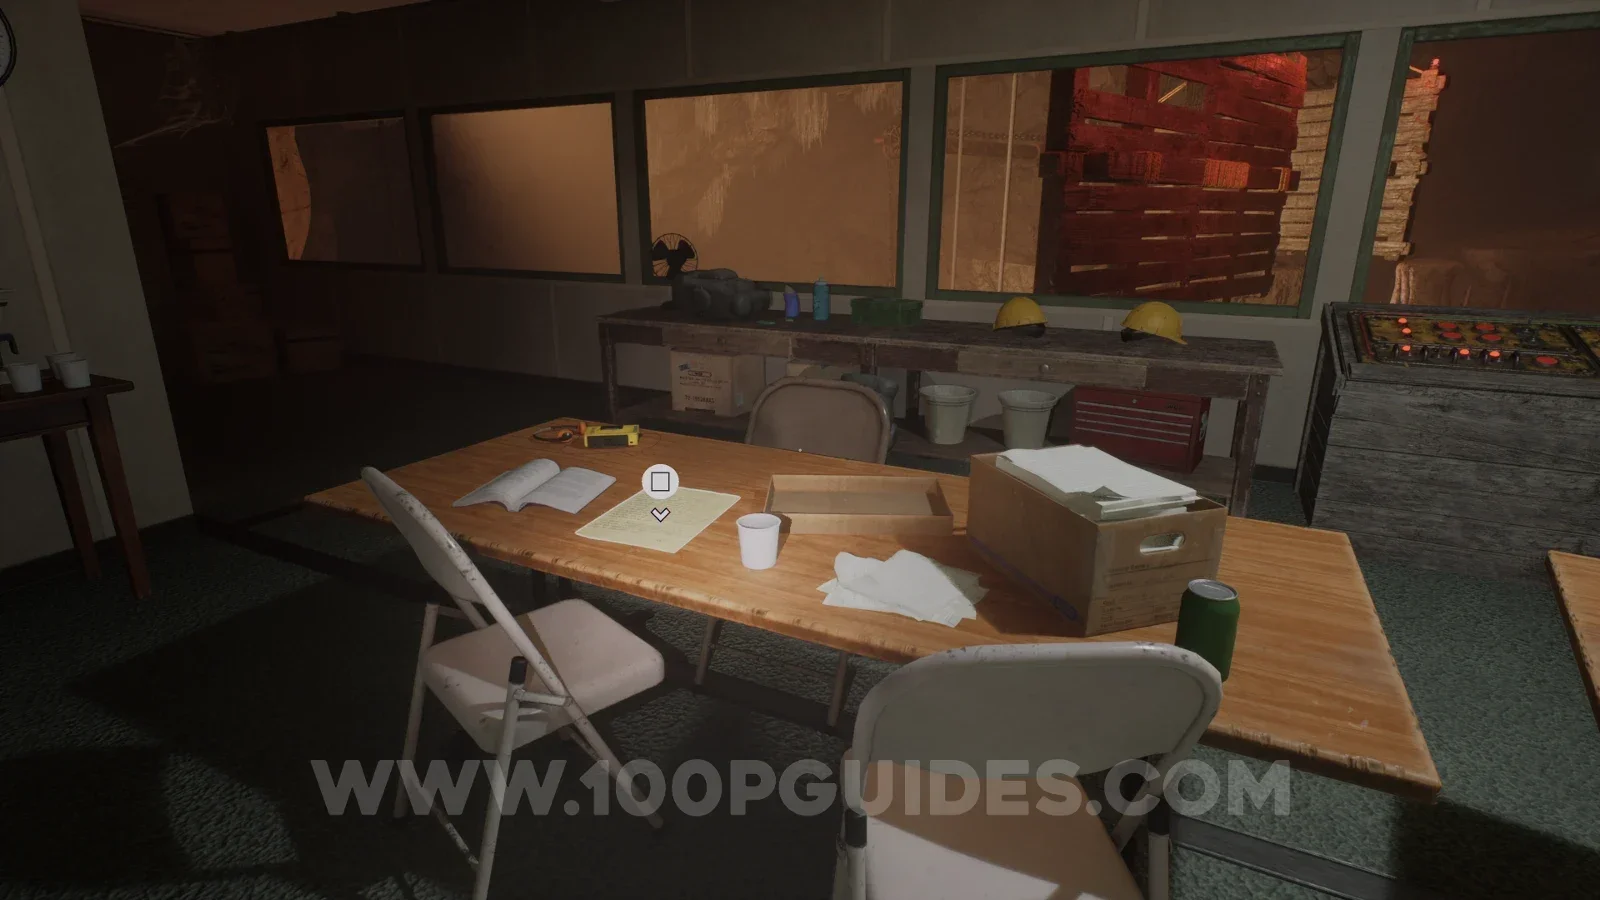
Office desk: inspect the paper beside the white mug, open book and folders, with the red toolbox and control console behind it. Location image ↗ Open collection entry ↗ |
Audio tapeThe Broker: Take WarningImage reviewed |
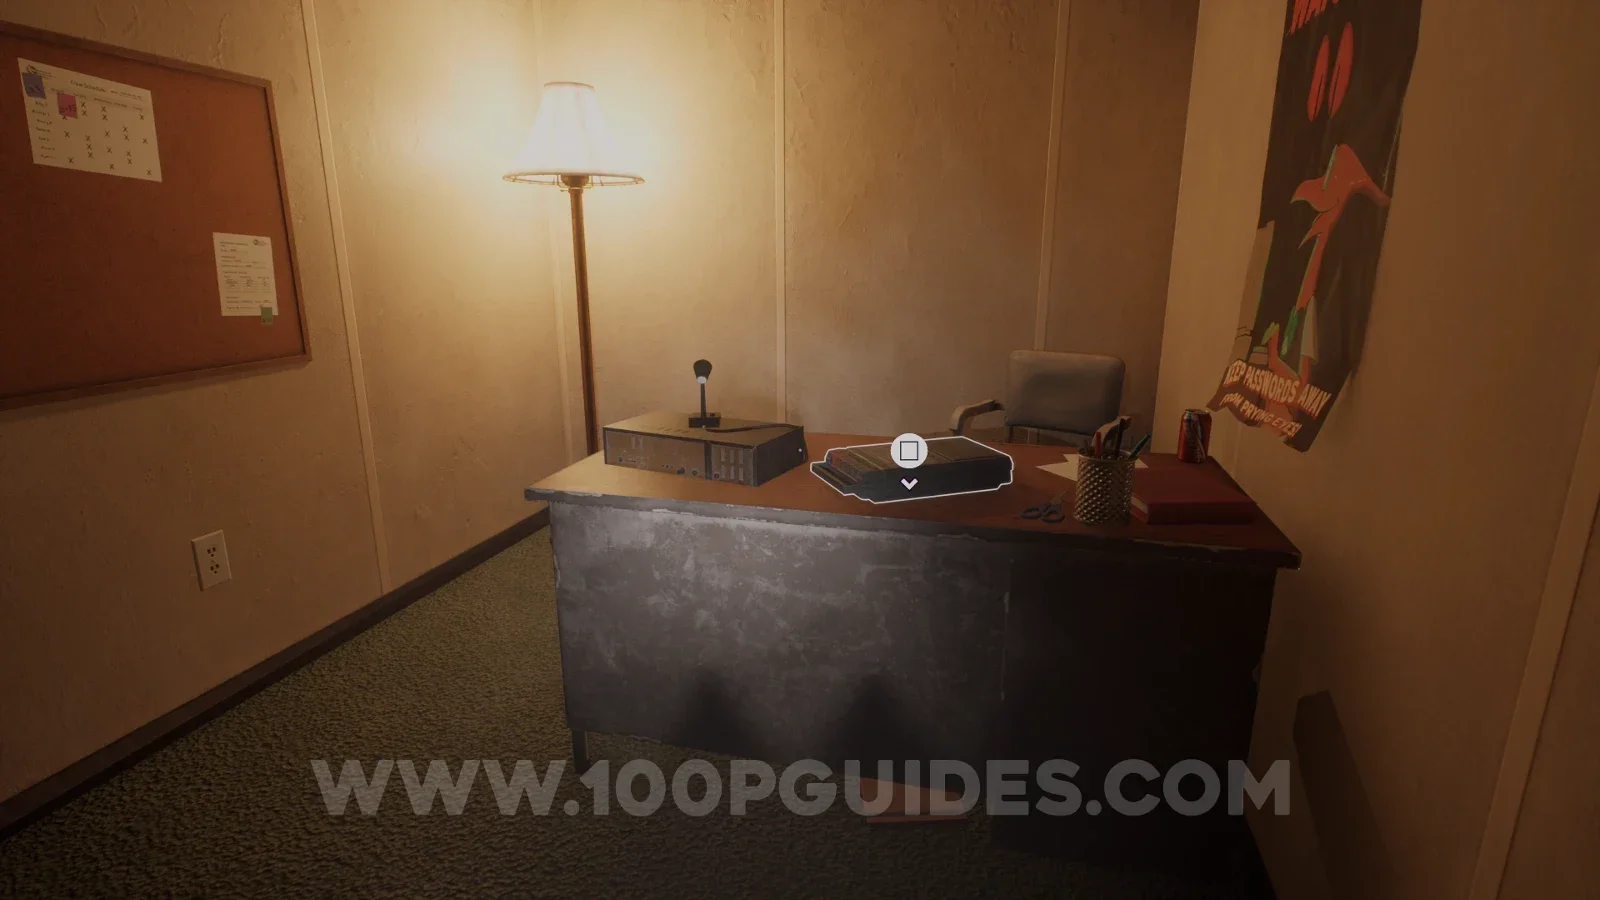
Conveyor-office building: enter its small rear room and inspect the desk beside the microphone and floor lamp. Location image ↗ Open collection entry ↗ |
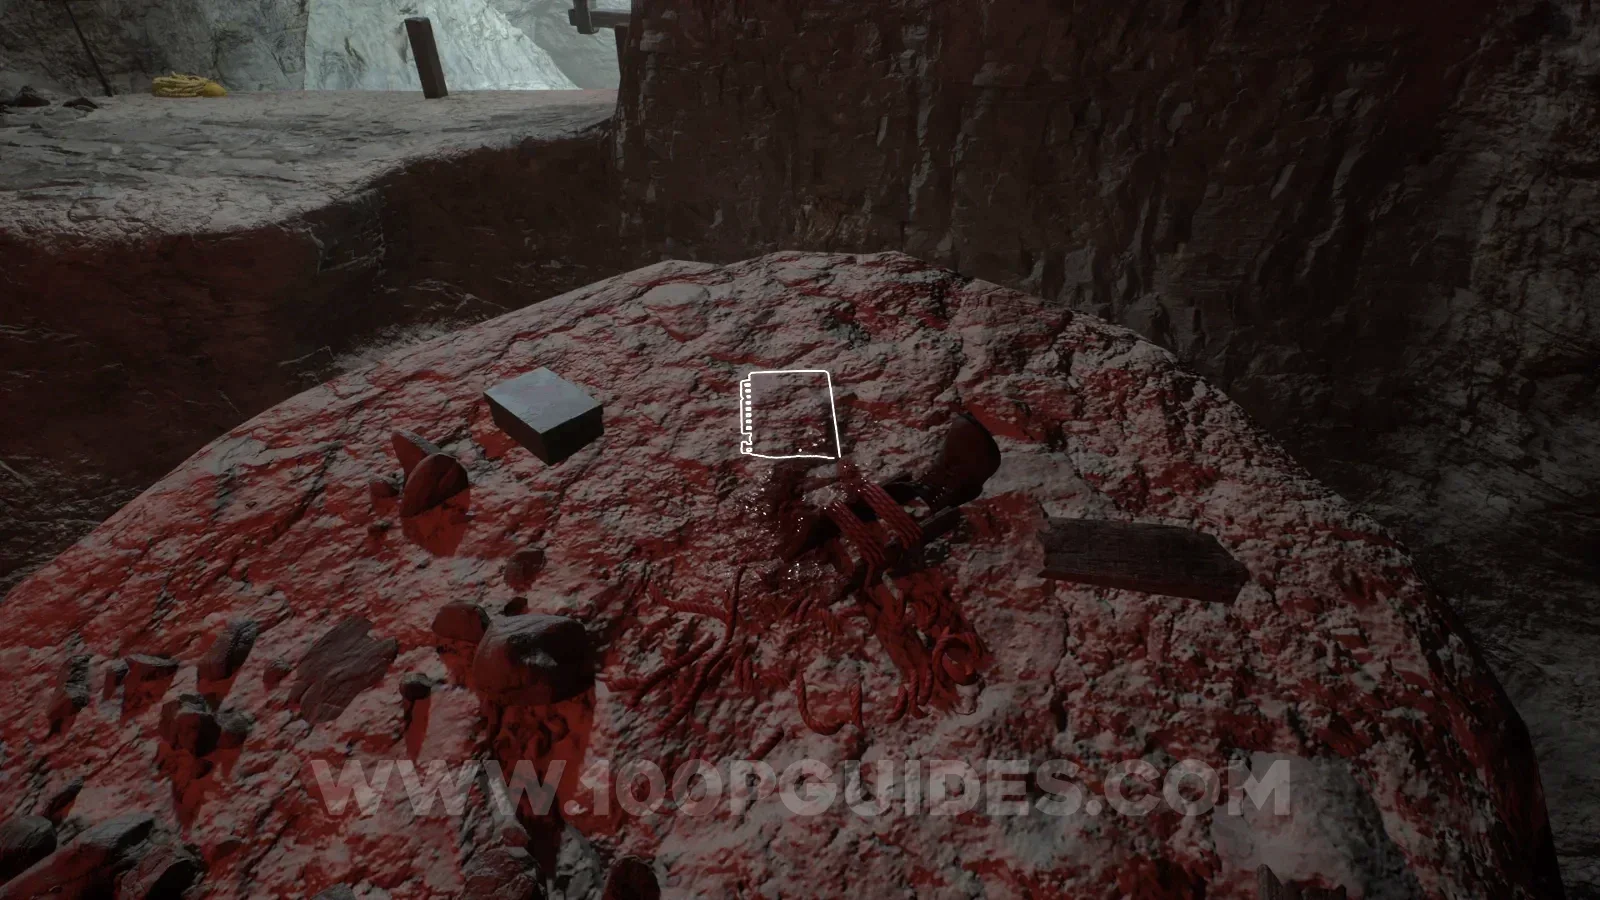
NoteAdrenaline Junkie: The EndImage reviewed |
Look on top of the bloodstained rock pillar: the highlighted spiral notebook lies beside the remains. This detour contains disturbing imagery. Location image ↗ Open collection entry ↗ |
NoteThe Other DigsiteCommunity report |
Reported route: Later Stella conversation area: table beneath the timber structure. Final pickup not confirmed here. Reference image ↗ Report this location ↗ Open collection entry ↗ |
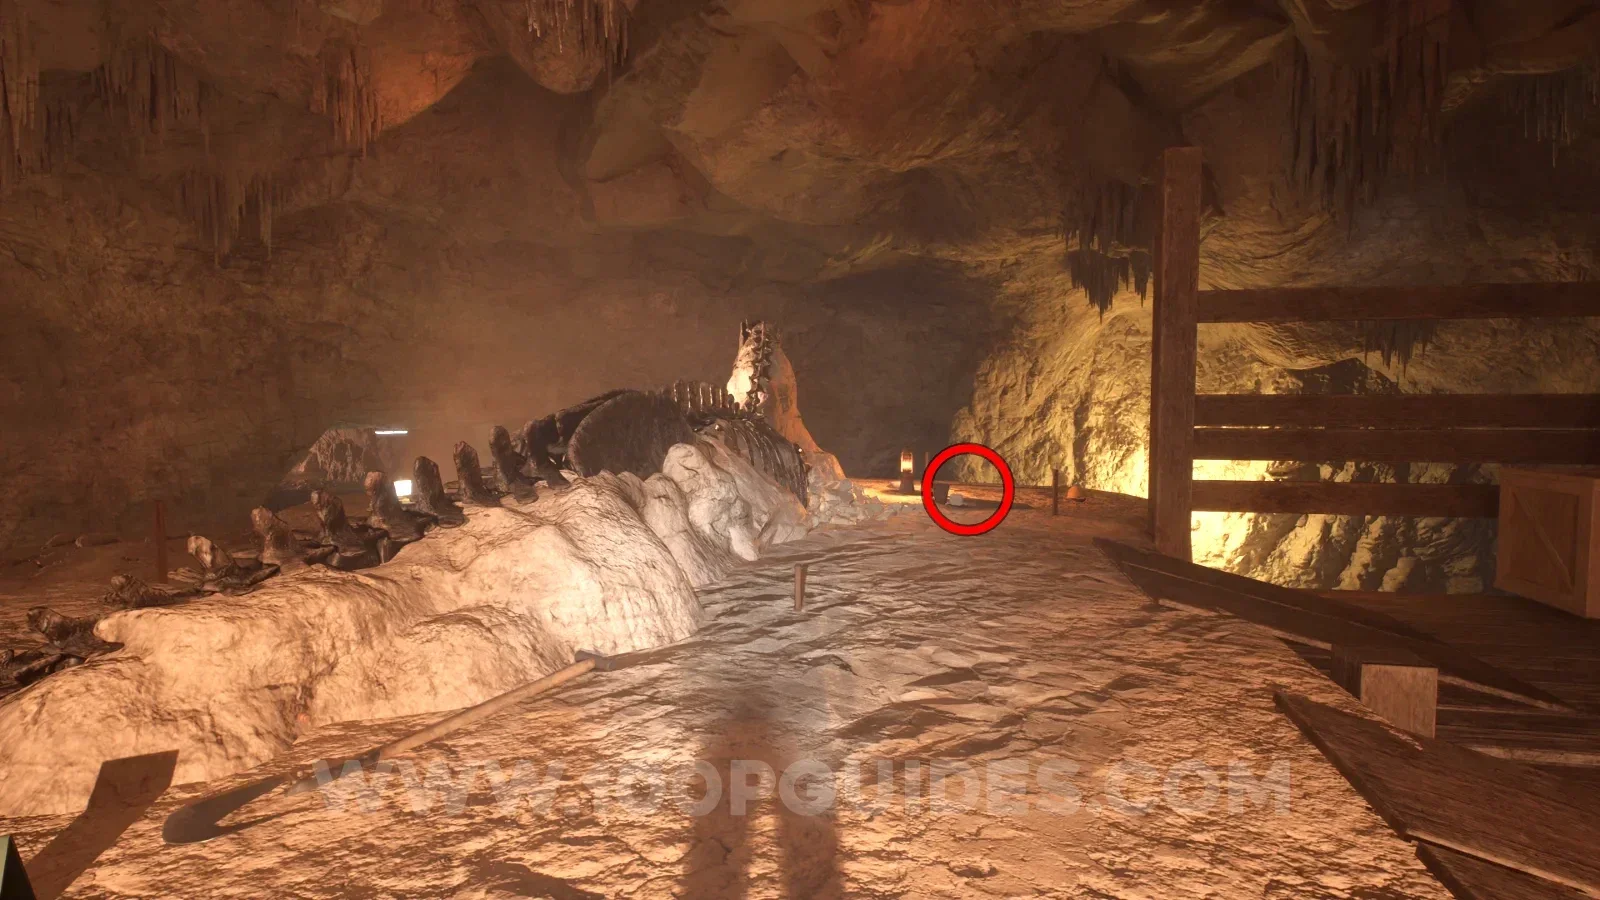
NoteThe Alpha DigsiteImage reviewed |
Upper digsite ledge beside the exposed dinosaur bones: inspect the small pale page on the low box near the upright work light and wooden supports. Location image ↗ Open collection entry ↗ |
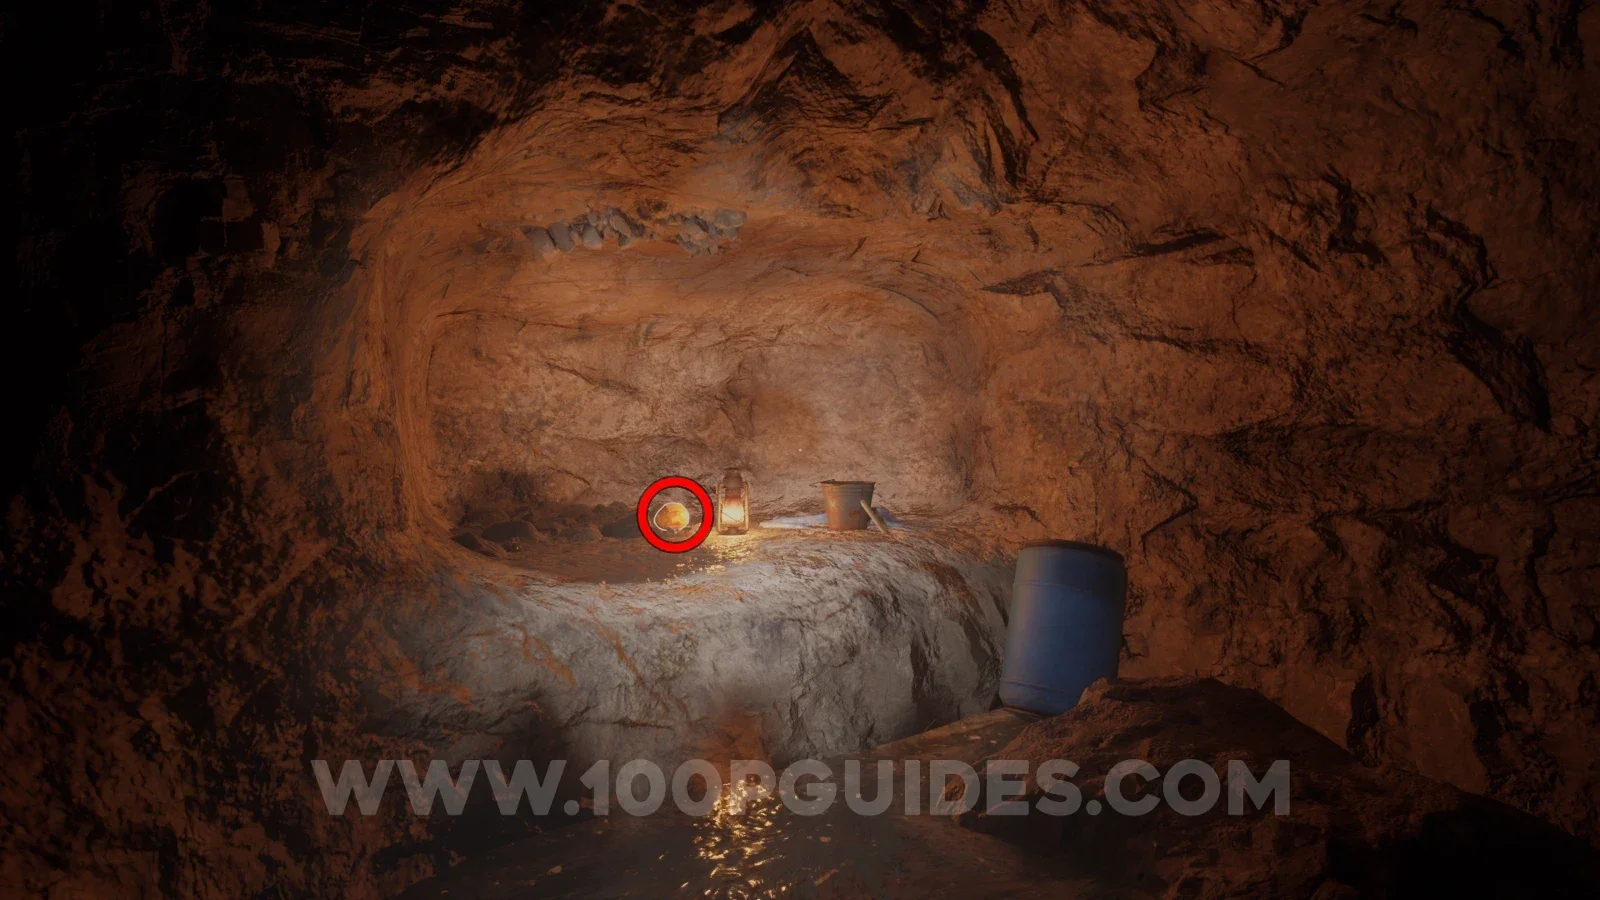
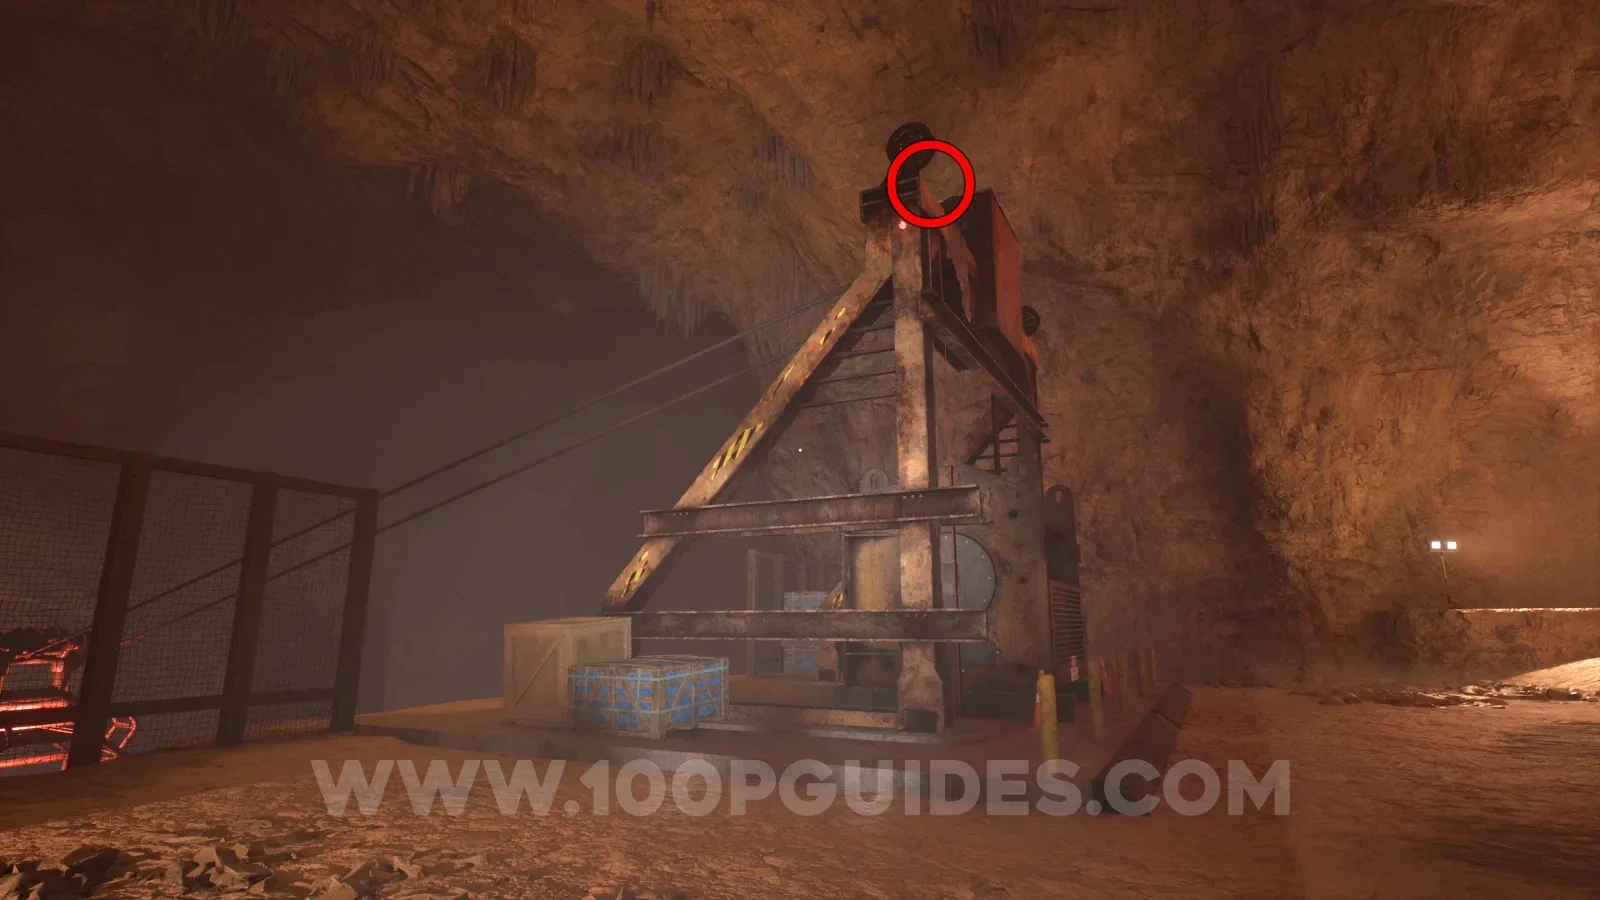
AmberAmber 08 |
Gondola cable support; climb the adjacent wooden box. View 08 ↗ Open collection entry ↗ |
Continue your route
After these listed detours, continue the Chapter 2 story and escape steps. Finishing this checklist does not mean the chapter or its achievements are complete.
Chapter 1 collection run · Chapter 3 collection run · Chapter 4 collection run